Learn how to give your crochet dolls luscious locks with this step-by-step guide to creating crochet doll hair.
So, you’ve got your crochet doll all stitched up but it’s as bald as a peeled potato? Fear not, my yarn-loving friend! Dive in to discover how to transform that shiny noggin into a luscious mane of crochet hair. Whether you’re dreaming of cascading curls, frisky fringe, or a perfect pixie cut, this guide’s got you covered from selecting the perfect yarn to those final, fabulous finishing touches.
Key takeaways:
- Choose yarn wisely for style and durability.
- Create varied hair lengths for natural look.
- Use loop stitch for playful, textured hair.
- Attach hair evenly for balanced look.
- Add bangs for personality, trim for style.
Materials Needed
A crochet hook, typically size 2.25mm to 3.5mm, will be your wand of wonder.
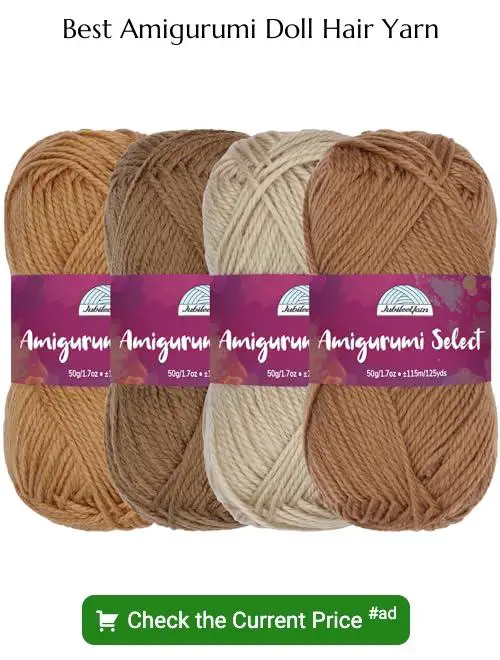
Yarn, of course, but choose wisely. Go for something soft like acrylic or wool, in whatever color makes your dolly’s coiffure pop.
Tapestry needle: No, it’s not for needlepoint grandma’s sampler. It’s for sewing those strands into the scalp like a pro.
Scissors for a snip here and there. No need for anything fancy, unless you enjoy playing Edward Scissorhands.
A comb or brush for styling. Your doll dreams of magazine cover hair, after all.
Optional but nifty—a stitch marker. Helps keep track of those crafty little loops. Silence the chaos.
Choosing Yarn Type
When it comes to selecting yarn, consider the style of hair you’re aiming for. Soft, fluffy yarns like mohair or alpaca are perfect for achieving a natural, wavy look. They add a touch of realism with minimal effort. On the other hand, cotton yarns offer a sleek, shiny appearance, great for more structured hairstyles.
Color is your playground here! Mix various shades for a multidimensional look or stick to one bold color for a standout feature.
Don’t forget the thickness of the yarn. Finer yarns give a delicate, more intricate texture but require more strands to cover the head. Thicker yarns fill space quickly but can look bulky if overdone.
Lastly, consider durability. Remember, these dolls could be handled often, so choosing a sturdy yarn that can withstand a bit of love and tugging is key.
Creating Hair Strands
Grab your yarn and cut strands twice the desired hair length. You don’t want a bob when you’re aiming for Rapunzel. Keep in mind, the yarn will be folded in half.
Cut more strands than you think you need. Yarn hair is like coffee – more is always better.
For a natural look, vary the length. It’s like giving your doll layers without the drama of a bad haircut.
Bundle up those strands in groups of 2-4. Manageable, just like handling kids at a playdate.
If you’re feeling fancy, mix different yarn colors. Highlights aren’t just for humans!
Loop Stitch Technique
Picture a loop-de-loop roller coaster, but, you know, made out of yarn. That’s a loop stitch! It’ll give your doll’s hair a playful, textured look.
First, insert your hook into the stitch where you want the hair. Now, instead of just yanking your yarn through the stitch, pull up a loop but leave it hanging out. Keep the loop as long as you like; longer loops for wild hair or shorter for a more tamed look.
Hold the loop in place with your finger (unless you’re a crochet magician) and yarn over. Draw through both the loop and the original stitch.
Repeat the process and gradually your doll’s head will transform, like magic, into a funky, stylish wig that would make even Rapunzel a bit envious. Practice makes perfect, so don’t worry if you end up with a dreadlock or two. Your doll isn’t auditioning for a shampoo commercial, right?
Attaching Hair to Head
For a secure hold, use a tapestry needle to thread the hair strands into the doll’s head. Insert the needle at the bottom of the strand, pull it through the scalp, and voila! You’ve got a hair plug.
Space the plugs evenly for a balanced look. You don’t want a doll with a receding hairline or an inexplicable bald spot! Aim for uniformity but embrace the cute imperfections.
To avoid a patchy scalp, start from the bottom back of the head and work your way up. Think of it as a stylish hairdo under construction.
If you’ve got thick yarn, fewer plugs are needed. For thinner yarn, plan on more strands for that luscious volume.
Secure each plug with a firm knot inside the head. No one wants a doll having a bad hair day, especially not after all your hard work!
Rooting Hair Method
Rooting hair gives your doll a realistic and fabulous mane. Grab your yarn and cut it into equal-length strands, about twice the desired final length. Ready? Now let’s get rooting!
Use a fine crochet hook or a yarn needle. Push it through a stitch in the doll’s scalp. Fold a strand of yarn in half and snag the loop with your hook or needle. Pull it back through the stitch, forming a loop. Pull the yarn ends through the loop and tighten.
Keep repeating this process, ensuring even coverage. Work in sections, row by row, like planting a tiny forest on your doll’s head.
Adjust strand thickness for volume control. Thicker strands = fuller hair. Thinner strands = delicate tresses.
Mix different yarn types or colors for highlights and lowlights. Because, why not give your doll the hair of dreams?
Don’t forget to secure the hairline. You don’t need bald spots stealing the show.
Lastly, stop and admire your work frequently. Doll hair mastery deserves regular bouts of self-applause!
Styling Hair
Braiding is a doll hair classic. Simply divide the yarn into three sections and braid away. Secure the ends with a piece of matching yarn or a tiny rubber band.
Pigtails? Easy-peasy! Gather two bunches of hair and tie them with small ribbons or yarn. Instant cuteness overload.
Want curls? Wrap the yarn around a pencil, spritz with water, and let it dry. Remove the pencil once dry, and voilà, bouncy curls.
For a sleek look, part the hair down the middle and trim the ends evenly. Use a tiny bit of hair gel or diluted glue to keep stray strands in check.
Experiment with updos by twisting sections of hair and pinning them in place with a small dab of glue. Add a miniature bow or a tiny crochet flower for extra flair.
Feeling adventurous? Try a beehive or a top knot. Gather the hair upward and secure it tightly, then fluff it out for volume.
Adding Bangs/Fringe
Adding these stylish little bits can give your doll some serious personality! Let’s dive into it:
Work in small sections at a time. Measure your yarn strands so that they’re just a smidge longer than you want the final bangs to be. Remember, it’s always easier to trim than to add more.
Use a sturdy needle or crochet hook to pull each strand through the same row, right at the hairline. This keeps the bangs looking natural and not like they’re having a bad hair day.
Once you’ve looped all your strands through, give them a trim to the desired length. A slight unevenness can actually look charming, as perfection is overrated.
Consider the thickness. For a fuller look, use more strands. Sparse bangs can give a delicate, wispy appearance.
Finally, style them. Maybe a little side-swoop or leave them straight. Have fun experimenting!
Tips for Thickness and Volume
For a fabulously full head of doll hair, consider doubling or even tripling up the yarn strands. Go big or go home, right? If you want Messi-level volume, use bulkier yarn – this makes each strand thicker and the overall result, more luscious.
Inserting hair strands closer together works wonders too. When you add more hair to each row, you get that rich, voluminous look that’s perfect for glamorous dolls. Just be careful not to overdo it and end up with a doll who can’t hold its head up!
Finally, don’t forget about fluffing. Gently separating the strands with a wide-tooth comb or your fingers can add instant volume. Channel your inner hairstylist and voilà, your doll’s hair will put even Rapunzel to shame.
Finishing Touches and Care
Don’t leave that doll hairdo hanging! Here are a few ways to keep those locks looking fabulous:
Snip, Snip! Trim any uneven strands to ensure a neat and tidy look. No one wants a lopsided haircut, even if they are made of yarn.
Tangle Tamer: Gently brush through the hair with a soft bristle brush or your fingers. Avoid yanking; think of it as a spa day for your doll.
Spritz and Shine: Give the hair a light spritz with water to smooth out any flyaways. We’re going for doll hair, not bedhead chic.
Volume Up: For a little extra oomph, gently tease the roots. A little poof can go a long way!
Lock It Down: If the style looks perfect, secure it with a small dab of fabric glue. Stray hairs? Not on our watch!
Safe Storage: When the doll isn’t strutting the runway, store it in a cool, dry place. Moisture and dust are the enemies of yarn perfection.
Keep these tips in your back pocket. Happy styling!


