Learn how to add a playful crochet fringe to your projects with this step-by-step guide.
Looking to add a sassy tassel or a fab fringe to your crochet project? You’ve stumbled upon the ultimate cheat sheet! We’ve got the inside scoop on how to use a larger hook for that perfect drape, select the snazziest yarn, and measure like a pro. Not to mention, we’ll show you how to evenly slice that yarn like a chef dicing onions and securely attach it with style. Let’s fringe it up!
Key takeaways:
- Use larger hook for fringe
- Choose yarn with flair and practicality
- Measure for uniformity and style
- Cut yarn evenly and efficiently
- Attach fringe securely and stylishly
Materials Needed
Grab some yarn, scissors, and a crochet hook that’s slightly larger than the one you used for your project.
Different yarns create different fringe styles. Toss in some beads or charms if you’re feeling fancy.
A ruler or measuring tape can be handy for keeping the fringe uniform.
Don’t forget a yarn needle for securing loose ends. Simple, right? Now you’re ready to get fringing!
Choosing the Right Yarn
When picking yarn for your fabulous fringe, aim for something with a bit of flair but also practicality. Don’t go for the yarn that tangles if you so much as look at it funny or unravels faster than a mystery novel in the last chapter.
Consider the texture – smooth yarns create sleek, consistent fringes. If you’re feeling wild, try something with a bit more texture for a shaggy, bohemian look. Think alpaca or mohair, but remember: with great fuzziness, comes great responsibility.
Match the weight of your fringe yarn to the main project. A bulky fringe on a delicate shawl might look like a woolly mammoth trying to tip-toe on toothpicks. Not a good look.
Last but not least, color! Complement or contrast, but choose wisely. Neon orange fringe might not vibe with your sophisticated black scarf unless you’re going for the “Halloween all year round” aesthetic. Then carry on and rock that vibe!
Measuring Your Fringe
Decide the length you want for your fringe first. Hold a measuring tape against your intended project to get a visual idea. Remember, fringe can be short and sassy or long and luxurious.
Double the length of the final fringe to account for the fold. For example, if you want a 3-inch fringe, cut 6-inch yarn strands. Adding a little extra ensures you get that delightful swingy effect.
Consider the balance – too long and it might overshadow your masterpiece, too short and it may look like a bad haircut. Aim for harmony. Don’t forget, the yarn weight influences how the fringe dangles. Heavy yarns create a more substantial fringe, while lightweight yarns offer a delicate touch. Happy measuring!
Cutting the Yarn
Grab your scissors and get ready to snip away! Here’s how to make the perfect yarn cuts for your fringe:
First, decide on the length of your fringe. If it’s too short, it’ll look like your crochet project got a bad haircut. Too long, and it might get tangled in everything from doorknobs to your cat. Aim for the Goldilocks length – just right.
Measure one piece to your desired length and use it as your template. No need to eyeball each piece like a yarn whisperer. Consistency is key.
Save yourself time. Fold the yarn multiple times and cut several strands at once. This way, you won’t be stuck snipping one strand at a time until your fingers cramp.
Lay out the strands nice and neat. A messy pile might end up looking like a tangled bird’s nest, and no one wants their fringe to resemble a wildlife sanctuary.
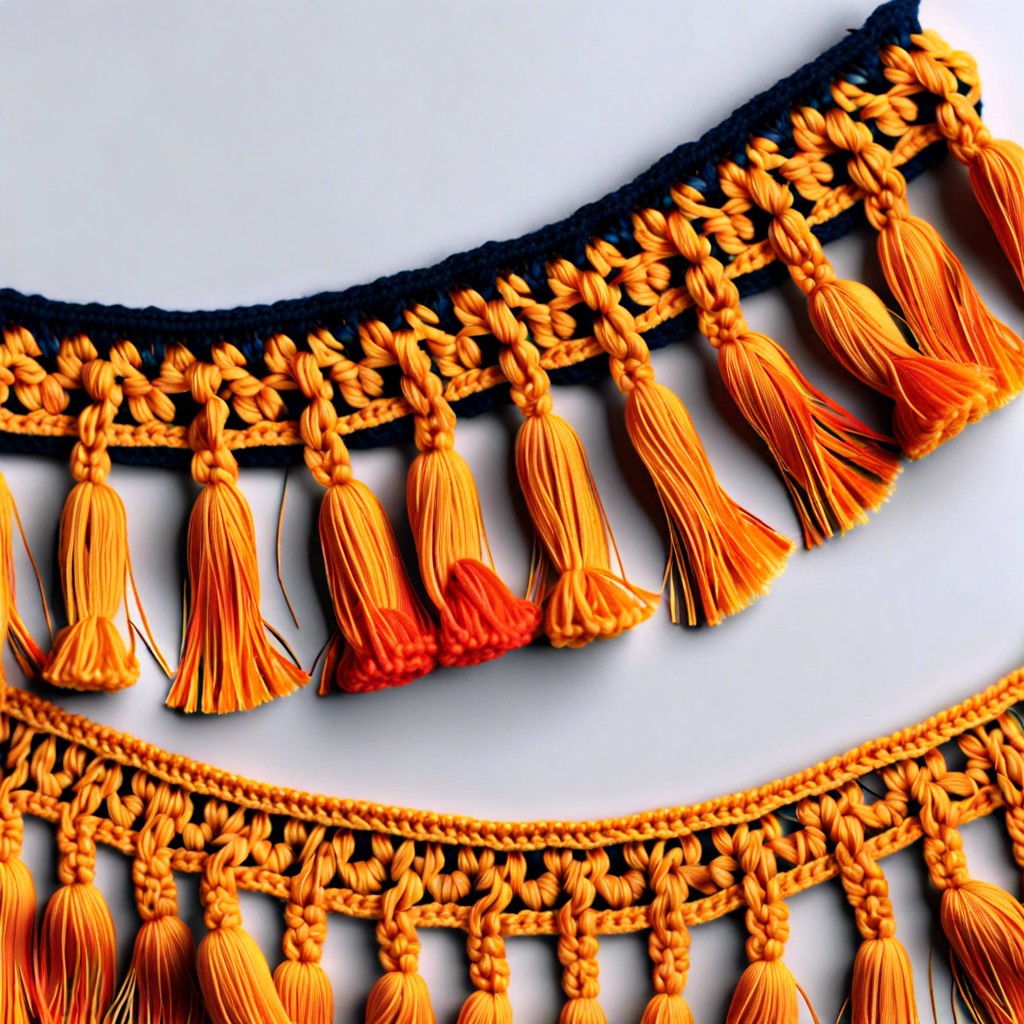
Attaching the Fringe
Fold each piece of pre-cut yarn in half, creating a loop at one end. Slide your crochet hook through the stitch where you want your fringe.
Hook the looped end of the yarn onto the crochet hook and pull it through the stitch, but not all the way! Now wiggle the yarn tails through the loop and pull tight.
Voilà! You’ve got a fringe hanging there like it just came back from a 70s disco. Repeat this process for each fringe segment, spacing them out evenly. Keep a rhythm going, and soon you’ll be in the groove.
Securing the Knots
Once the fringe is attached, it’s time to make sure those knots hold steady. Think about these tips to keep everything snug as a bug:
Choose a method! Some go for a simple overhand knot, while others prefer a lark’s head knot. If it sounds like a fancy bird move, you’re on the right track.
Double up if needed. For thicker yarns, a single knot might hold; for thinner yarns, a double knot adds extra security. You don’t want your masterpiece shedding fringe like it’s fall!
Pull tight, but not too tight. Yanking the yarn with all your might could distort your work. A firm tug should suffice.
Don’t forget to straighten. Before tightening the knot completely, make sure each strand lies flat and smooth.
Check your work. Give each fringe a little tug once you’ve tied it—better to catch a loose one now than later when you’re showing off your creation.
Trimming the Fringe Evenly
Grab your scissors and embrace your inner hairdresser! Here’s how to get that fringe looking fabulous:
First, give your project a good shake. Seriously, give it a wiggle. This helps the fringe strands to settle into their natural positions.
Next, lay the project out flat on a table. Think operation room: precision is key.
Use a tape measure or ruler to mark the desired length along the fringe with pins or a piece of chalk. No guesswork here; we’re aiming for uniformity.
When you’re ready to cut, use sharp scissors. Blunt scissors will leave you with a fringy crime scene. Hold the strands tight and make small snips rather than one big chop. You’re crafting art, not hacking weeds.
A handy tip: Cut a little longer than you think you need and then trim down as necessary. Remember, yarn is stubborn about growing back.


