Learn how to crochet a rectangle, from choosing the right yarn to finishing off your project seamlessly.
Got your hooks ready to whip up the perfect crochet rectangle? Whether it’s for a cozy blanket, a versatile scarf, or even a humble dishcloth, nailing that rectangle shape is a game-changer. We’ll steer you through yarn choices, crack the crochet code on abbreviations, and banish those pesky slanting and curving woes. Buckle up for a stitch-by-stitch guide to keep your rectangles crisp and fabulous!
Key takeaways:
- Choose medium-weight yarn for easy handling.
- Learn crochet abbreviations for pattern success.
- Follow step-by-step guide for perfect rectangles.
- Watch out for slanting and curving issues.
- Create blankets, scarves, dishcloths with rectangles.
Needed Materials and Tools

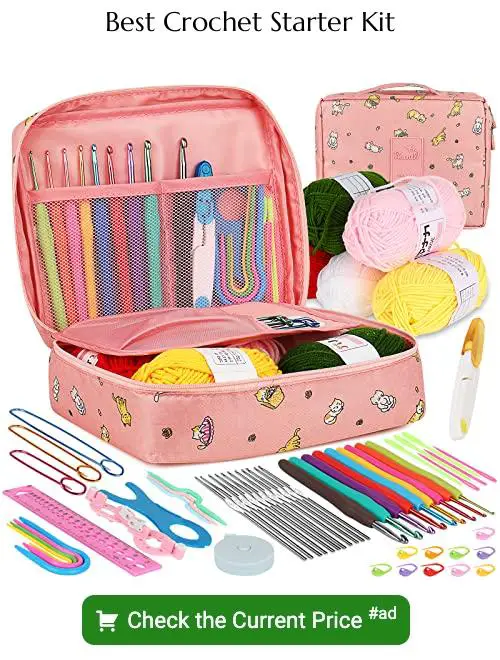
Ready to get started with your crochet rectangle masterpiece? Here’s your shopping list and toolbox.
First, you’ll need some yarn. Any yarn will do, but beginners might love medium-weight yarn for its straightforwardness. It doesn’t slip away like a sneaky cat.
Grab a crochet hook that matches your yarn. Look at the yarn label; it often nudges you in the right direction.
Scissors, for snipping all the loose ends. Please, no kitchen scissors. We don’t want frayed edges.
A yarn needle for weaving in ends. Think of it as the tidy-up crew for your rectangle.
Optional, but oh-so-helpful: stitch markers. These little guys will keep you on track.
Now, you’re equipped. Time to make yarn magic happen!
Abbreviations for Crochet Rectangles
Ready to master the art of deciphering crochet patterns for rectangles? Cool. Let’s dive into the world of abbreviations that might pop up.
sc – Single Crochet. The trusty stitch. Short, sweet, and simple.
dc – Double Crochet. Twice the height, twice the fun.
ch – Chain. The backbone of your rectangle journey.
sl st – Slip Stitch. The sneaky little stitch that closes things up neatly.
st – Stitch. Count ’em, don’t lose ’em.
tr – Treble Crochet. Extra tall, for those dramatic effects.
Remember, these abbreviations are the secret code to unlocking the magic of crochet patterns. Keep this handy, like the cheat sheet it is, and you’ll be crocheting rectangles like a pro. Or at least like someone who reads the instructions.
How to Crochet Rectangles Step By Step
- Start with a foundation chain. Decide the length of your rectangle and chain the desired number of stitches. Remember, longer chains mean longer rectangles. Mind-blowing, right?
- Once you’ve got your chain, turn your work and begin single crocheting (SC) or double crocheting (DC) in each chain across. Don’t worry if your first row looks a bit wobbly—imperfection adds character.
- At the end of the row, chain one (for SC) or chain two/three (for DC). This little turn chain will give your rectangle a snazzy, neat edge. Turn your work like a pro.
- Continue crocheting across each row, repeating the previous row’s stitch. It’s repetitive yet oddly therapeutic. Like popping bubble wrap, but with yarn.
- Keep an eye on your stitch count to avoid a wonky rectangle. Nobody wants a trapezoid when they’re aiming for a rectangle.
- Ready for the big finale? Once you’ve reached your desired size, finish off by cutting your yarn and pulling the tail through the last loop. Voila! You’ve just created a rectangle.
Now your rectangle is ready for the world. Or at least, for your next project.
Crochet Single Crochet Rectangles
Start by chaining the length you want for your rectangle. This initial chain sets the stage for your masterpiece.
Turn your work and single crochet into the second chain from the hook. Continue single crocheting across the row.
When you reach the end of the row, chain one and turn. Single crochet into each stitch across the row again.
Repeat this process until your rectangle reaches the desired height.
For crisp edges, always remember to single crochet into the very first stitch after turning your work.
Watch out for that sneaky last stitch—it loves to hide and make your rectangle uneven. Keep an eye on it.
Crochet Double Crochet Rectangles
To create a rectangle using double crochet, start with a chain that matches the length of your desired rectangle. Remember to add a couple of extra chains for your turning chain. These extra chains won’t count as stitches, they’re just there to help you turn around. Like a friendly U-turn in your yarn highway.
First row: Yarn over, insert your hook into the fourth chain from the hook, yarn over again, pull up a loop, yarn over, pull through two loops, yarn over, pull through the last two loops. Voilà! Your first double crochet. Repeat this magic all the way across.
Turn your work.
Second row and beyond: Chain 3 (this acts as your first double crochet for this row), then double crochet into each stitch across. Seriously, it’s that simple. At the end of each row, remember to do your U-turn. Chain 3, flip it like a pancake, and double crochet your way back.
Before you know it, you’ll have a lovely double crochet rectangle ready to be shown off or, you know, thrown at your cat. They love those.
Common pitfall: Forgetting to double crochet into the turning chain can make your edges look like a roller coaster. Smooth edges make all the difference, so give your rectangle the love it deserves.
Common Issues and Fixes (Slanting, Curving)
One pesky problem: slanting. Frustratingly, rectangles often resemble parallelograms. Why? Tension inconsistency. Your stitches may be tighter on one side. Solution: focus on maintaining a uniform tension. Sometimes a smaller or larger hook helps keep things steady.
Curving edges drive people bananas! Crochets intended to lie flat suddenly decide to develop hills. The culprit? Inconsistent stitch height. When switching between stitch types, stitches can become taller or shorter. Remedy this by keeping even pressure and pulling your yarn consistently.
If your projects are still wonky, check your foundation chain. Too loose? Consider a smaller hook size. Too tight? A larger hook might do the trick. Sometimes it’s as simple as adjusting your foundation to stop your rectangles from going rogue.
Occasionally, stitch count goes haywire. Miss a stitch, add a stitch, your rectangle looks more like abstract art. Regularly count your stitches, ensuring everything stays symmetrical.
With these fixes, your rectangles can wave goodbye to unwanted quirks, giving you peace of mind and a perfect rectangle every time.
Popular Uses for Crochet Rectangles
From cozy blankets to stylish scarves, possibilities are endless. Throw a few colorful rectangles together, and voilà, you’ve got a vibrant patchwork blanket—perfect for combating chilly evenings.
Turn a humble rectangle into a chic infinity scarf by simply seaming the short ends together. If practicality is your jam, rectangles make splendid dishcloths or washcloths.
Got pets? Crochet a comfy pet bed by stacking rectangles.
For the home décor aficionados, table runners and placemats are a cinch. Rectangles can even form the base of bags; fold, seam, and add handles for an instant tote.
Feeling creative? Stitch up a batch of rectangles and join them into a quirky sweater. Endless fun, endless functionality.


