Learn how to make your own crochet hook at home with simple materials and easy steps.
Ready to turn a random twig into your new favorite crochet hook? This guide dives into crafting your crochet tool from scratch—covering everything from choosing the perfect wood to adding those finishing flourishes. Whether you’re aiming for ergonomic excellence or just want something that’s uniquely yours, we’ve got the nitty-gritty details locked down. Let the handmade hook adventure begin!
Key takeaways:
- Choose hardwoods like maple, oak for durability.
- Craft handle for comfort.
- Shape hook tip gradually for smooth crocheting.
- Sand with fine-grit paper for a silky finish.
- Use finish like linseed oil for protection.
Choosing the Right Wood
Hardwoods like maple, birch, and oak are perfect candidates. They’re not just sturdy—they’re like the Hercules of woods. Softwoods can break easier than cookies dunked in milk, so avoid them for a durable hook.
For the eco-warriors and fancy pants out there, bamboo is a fab option. It’s strong, sustainable, and gives off major zen vibes. Just imagine crocheting your next project while saving the planet—talk about multitasking!
Grain matters too. Look for tight, even grain patterns. They make sanding easier and leave you with a silky-smooth finish. Wavy or irregular grains can create rough spots, not ideal when you’re trying to glide through yarn.
Lastly, thickness should be considered. Start with a piece that’s larger than your intended hook size. You can always whittle down, but adding wood back is a no-go. Choose wisely, and you’re on your way to a stellar DIY crochet hook!
Shaping the Handle
Let’s get those handles into shape! Imagine a wand, but one that conjures cozy blankets instead of magical sparks.
Firstly, whittling down the handle is vital. A handle that’s too chunky feels like gripping a tree branch while crocheting, and nobody wants that in the middle of crafting a scarf.
A well-shaped handle should fit comfortably in your hand. Aim for a gentle taper towards the hook end; an ergonomic design here can save your wrists.
Consider adding some subtle grooves or contours where your fingers naturally rest. These little indentations can enhance grip and prevent hand fatigue.
Lastly, keep it smooth. Any rough edges or splinters need to be banished. Sandpaper will be your new BFF for ensuring the handle transitions seamlessly from the hook tip. No one wants a crocheting adventure to include unexpected splinters.
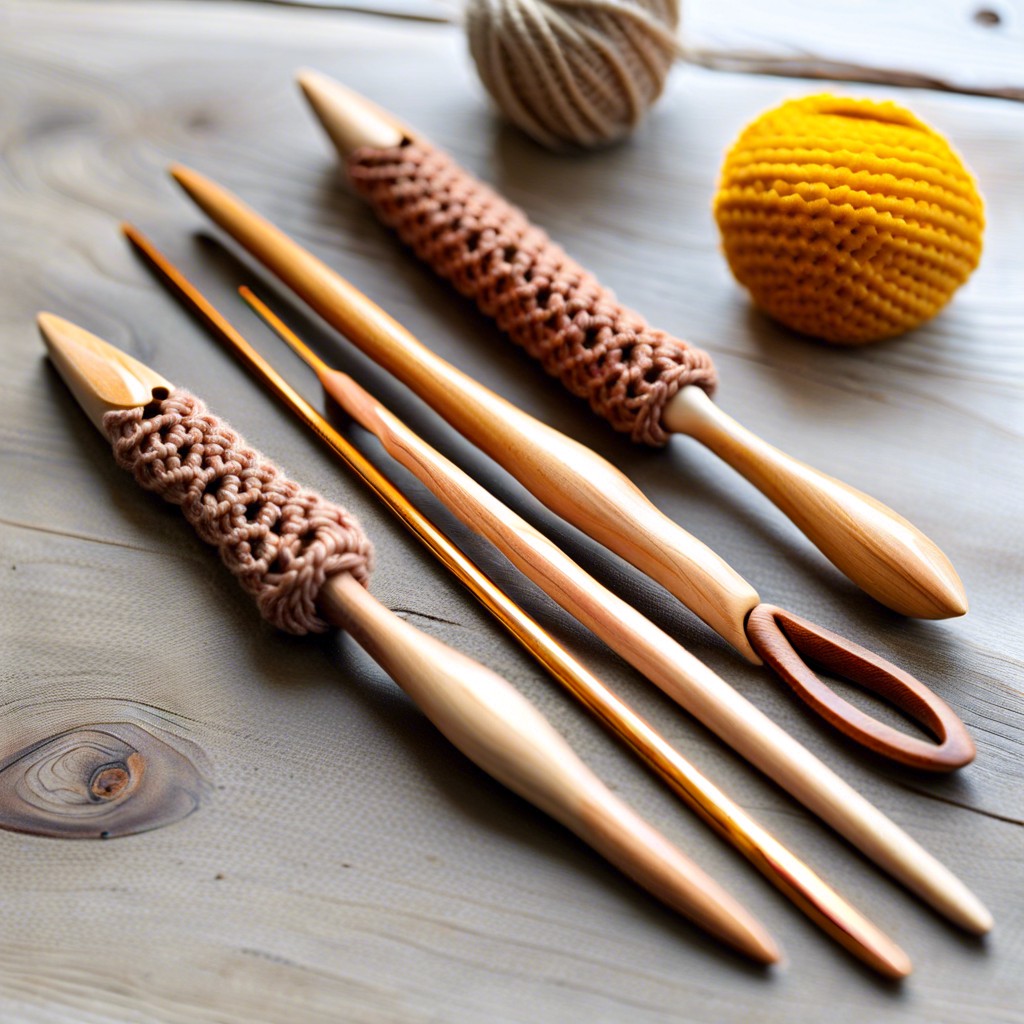
Crafting the Hook Tip
First, sharpen your carving tools; a dull knife is a recipe for a finger bandage. Carefully carve down the end of your hook to form a smooth taper. Aim for a gradual slope, like a tiny wooden ski slope for yarn.
Next, focus on the throat. This is the section where the hook catches the yarn. Gently carve a rounded indentation. Take your time, and think, “How would I want a tiny sled to ride in here?” Doesn’t need to zoom, just slide snugly.
Now, define the actual hook. The tip curves back toward the shaft, resembling a shepherd’s crook. This part requires precision. A small gouge or whittling knife works best. Take shallow cuts to avoid chipping the wood.
Once you’ve shaped the hook, use fine-grit sandpaper to smooth it out. Run the paper over every nook and cranny. Your goal? Zero snags.
And there you have it, the fundamentals of crafting a hook tip. Just remember: slow and steady wins the crochet race!
Smoothing and Sanding
Smoothness is key to avoid snagging your precious yarn. Grab some fine-grit sandpaper, ideally starting with 220 and moving to 400-grit for a silky finish.
Sand in the direction of the grain. This minimizes scratches and ensures a smooth glide. Feel like a wood whisperer yet?
Keep the hook steady. A vice or a steady hand will do. No one needs a rogue crochet hook flying across the room.
After sanding, wipe the hook with a microfiber cloth to remove dust. This preps it for the final finish and makes you feel like a professional.
Remember: smoother than your favorite yarn’s purr.
Applying Finish and Sealant
Keep your newly carved crochet hook safe and smooth with a good finish and sealant. You don’t want splinters ruining your cozy crafting time, do you?
First, choose a finish. Linseed oil, beeswax, or even food-safe mineral oil can work wonders. Each offers unique benefits: linseed oil penetrates deeply, beeswax adds a protective layer, and mineral oil is super easy to apply.
Apply the finish using a soft cloth. A little goes a long way. Rub it in gently, ensuring the entire hook gets a good coating. Let it sit for a while to soak in. Patience, my friend. This isn’t a race; it’s a journey to crochet hook perfection.
Wipe off any excess oil or wax. Leaving too much can make things sticky. Nobody likes a sticky hook—unless you plan on starting a trend for adhesive yarn.
Let the hook dry completely. This step is crucial for durability and smooth operation. Place it somewhere safe, away from curious pets and sticky fingers.
Repeat as necessary. One coat may not be enough, like a single layer of chocolate on a cake. Aim for at least two to three coats.
Voila! Your hook looks stunning and ready to tackle the chunkiest yarn or the finest thread. Happy crocheting!
Testing and Adjustments
To make sure your new crochet hook is up to snuff, run a few quick tests.
First, grab some yarn and try a simple chain stitch. If the hook snags, you might need to smooth out the tip a bit more. It should glide through the yarn like a hot knife through butter.
Next, hold it in your hand for a bit. Does it feel comfortable? Try a few rows of single crochet. If your hand cramps up, you might need to tweak the handle shape. Comfort is key; no one wants crochet-induced claw hand.
Also, inspect it for any rough spots. Yarn should love your hook, not hate it. Sand a little more if necessary.
Lastly, check the size. If it’s too big or small compared to standard hooks, gauge adjustments might be needed. Eyeballing sizes is a skill, but a ruler can help.
Happy hooking!
Decorating Your Hook
Let’s add some pizazz to your new crochet hook. After all, it’s going to be your trusty yarn companion.
First, think about paint. Acrylic is a solid choice. It sticks well to wood, and you can go wild with colors and designs. Maybe a rainbow swirl or tiny polka dots.
Stickers can also add a fun element. Look for durable, water-resistant ones. Unicorns, flowers, or even tiny cats. Why not?
Consider carving if you’re feeling adventurous. Small, detailed carvings can add a personal touch. Maybe your initials or a quirky symbol.
And don’t overlook the impact of some glitter. A little bit mixed into a clear sealant can give your hook that extra sparkle.
Lastly, try wrapping parts of the handle with yarn or embroidery thread. It provides grip and a splash of color.
Decorating is where your creativity shines, so make it uniquely yours.
Ergonomic Considerations
Crocheting should be a joy, not a hand-cramp marathon!
First, consider the grip size. The handle shouldn’t be too slender, or it’ll feel like holding a toothpick. Beef it up a bit, Goldilocks-style, for that just-right feel.
Shape matters too. A rounded handle can often be more comfortable than a flat one. Curves aren’t just for fashion!
Length is another key. An extra-long hook can be unwieldy, while a super short one might cramp your style—and your fingers. Aim for somewhere between Goldilocks-approved and longer, not shorter.
Lastly, think about weight. Heavy hooks can tire you out faster than using up your favorite yarn. Lighter is often better, unless you’re aiming for an arm workout.
Recommended Tools and Materials
For this crafty endeavor, you’ll want to arm yourself with some simple tools and materials. First, grab a piece of hardwood like maple, oak, or birch; they’re sturdy and timeless. Softwoods are like giving your granny a rollercoaster ride—not great for the heart (or hook durability).
Next, you’ll need a carving knife. Think of it as a sculptor’s chisel but for your crochet dreams. Add some fine-grit sandpaper to your list; you don’t want a splintery situation tickling your fingers.
A small round file or a dremel tool will help shape that hook tip like a pro. For finishing, a bit of beeswax or wood oil works wonders, gliding on smoother than a buttered cat on a linoleum floor.
Don’t forget protective gloves. We’re DIY-ers, not aspiring forensics subjects. Lastly, a pencil for sketching your masterpiece before you dive in!
Related Posts
 Easy Crochet Gnome Pattern Free: Transform Yarn into Whimsical Friends
 Crochet Star Blanket: A Stellar DIY Guide
 How to Crochet Slippers for Beginners Step by Step with Pictures: Cozy Feet Awaits
 Adjustable Ring Crochet: Master the Magic Circle
 How to Crochet Without a Hook: Hands-On Creativity