Learn what “dtr” stands for in crochet and how to create this advanced stitch step-by-step.
Curious about the double treble crochet stitch, or got tangled up with “dtr”? You’re in the right place! Read on to demystify this impressive stitch, from yarn overs to turning chains. Get ready to turn your crochet projects into masterpieces with our detailed, humorous guide.
Key takeaways:
- “Dtr” stands for double treble crochet.
- Yarn over three times for the stitch.
- Insert hook into designated stitch.
- Yarn over, draw through loops.
- Follow turning chain guidelines for height.
Materials Needed
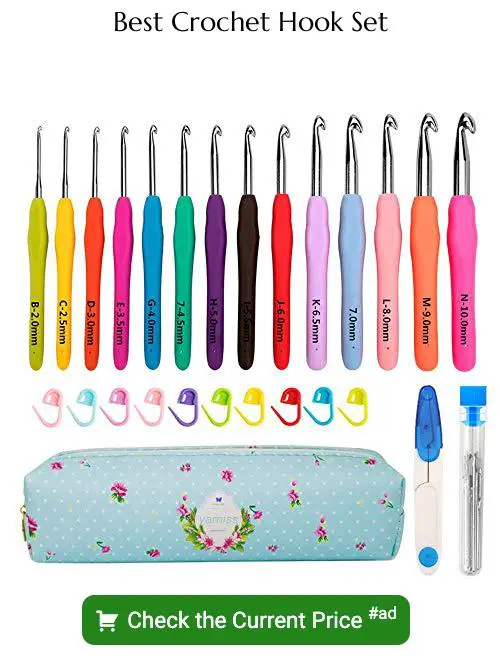
To whip up some double treble crochet magic, you’ll need a few basics. Firstly, grab your favorite yarn. Any type works, but beginners might enjoy smoother textures for less snag drama.
You’ll also need a crochet hook that corresponds with your yarn choice. Most yarn labels include hook size suggestions—think of them as your yarn’s personal trainer, guiding it to success.
A quick finger workout is essential; nimble fingers make the complex stitches feel like a breeze. Stitch markers can be helpful to keep track of your progress, especially when working on larger projects.
Don’t forget a pair of scissors for a tidy finish and a darning needle to weave in those rebellious yarn ends. Ready? Yarn’s at the gate, hook’s in hand, and you’re set for some double treble fun!
Double Treble Crochet Stitch Abbreviation
In the wild, double treble crochet is often spotted under the alias “dtr.” Yes, it’s like a secret agent of the crochet world, blending in with its sleek abbreviation.
- Context Clues: Found in patterns like a treasure map, “dtr” guides you to grandiose stitches.
- Reading Patterns: Spot an “dtr” and you know it’s time to unleash the mighty four-loop yarn-over move, like a crochet superhero.
- Learn the Lingo: Understanding “dtr” turns those cryptic crochet hieroglyphs into plain old instructions, connecting you to the crochet community like the secret handshake for yarn lovers everywhere.
Master this acronym and you hold the power of epic stitches!
Yarn Over 3 Times
Grab your yarn and let’s get twisting! First, wrap the yarn around your hook not once, not twice, but a triumphant three times. It’s like putting a little yarn tutu on your hook.
- Here’s what to remember:
- Make sure the wraps are snug but not too tight. They should slide effortlessly but stay in place.
- Keep the yarn tension consistent to avoid a wonky stitch. No one wants a double treble disaster.
- Practice makes perfect, so don’t be bummed if the first few are a little wobbly. Your yarn over game will improve quickly.
And just like that, you’ve mastered the first step to crochet greatness!
Insert Hook
The next step involves positioning your hook in the designated stitch or space. Here’s how to do it:
- Identify the stitch or space where your hook needs to go.
- Move your hook through both loops from front to back.
- Ensure your yarn is at the back of your work – doing a little yarn peek-a-boo can ensure smooth crocheting.
These simple steps ensure your project stays on track and your stitches look uniform. Remember, a well-placed hook is the secret to crochet harmony.
Yarn Over, Draw Through
Now that the hook is in place, your next step is getting that yarn to cooperate! Here’s how:
First, yarn over the hook again. Think of it as giving the hook a cozy yarn jacket before it tackles the loops.
With your newly yarn-jacketed hook, draw the yarn through the first two loops on your hook. This might feel a bit like threading a needle with mittens on, but trust the process.
And voilà, you’re already reducing the loops. It’s a bit like a yarn-themed magic trick, but with fewer rabbits. Or maybe more, depending on what you’re making.
Remember, consistency is key. Tug gently to maintain the same tension throughout, ensuring your stitches are uniform and your project doesn’t end up looking like a ruffled potato chip. Keep at it, you’re on a roll!
Repeat Yarn Over, Draw Through
Now that you’ve inserted the hook and yarned over, it’s time for a little game of “draw through the loops.” Here we go:
First, yarn over again. Draw that yarny goodness through the first two loops on your hook.
Rinse and repeat. Another yarn over, another two loops to draw through. Easy peasy!
Keep this up until you’ve got only two loops left.
One more yarn over and… you guessed it! Draw through the final two loops.
Your patience will be rewarded with a lofty stitch resembling a cozy skyscraper. Double treble crochet stitches may look a bit like overachievers but their height can create some seriously dreamy textures.
Continue Through the Last Two Loops
Now, here’s the grand finale of your double treble crochet escapade. You’ve drawn through loops, hoarded yarn overs like a pirate collecting treasure, and you’re almost there.
First, admire your work so far. Seriously, it’s looking good.
Now, take that yarn over. You know what to do. Draw through two loops on your hook.
Repeat. Do it again. Pull that yarn through the next two loops. Almost like buttering toast – smooth and satisfying.
Keep going. Another yarn over, another set of loops conquered. You’re unstoppable.
Finally, when you have just two loops left, a final yarn over. Draw through them with a flourish. Victory!
Ta-da! You’ve done it. The double treble crochet stitch is complete and ready for action. Go ahead, give yourself a small celebratory dance before moving on.
Double Treble Turning Chain
This stitch is tall, so you need a good starting point. Enter the turning chain. Here’s the lowdown:
Firstly, after finishing a row, chain four. Yes, four – not one, not two, but a whole quartet of them.
This chain gives you the height needed to match the upcoming stitches. Think of it as the skyscraper of turning chains.
Whenever you flip your work, these four chains officially count as your first double treble crochet. Meaning, you won’t be adding a stitch directly at the base of this chain. No stitch overcrowding here.
By ensuring you follow this method, you maintain the integrity and evenness of your crochet project’s edges. It’s like giving your crochet a haircut, but less risky.
Voilà! Your next row of stitches is now queued up and ready for action.
Tips for Using Double Treble Crochet Stitches
First, keep an adjustable tension. Double treble crochet stitches are tall and can easily become loose if you’re not careful. Imagine trying to wrangle a herd of overexcited kangaroos; don’t let them jump around too much!
Next, ensure your hook size suits your yarn. Go too small, and each stitch will feel like a bad blind date: awkward and tight. Too large, and your work might end up looking like a fishing net gone wild.
Practice your turning chains. These stitches require a taller turning chain, usually four chains, so your edges don’t resemble a wonky roller coaster.
Count your stitches. Tall stitches can lead to unwanted holes and gaps. It’s easy to lose track of where you are. Turn counting into a mini-game, but without the enemy bosses.
Finally, consider stitch markers as your new best friends. Place them at intervals to keep your long rows in check. It’s like having GPS for your crochet project!
What to Make With Double Treble Crochet
Double treble crochet stitches create wonderfully lofty and open fabric, perfect for projects that need a bit of extra flair or breathability. Think scarves that billow like clouds and shawls that drape like a dream.
Due to its length, it’s also great for building height quickly—ideal for afghans when patience is running thin and creativity is running high. This stitch pairs beautifully with lacy patterns, making it a go-to for airy market bags or elegant table runners.
And don’t overlook it for texture. Adding a few double trebles to a hat or a blanket can give a delightful dimension switch. The eye-catching results can trick people into thinking you’re a crochet wizard. Presto, crafting magic.
