Learn how to crochet two pieces together seamlessly for all your next-level projects.
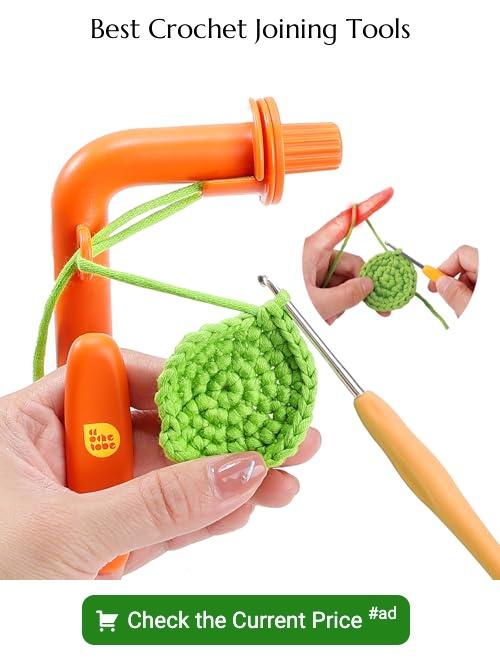
So, you’ve got two delightful crochet pieces that need to become one spectacular creation? Worry not, because we’ve got you covered with a treasure trove of joining techniques! Dive in to explore everything from the trusty whip stitch to the ever-so-magical mattress stitch, each ensuring your pieces come together seamlessly—literally. Stick around for tips that’ll make your seams flawless and your crochet heart sing!
Key takeaways:
- Whip stitch for beginners: Easy sewing technique, secure with knot.
- Mattress stitch for clean join: Align pieces, invisible finish, like magic.
- Single crochet for strength: Sturdy seam, decorative ridge, consistent tension.
- Slip stitch for sleekness: Join invisibly, gentle tugs, matching yarn.
- Tips for perfect seam: Block pieces, use markers, match yarn weight.
Method 1: Whip Stitch Crochet Seam
Whip stitching is a breeze and perfect for beginners. Here’s the lowdown:
First, line up the pieces you want to join, making sure the edges match. Grab your yarn needle, thread it with a length of yarn, and double-check that it’s similar in weight and color to your project.
Start at one end and insert the needle through both pieces from back to front. Pull the yarn through, but don’t pull too tight—you’re sewing here, not tying a knot on a balloon animal.
Insert the needle through the next stitch of both pieces again from back to front. Pull through and repeat. Look at you, cruising along!
Keep your stitches evenly spaced for a neat finish. Consistency is key unless you want a wavy roller-coaster seam. Secure the end with a little knot and weave in that pesky end. Done!
Bonus tip: Use the same yarn as your project to make the seam blend in like a secret agent.
Method 2: Mattress Stitch Crochet Seam (or Invisible Join)
For an incredibly clean and nearly invisible join, the mattress stitch crochet seam is your go-to. It’s like the ninja of seaming techniques, slipping in quietly and doing its job without fanfare.
- Here’s the essence:
- Align your pieces with the right sides facing up. The edges should be flush, like puzzle pieces ready to click together.
- Thread a yarn needle with a length of yarn in the same color as your pieces. Stealth mode engaged!
- Start from the bottom edge and pick up the corresponding loop of each piece. This is your mission: grab one bar on each side, and pull the yarn through.
- Alternate sides, weaving back and forth, like a seamstress with a spy’s finesse. Each stitch should be discreet, bringing the edges together seamlessly.
- After you’ve stitched the entire seam, gently pull on the yarn. Witness the magic as the edges disappear like Houdini’s best trick.
This is perfect for when you want your seam to fly under the radar, leaving nothing but smooth, uninterrupted crochet in its wake.
Method 3: Single Crochet Seam
For a sturdy and decorative seam, the single crochet seam is your best buddy. It joins pieces together and adds a pleasing ridge, perfect for blankets and other projects that need a bit of oomph.
Start by holding your pieces with the right sides facing out. Insert your hook through both layers at the edge. Yarn over and pull through both layers, giving you two loops on the hook.
Yarn over again and pull through both loops. Congrats, you just made your first single crochet stitch!
Work single crochet stitches along the edge, keeping tension even for a consistent seam. Remember to crochet through both loops of each stitch on both layers.
When you reach the end, fasten off and weave in your ends. Voilà! The single crochet seam is complete. Enjoy that extra texture and strength.
Method 4: Slip Stitch Crochet Seam
Hook and yarn at the ready? The slip stitch seam is a sleek way to join crochet pieces. Think of it as crocheting in stealth mode. Here’s the scoop:
Imagine threading a magical thread that binds your pieces together invisibly. Almost. Insert your hook into the first stitches of both pieces. Yarn over and pull through everything on your hook. Repeat along the seam. It’s that easy!
- Key Points:
- Be gentle. Tugging can distort your stitches.
- Keep your tension consistent. No one likes lumpy joins.
- Use matching or contrasting yarn for different effects. Spice things up, or keep it sleek.
- Work on the right side for a neater finish, or wrong side if you’re a rebel.
With the slip stitch seam, your crochet pieces will look like they were always meant to be together, like peanut butter and jelly, ducks and ponds, you get the idea.
Tips for Seaming Crochet
First things first, block your pieces. This step magically transforms your work, trust it.
Use stitch markers. They are like little traffic cones ensuring everything matches up, row by row.
Match your yarn weight. Seaming with the same yarn you used for your pieces creates a more polished look. Unless, of course, you’re aiming for a Frankenstein vibe.
Work with the right side facing you. Because, let’s be real, you want to admire your masterpiece as you go.
Check your tension. Tight seams can make your piece look puckered. Loose seams, and you might as well be stitching the Grand Canyon in there.
Secure those ends. Weaving in ends securely prevents your lovely seam from unraveling and ensures you don’t end up with a boho fringe you didn’t ask for.
Preparing Your Crochet Pieces for Seaming
First things first, block your crochet pieces. Just like toweling off after a shower, it sets everything in the right place.
Ensure both pieces have an equal number of stitches along the edges to be joined. Feeling a bit off-kilter like a car with one tire bigger than the others isn’t helpful.
Align your pieces. Lay them flat, side by side, and make sure the edges match up like long-lost jigsaw puzzle pieces.
Use stitch markers. They’re your best friends here, keeping the pieces in place as you sew them together. Mark key points, like corners and midpoints.
Choose a yarn that blends seamlessly with your crochet. Unless you’re going for a Frankenstein vibe, matching or complementary yarn works best.
Lastly, check your tension. Avoid becoming the Hulk and pulling too tightly, or going loosey-goosey, making your seam look like it’s in need of a facelift.
Join-as-You-Go (JAYG) Method
This method saves time and adds character. Here’s the skinny:
First, crochet your initial motif or square completely. You’ll then start crocheting the next piece, joining it to the first when you reach the edges. Think of it like kids holding hands across the playground, forming a chain of joy.
- Use slip stitches or single crochet to attach edges.
- Make sure to match stitch-for-stitch so everyone lines up nicely. Nobody likes mismatched socks, right?
- This works wonders for granny squares and many motif-based projects.
- Test different hook sizes if tension feels off.
Voila! Less sewing, more crocheting fun.


