Learn to crochet a whimsical dragon with step-by-step instructions that simplify creating your very own mythical masterpiece.
Feeling fiery and ready to stitch up some magical mischief? Welcome to the ultimate guide on crocheting your very own dragon! We’ll cover everything from gathering your mystical materials and mastering essential techniques, to stitching together each scaled segment of this beast. Follow along and by the end, you’ll have a stunning, snuggly dragon to call your own—no dragon whispering required!
Key takeaways:
- Opt for acrylic yarn for durability and vibrant colors.
- Master basic crochet stitches like single crochet and double crochet.
- Use a magic ring for neat circles in your dragon’s body.
- Stuff body parts as you go and shape to bring life.
- Attach parts neatly; sew securely for a majestic dragon.
Needed Materials and Tools

First, you’ll need yarn. Opt for an acrylic blend; it’s durable and comes in various vibrant colors. Grab a main color for the dragon’s body and a contrasting shade for details.
Next, pick a crochet hook that matches your yarn weight. Typically, an H/8 (5mm) hook works well with worsted weight yarn.
Don’t forget the stuffing. Polyester fiberfill gives your dragon a cuddly, plush feel.
Safety eyes are a must for that fierce-yet-cute look. Choose a pair that complements your yarn color.
Tapestry needles will help sew everything together and weave in those pesky loose ends.
Lastly, stitch markers to keep track of your rounds. You’ll thank them later.
Needed Techniques
Get ready to wield your crochet hook like a wand. Here’s what you’ll need to know to conjure a dragon from yarn.
Basic Stitches: Master the single crochet (sc), double crochet (dc), and slip stitch (sl st). They’re the building blocks for our fire-breathing friend.
Magic Ring: The secret to neat, tight circles. Perfect for the dragon’s head, body, and limbs. Think of it as the portal to dragon world.
Increasing & Decreasing: This isn’t just math class, I promise. Increase to make parts wider, decrease to taper things off. Essential for shaping your dragon’s curves.
Stuffing & Shaping: Techniques to bring your dragon to life. You’ll add stuffing as you go, shaping the creature’s majestic form.
Sewing Parts Together: Your dragon won’t assemble itself, even though that would be super cool. Use yarn or a tapestry needle to attach limbs, wings, and decorative spikes.
Counting Stitches: Keep track of your stitches like a dragon guards its hoard. Consistency is key to prevent your dragon from looking like it’s been through its own fiery battle.
You’re now armed with these techniques; let’s start giving that dragon its personality!
Crochet the Head and Body
Start by making a magic ring with your chosen yarn. This will be the foundation of your dragon’s head. Isn’t magic fun? Just like this dragon will be.
Single crochet six stitches into your ring. Don’t worry, the six stitches might not look much like a dragon yet, but trust the process.
Next, you’ll be increasing each round to shape the head. Adding two single crochets into each stitch around will puff it out. Think of it like feeding your dragon some extra snacks—it grows!
When you reach the desired width, simply crochet around without increasing. This keeps the shape consistent, like your dragon is content and full.
For the body, after finishing the head, continue crocheting down. Do a few decreases to make it taper just a bit, shaping that classic dragon body.
Remember, dragons come in all shapes and sizes. Feel free to add a stitch here and there to get the look you like. This is your dragon, after all.
Crochet the Legs (2x)
Start by creating a magic ring and crochet six single crochets into it. Tighten up the ring. This little circle is the start of your dragon’s mighty leg.
For the next round, increase each stitch. That means two single crochets in each stitch around. You’ll now have twelve stitches in total.
From here, continue to crochet in the round. No more increases. Just single crochet around for several more rounds until you have a little tube, perfect for dragon stomping.
If you want a beefier dragon, add a few extra increases in the early rounds. If skinny legs are more your dragon’s style, skip this.
Don’t forget to stuff the legs with fiberfill as you go. Trying to shove fluff into a skinny, yarny leg later on is like trying to put toothpaste back in the tube. Not impossible, but why do it to yourself?
After achieving the desired length, fasten off and leave a tail for sewing. Repeat for the second leg. Now your dragon looks ready to dance at its next yarn festival.
Crochet the Arms (2x)
Ah, arms. Essential for any dragon needing to grip, grab, or give the most unexpected high-fives. For these, you’ll start with a magic ring. Magic indeed!
Chain a few, crochet a round, and increase steadily for that arm meat. Keep it slender but sturdy because, you know, your dragon needs to show off those crocheted guns. Once you’ve reached the desired length, taper them off with decreases so they’re ready to attach.
Remember, symmetry is key. Use the same stitch count and rows for both arms to avoid a lopsided dragon that might trip over its own limbs in excitement.
And there you have it. Two arms, ready for attaching and adventuring. Hook and yarn at the ready, folks!
Crochet the Muzzle
For the muzzle, you’ll need a smaller hook to ensure a tighter stitch since dragons aren’t known for having floppy muzzles. Start by making a magic ring. It’s like conjuring a mini black hole but with yarn. Single crochet six stitches into the ring.
Increase your rounds by working two single crochets into each stitch until you reach the desired circumference. Remember your dragon’s personality: a bigger muzzle for a puff-the-magic type, smaller for a sleeker, speedier dragon.
On the final round, work single crochets evenly around to finesse the shape. Feeling fancy? Add some tiny nostrils using contrasting yarn. Keep it even – no dragon wants a wonky snoot. Once complete, stuff lightly, leaving room for adjustments and attach to the head.
Crochet the Tail
Start with a magic ring and crochet in the round. Increase stitches gradually to give the tail a thick base. Remember, dragons with skinny tails are just underfed!
As you work your way down, begin to decrease stitches. This will taper the tail to a nice pointy end. Think of it as giving your dragon a stylish but fierce whip.
Stuff the tail lightly with fiberfill as you go. Not too much, unless you’re making a dragon that’s just discovered the local doughnut shop.
Make sure to leave a long yarn tail for sewing it onto the body. This will ensure it stays put during those epic, imaginary battles.
Voila! Your dragon’s tail is ready to swish with pride.
Crochet the Wings (2x)
Hook in hand, it’s time to tackle those wings. Picture bat-like, fierce appendages that make your dragon look ready to take flight at any moment. Here’s how to do it:
Start with a magic ring. Chain a few stitches for height.
Increase your stitches gradually with each round to form a widening triangle.
Double crochet and half-double crochet stitches work well here. They offer texture and stability.
Mix in some chain stitches to add those wingy gaps. It’ll create a more authentic look.
Once you’ve got a shape that can intimidate any knight, bind off and make another.
Your dragon’s aerial prowess relies on matching pairs. Keep those wings identical, unless your dragon has an adventurous backstory involving a jousting accident.
Crochet the Spikes
Get ready to add some personality to your dragon with its spiky back.
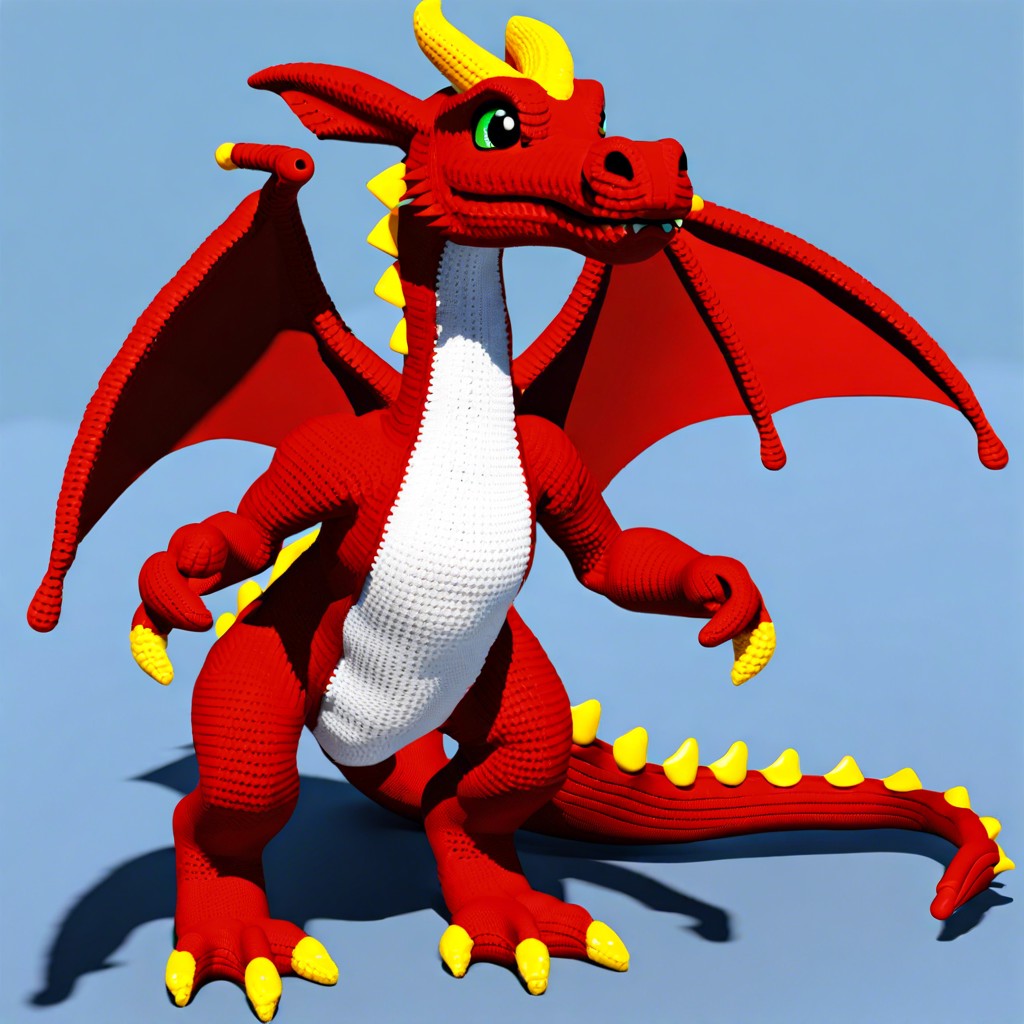
First, choose a contrasting yarn color for some pizzazz. Using your crochet hook, work a series of little triangles or cones, depending on your creative vision.
Make a small chain, usually about 5 stitches. Single crochet back down the chain, decreasing stitches as you go to form a point.
Want more dramatic spikes? Increase the chain length and stitch count. For subtle bumps, keep it short and sweet.
Once each spike is done, leave a long tail for sewing. Space them evenly along your dragon’s back, from head to tail, using the tapestry needle and tails to attach firmly.
Remember, irregularity can add charm. Dragons aren’t known for their symmetry!
Assembling
Think of assembling as putting together a puzzle, but instead of edge pieces, you’ve got dragon limbs and wings. Start by attaching the head to the body, aligning the opening and using a whip stitch to join them. After ensuring the head is secure and straight, sew the legs to the bottom of the body, spacing them evenly for balance.
The arms go next. Attach them to the sides, just below where the head meets the body. The muzzle gets sewn onto the front of the face, making sure it’s centered.
For the tail, position it at the back of the body and sew it in place securely—dragons with wobbly tails aren’t very impressive. Attach the wings on the back, aligning them symmetrically. Finally, add the spikes along the spine from head to tail for that fierce, majestic look.
Double-check all attachments for security. No one wants a dragon falling apart mid-flight.


