Learn what essential supplies you’ll need to crochet a blanket, from yarn and hooks to helpful accessories.
So, you’ve decided to crochet a blanket, but you’re feeling lost in a sea of yarn and hook sizes? Fear not! This guide covers every nitty-gritty detail, from selecting the perfect pattern to mastering color changes and adding a fabulous border. Dive in and soon you’ll be stitching your way to a cozy masterpiece faster than you can say “chain stitch.” Let’s get those hooks moving!
Key takeaways:
- Choose the right pattern for your style.
- Select yarn based on weight, fiber, and color.
- Pick the correct crochet hook size.
- Utilize stitch markers for seamless crochet.
- Incorporate a border to finish your blanket.
Selecting the Pattern
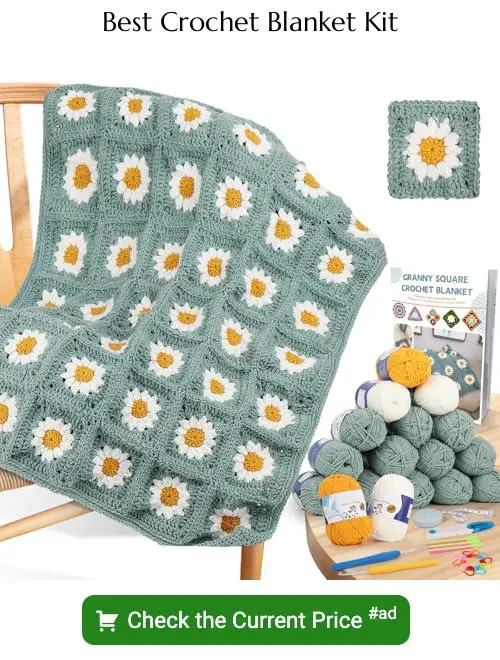
Crocheting a blanket is like choosing a dessert—endless options and all deliciously tempting. Go for a classic granny square if you favor vintage vibes. A ripple or chevron pattern might catch your eye if you’re into modern aesthetics.
Thinking baby blankets? Opt for something with tight, cozy stitches to keep the little one snug as a bug. For a statement piece in your living room, a bold, geometric design can be a real showstopper.
Remember, complexity can vary dramatically. Some patterns are beginner-friendly with simple repeat rows, while others could challenge a wizard. Always check the difficulty rating before committing your precious evenings to it.
Choosing the Yarn
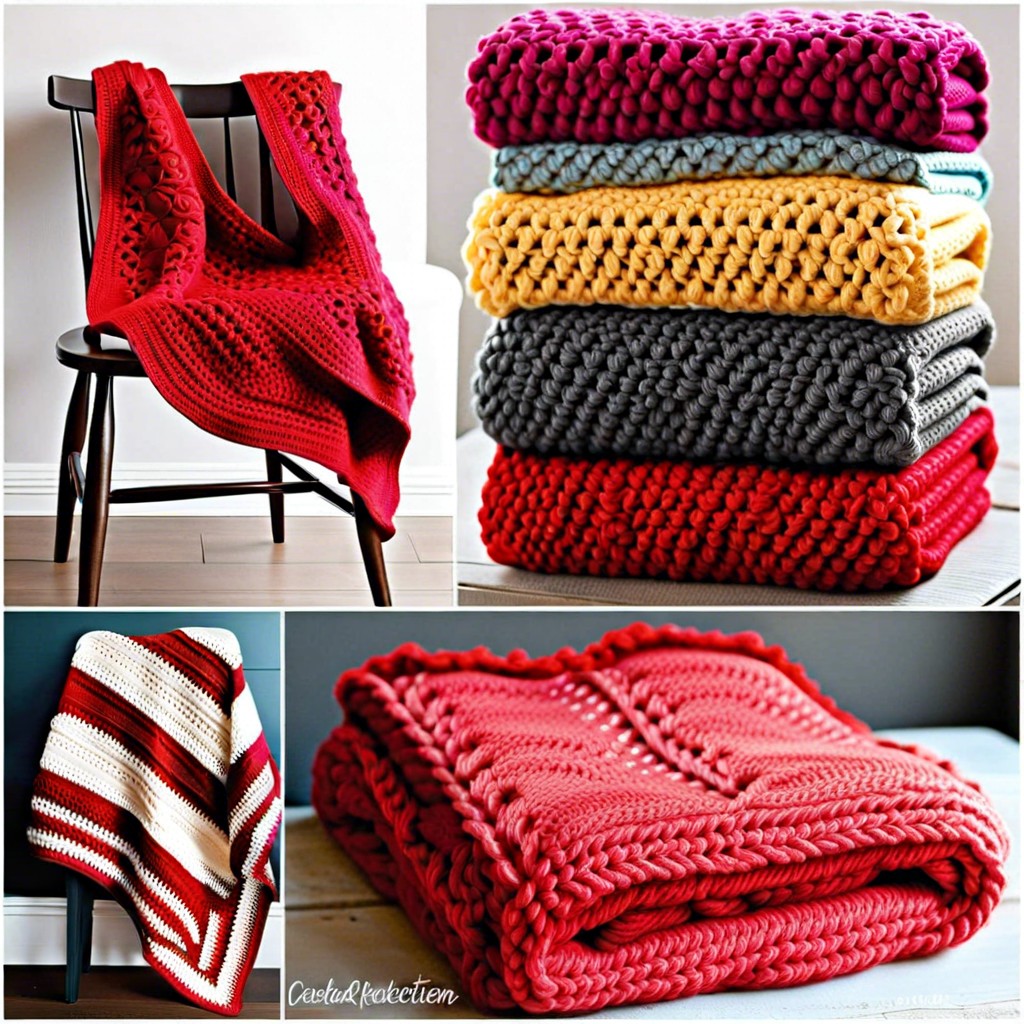
For a cozy blanket that you’ll love snuggling under, yarn choice is key. First, consider yarn weight. Bulky and super bulky yarns make quick, warm blankets. Lighter weights, like sport and DK, are more delicate but may take longer to complete.
Fiber matters too. Natural fibers like wool provide warmth, but may need special care. Acrylic yarns are easy to wash and budget-friendly, making them a solid choice for every day use. Fancy a touch of luxury? Try a blend with some silk or alpaca.
Color, of course, is where you can really let your personality shine. Go monochrome for a chic look or mix vibrant hues for a playful statement piece.
Lastly, check the yarn label for yardage. You’ll need enough to cover that cozy expanse! Nobody enjoys mid-blanket runs to the craft store.
Picking the Hook
The size of the crochet hook matters. It affects the overall look and feel of your blanket. If you want something super cozy and plush, go for a larger hook. Smaller hooks give you tighter, more detailed stitches.
Check the yarn label. Most yarns have a recommended hook size conveniently printed there.
Got a stubborn streak? Make sure to match the hook size with your chosen yarn’s thickness. Using a delicate hook with chunky yarn will leave you feeling ten kinds of frustrated.
Comfort is key. Try different hook materials, like aluminum, plastic, or bamboo, to see what feels best in your hand. Crocheting a blanket is a marathon, not a sprint.
Don’t worry if you start off feeling like you’re juggling spaghetti. With the right hook, you’ll soon be looping like a pro.
Obtaining Stitch Markers
Stitch markers are essential tiny heroes in your crochet toolkit. They’re like little bookmarks, but for your yarn! Here’s how they can save your sanity:
– Keeping Track: Place a marker to remember your starting point in a round or row. No more guessing games.
– Counting Rows: Pop a marker on every 10th row. Now, you won’t need Einstein to figure out how many rows you’ve done.
– Pattern Guide: Use different colored markers for key changes in patterns. It’s like having a crochet GPS.
Find them in various shapes and colors, or DIY with safety pins or a loop of contrasting yarn. Simple, yet life-changing!
Utilizing a Yarn Needle
A yarn needle is an unassuming yet mighty tool in crochet land. Here’s why you want one in your arsenal:
First up, weaving in ends. You can’t escape it; it’s inevitable. A yarn needle slides through stitches like a ghost, securing your hard work from unraveling at the slightest tug.
Next, there’s joining pieces together. When your blanket requires multiple panels, sewing them together using a yarn needle and matching yarn will make the seams nearly invisible.
Need to fix a mistake? A yarn needle helps you easily undo a few stitches without turning your project into a frayed mess.
Lastly, adding embellishments. Whether it’s crafty flowers or a random star, a yarn needle helps attach them seamlessly, giving your blanket that bespoke look.
One tool, many perks.
Following the Gauge
Ever noticed how some sweaters look more “oops” than “aah”? That’s where gauge comes in. Gauge is your secret weapon against size surprises.
First, swatch it out. Crochet a small square with the same yarn and hook you’ll use for your blanket. Measure it. If your stitches per inch match the pattern, you’re golden!
Too loose or too tight? Change your hook size. Bigger hook for loosey-goosey stitches, smaller hook for tighter, neater stitches.
Yarn can be sneaky. Different brands or even different batches can mess with your gauge. When in doubt, swatch again. Think of it as a fun little warm-up before the blanket marathon.
Starting With a Foundation Chain
Alright, got your yarn? Great. Now grab that hook and let’s dive into making the foundation chain.
First, form a slipknot on your hook. This knot should be snug but not strangling your hook. We want the hook to breathe.
Yarn over the hook. This means draping the yarn from back to front over the hook. Imagine the hook is your yarn’s dance partner, and they’re about to tango.
Pull the yarn through the loop on your hook. Boom, you’ve got your first chain stitch. High five!
Repeat the yarn over and pull through dance until you have the desired number of chain stitches according to your pattern. Remember, the foundation chain is the backbone of your blanket—spine straight, no slouching!
Keep your tension even. Too tight, and you’ll need Hulk-like strength to work the next row. Too loose, and your chain will look like it’s been on a week-long pizza binge.
Now marvel at your chain—a string of pearls formed by your sheer willpower and dexterity. A round of applause for you!
Creating Basic Stitches
Alright, buckle up your yarn, because we’re diving into the heart of crocheting your blanket – the stitches.
Start with a chain stitch. It’s super easy. Loop the yarn over your hook, then pull it through the loop on the hook. Repeat. Congratulations, you just learned chaining.
Next, the single crochet. Insert your hook into the stitch, yarn over, pull up a loop, yarn over again, and pull through both loops. Voila! Master of the single crochet.
Double crochet might sound like double trouble, but it’s all good. Yarn over first, insert hook into stitch, pull up a loop, yarn over, pull through two loops, and yarn over again to pull through the last two. Magic.
That’s your basic trifecta of stitches. Remember, practice makes perfect, and tangled yarn makes great cat toys.
Changing Colors
When you want to bring some pizzazz to your blanket, changing colors is the way to go. Imagine transforming a simple lap warmer into a kaleidoscope of coziness.
First, decide where you want the color switch. Typically, this happens at the end of a row to keep things tidy. But hey, rules are made to be broken, right?
To change colors, finish the last stitch of your old color but stop before you complete the final yarn over. Grab the new color and yarn over with it to finish the stitch. Pull the new color through and give both yarns a little tug. Boom! You’ve got a seamless transition.
Magic happens when you work over the starting tail of the new color to weave it in as you go. No one wants to weave in ends forever. Trust me.
For those mid-row color changes, just drop the old yarn, pick up the new one, and keep on crocheting. You might get a few sideways glances from the crochet police, but your blanket will look fab.
So, switch it up! Playing with color is half the fun of making your own blanket.
Adding a Border
Borders can make your blanket go from “meh” to “wow.” They add a polished finish and help to hide any wonky edges.
First, decide on the type of border: simple single crochet, frilly scallops, or something wild and wavy.
Use the same yarn or a contrasting color for an extra pop. Ensure the yarn weight is consistent with the blanket.
When starting, crochet evenly along the edges. Ever tried herding cats? Well, it’s easier than making sure those stitches are evenly spaced, but you got this.
Corners need special love. Most patterns recommend working a few extra stitches in each corner to keep them tidy.
You can even mix different stitches in the border for texture. Why stick to plain when you can have pizzazz?
So trust your instincts, keep it even, and you’ll wrap up that blanket in style.


