If your crochet project is curling up like a hedgehog in winter, read on to discover the common causes and how to straighten things out.
Key takeaways:
- Uneven stitches and wrong yarn weight or hook size can cause curling.
- Maintain consistent tension for even stitches.
- Choose appropriate yarn to minimize curling.
- Unravel and redo stitches or try steam blocking to fix curling.
- Wet blocking can relax curls and make projects lay flat.
Common Causes of Curling
Crochet curling is like an unwelcome guest at a yarn party, popping up when least expected. Often, it’s due to one of several mischievous culprits in your crochet process.
First, uneven stitches can be sneaky. If some are tight and others more relaxed, your project might start curling like a shy snail. Aim for uniformity in stitch size to keep everything flat and friendly.
Second, the culprit could be the wrong yarn weight or hook size. It’s like wearing a hat that’s too small — things tend to buckle under the pressure. Make sure you’re pairing your yarn with the appropriate hook to avoid any unintended texture party fouls.
Lastly, overzealous edges can contribute to the curl factor. If you’re adding extra stitches or inadvertently increasing your stitch count, your project might curl to cope with the growth. Keep a consistent stitch count as you move from row to row.
By understanding these common pitfalls, you’re better equipped to keep your crochet projects as flat as a pancake—or at least close enough!
Maintaining Consistent Tension
Tension in crochet can often feel like controlling weather; unpredictable but crucial to your picnic’s success. The secret to mastering consistently even stitches lies in the way you hold your yarn and hook.
First, find a comfortable grip on your crochet hook. You’re looking for a Goldilocks hold: not too tight, not too loose, just right. This lets you navigate your yarn through stitches like a mini crochet GPS with minimal hiccups.
Next, regulate the yarn flow. This is less about strangling your yarn and more like teaching it to samba smoothly across your fingers. The yarn should loosely cascade over your fingers, offering just enough resistance to form tight, even stitches.
Practicing these techniques might take some time, but it’s worth the effort. Like learning to whistle or finally nailing that grandma-level secret family recipe, it gets better with practice; soon you’ll be crocheting with Jedi-like serenity and precision.
Choosing Appropriate Yarn
Navigating the world of yarn choices can feel like decoding a particularly fluffy Morse code, but fear not—the right selection can help avoid the dreaded curl. Each yarn type brings its own personality to your crochet project, and some are more prone to curling than others.
Heavier yarns tend to lay flatter and are less likely to curl, making them a solid pick for beginners who are still mastering even tension. Lighter, more elastic yarns, while delightful for certain projects, can contribute to fabric curling if the tension isn’t uniform.
Just as in high school chemistry, where mixing certain elements could either result in a perfect experiment or an unexpected explosion, mixing yarn weights in a single project can similarly lead to a curling catastrophe. Stick to one yarn weight for the entire piece to maintain a consistent texture and minimize curling.
So, when your crochet starts acting more like a stubborn roll-up blind than a flat blanket, consider changing your yarn ally. Sometimes, all your project needs is a different companion to lie flat and behave.
Fixing Curled Crochet Projects
If you’ve found yourself facing the curling conundrum, fear not! There are some nifty tricks to straighten things out:
First up, don’t be shy to unravel your work. Yes, frogging (rip-it, rip-it) can feel like backpedaling, but it’s often the best path to perfect flatness. As you redo your stitches, concentrate on maintaining even tension and stick to the recommended hook size.
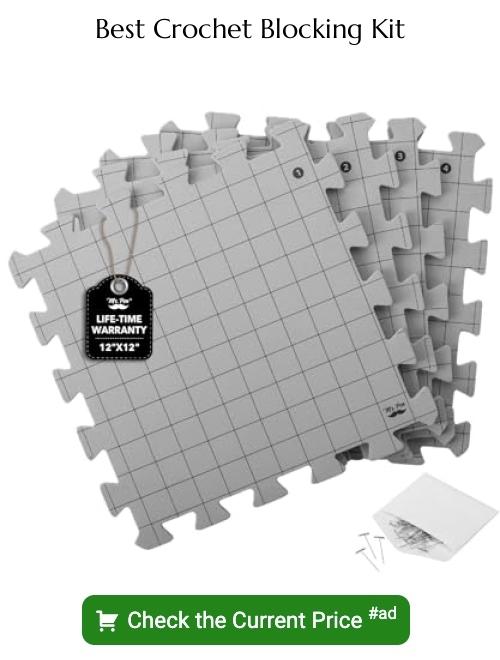
Another neat trick is to deploy the steam blocking method. Lightly steam the offending crochet piece without making direct contact with the iron. Pin the piece down on a blocking board to desired dimensions and let it dry. This method can relax the fibers and persuade your project to lie flat.
Lastly, consider adding a border. Sometimes, all it takes is a tidy single crochet border around the edge to provide the extra structure needed to combat the curl. Choose a compatible yarn and hook, and watch as the border acts like a charm to smooth things out.
Wet Blocking Techniques
Wet blocking is a knight in shining armor when it comes to relaxing those stubborn curls in your crochet. Here’s how it rolls:
First, give your finished crochet piece a relaxing bath. Soak it in lukewarm water mixed with a gentle detergent for about 20 minutes. Think of it as spa time for your yarn!
After the soak, it’s time to say goodbye to excess water—but gently, please! Press the piece between clean, dry towels to wick away moisture without wringing. Just imagine you’re giving it a cozy hug with a towel.
Now, the magic happens. Lay your piece flat on a blocking board or any clean surface that can handle pins. Gently stretch your crochet to the desired shape and pin it down. It’s like playing a game of ‘shape shifter’ with your yarn.
Let it dry completely. Patience is key! As it dries, the fibers relax and set in their new, flat formation. It’s like your crochet piece is getting its beauty sleep, waking up refreshed and curl-free!
Implementing these steps can help straighten out those curls, making your crochet projects lay flat and look fab!
Related Posts
 Easy Crochet Gnome Pattern Free: Transform Yarn into Whimsical Friends
 Crochet Star Blanket: A Stellar DIY Guide
 How to Crochet Slippers for Beginners Step by Step with Pictures: Cozy Feet Awaits
 Adjustable Ring Crochet: Master the Magic Circle
 How to Crochet Without a Hook: Hands-On Creativity