Crafting a dreamcatcher with yarn transforms ordinary materials into an enchanting piece of home decor because it involves the fusion of creativity, tradition, and simple, readily available supplies.
Creating a dreamcatcher with yarn is a wonderful craft project that combines elements of knitting and crochet. This article will guide you through each step, from selecting the right yarn and hoop, to crafting the intricate web and adding decorative elements. Whether you’re a seasoned yarn enthusiast or a beginner, you’ll find this process both rewarding and fun.
In the following sections, you’ll find detailed instructions, tips on choosing materials, and advice on how to personalize your dreamcatcher. This comprehensive guide ensures you’ll have all the information you need to create a beautiful, handmade dreamcatcher.
Key takeaways:
- Hoop: Use embroidery hoop, metal ring, or old hula hoop.
- Yarn: Choose durable, flexible yarn in desired color.
- Embellishments: Beads, feathers, ribbons for personalization.
- Follow step-by-step instructions for creating hoop and web.
- Experiment with different materials and designs for unique dreamcatcher.
Materials Required for DIY Dream Catcher
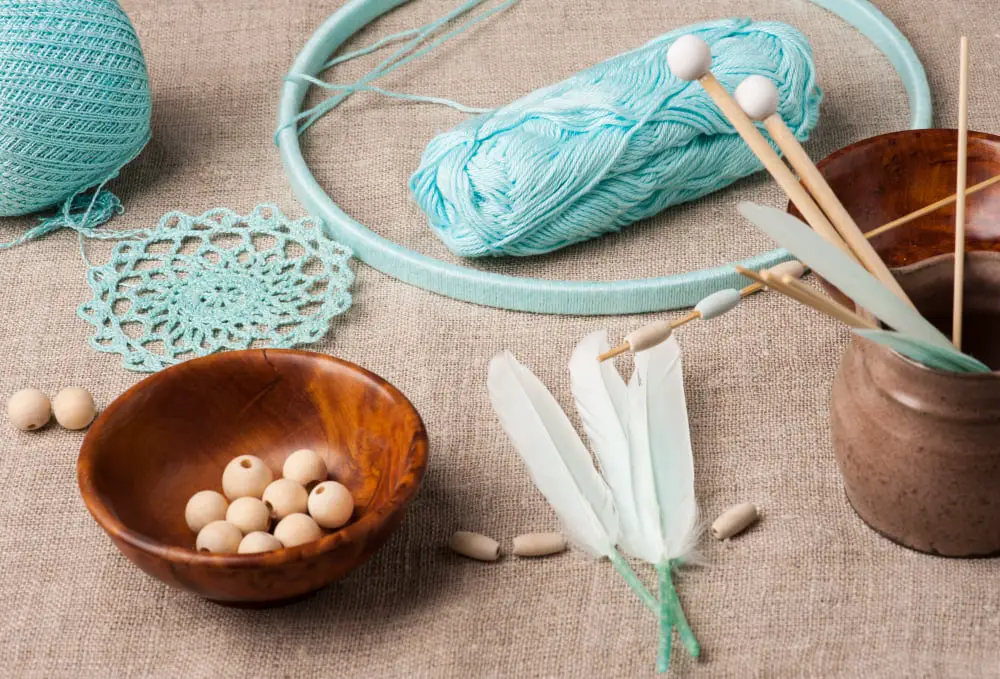
Gathering your materials before you start crafting guarantees a smoother process. The integral parts for a DIY yarn dreamcatcher include a hoop, yarn, and a selection of embellishments.
1. Hoop: You can use an embroidery hoop, a metal ring, or even a well-cleaned old hula hoop to make a dreamcatcher. The size and material of the hoop will impact the overall look and feel of your dreamcatcher.
2. Yarn: Selection of right yarn is quite critical. It’s advisable to choose a durable and flexible yarn that won’t easily break as you pull it taut. You can play with colors to create a unique design. Moreover, the thickness of yarn depends on the size of your dreamcatcher.
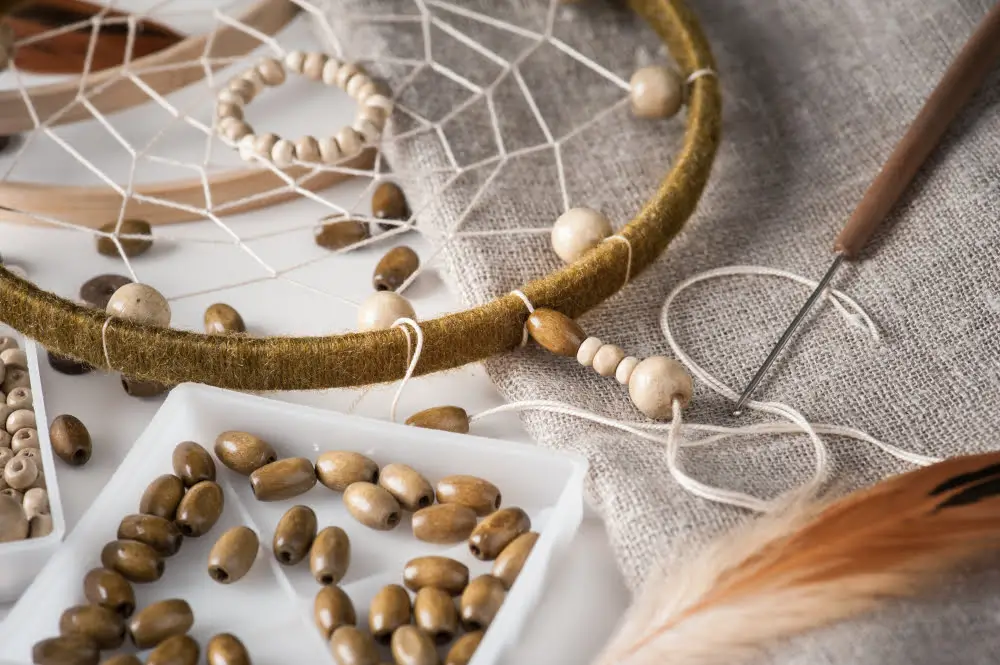
3. Embellishments: Beads, feathers, ribbons or any other decorative items that you wish to include. These add personality and intricacy to your dreamcatcher. They can be threaded onto the yarn or attached to the completed web.
Remember to select quality materials to ensure your dreamcatcher is durable and vibrant.
Equipment Needed for Creating a Dream Catcher
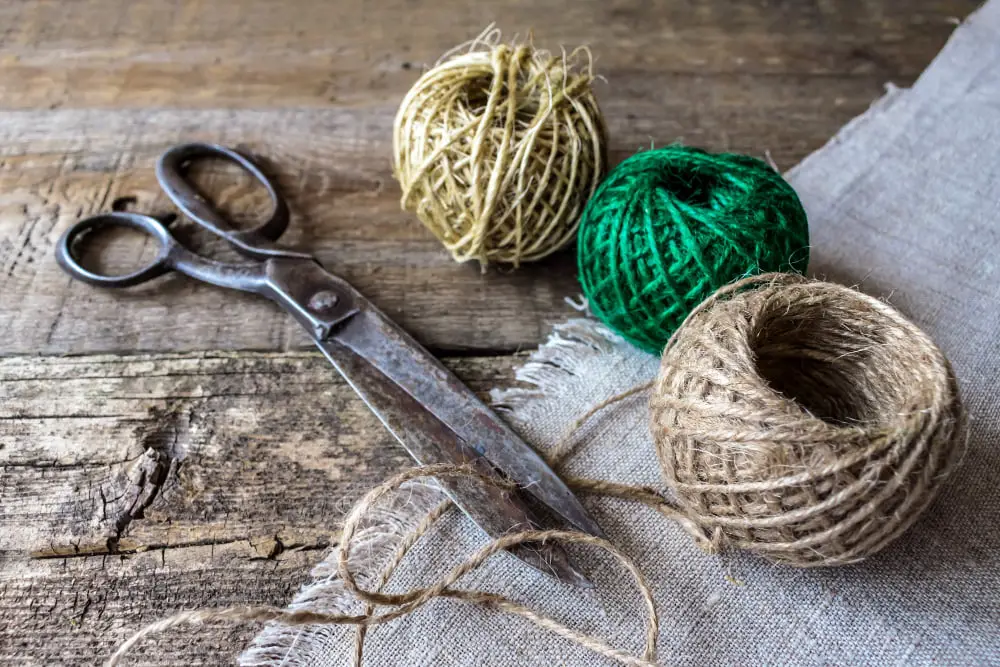
To start crafting your dreamcatcher, here’s a checklist of tools and supplies you’ll need:
- A hoop: This could be a metal hoop or one made of wood, depending on your preference. The size can also be chosen based on where you plan to hang your dreamcatcher.
- Yarn: You will need two types of yarn, one for the hoop and one for the web. Color choice is entirely up to you, but you might want a thicker type for the hoop, and a thinner, stronger type for the web.
- Feather and beads: These are standard decorations for dreamcatchers, often threaded onto the fringes for a traditional look. They represent air or breath, necessary for life.
- Needles and scissors: A needle will be really handy when threading the web, the beads or the feathers. Scissors, of course, will be needed for cutting your yarn.
- Glue: While it’s not a must-have, a bit of glue can provide extra security for any loose ends or knots.
It is worthwhile to gather all required equipment beforehand to ensure a smooth and uninterrupted crafting process. Don’t be afraid to experiment with different materials to create your unique dreamcatcher.
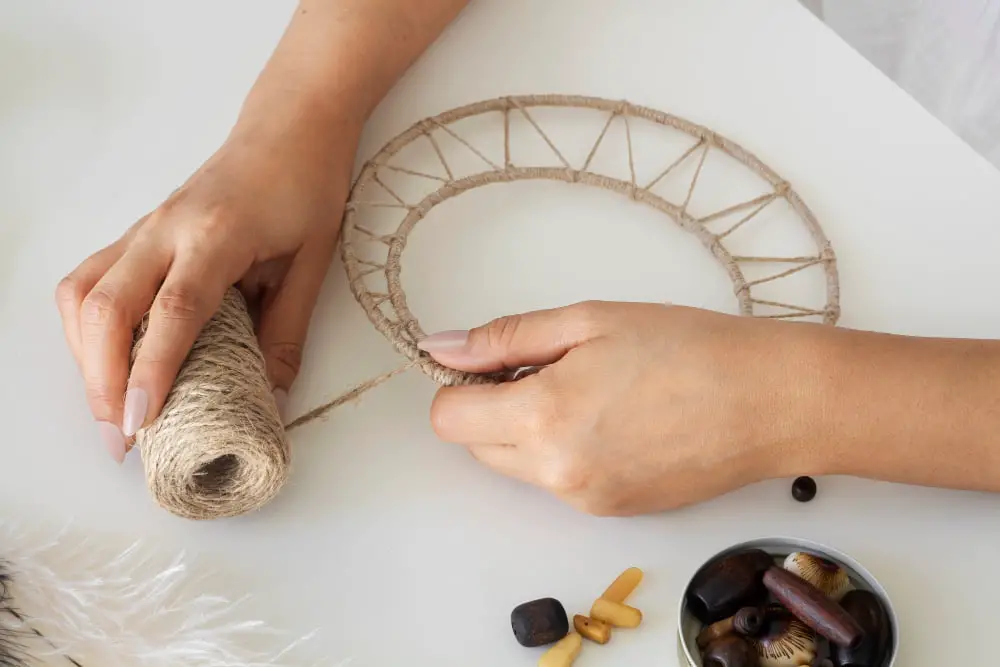
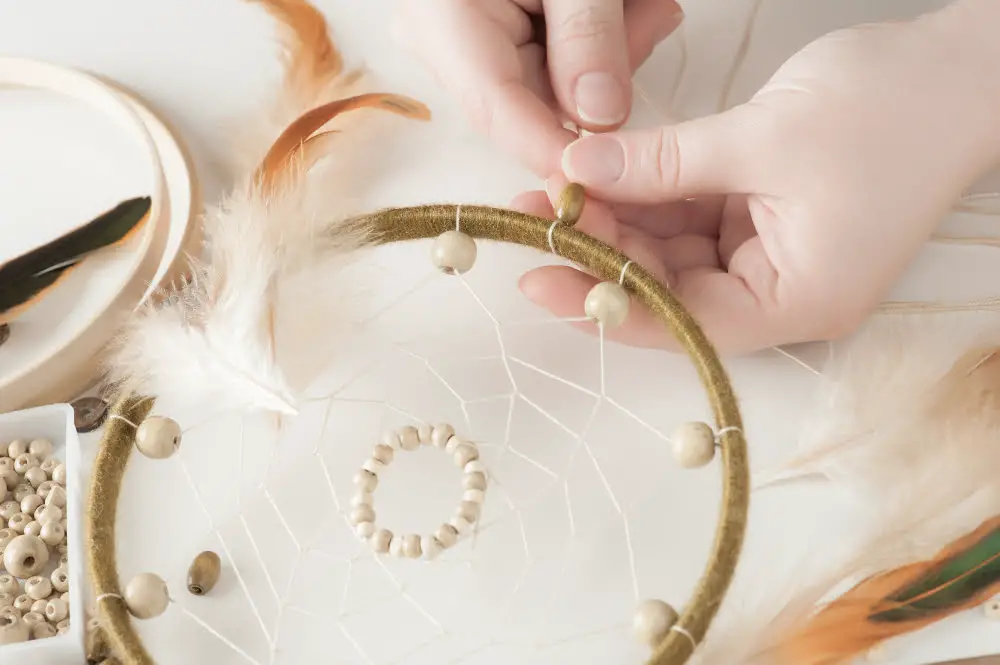
Create the Hoop for the Dream Catcher

Having gathered all necessary materials, the next step in our Dreamcatcher creation process is focused on the hoop. The hoop serves as the fundamental structure around which the remaining parts are constructed.
- Select a firm circular object that fits the preferred size for the dreamcatcher. It could be anything from a crafting hoop to an old bicycle wheel.
- Take your chosen yarn and wrap it tightly and uniformly around the entire circumference of the object, ensuring the yarn is snug against the hoop. A small dot of glue can be utilized discreetly at the beginning and end of the wrapping process for enhanced stability.
- Experimentation with colors and tone variations of the yarn could be considered at this stage, giving the dreamcatcher a personalized unique touch.
- Once the hoop is fully enveloped in the yarn, you should retain a long tail of about 30cm for use in the next step.
Proceed to the following step, ensuring careful attention to detail as it forms the core of your dream catcher.
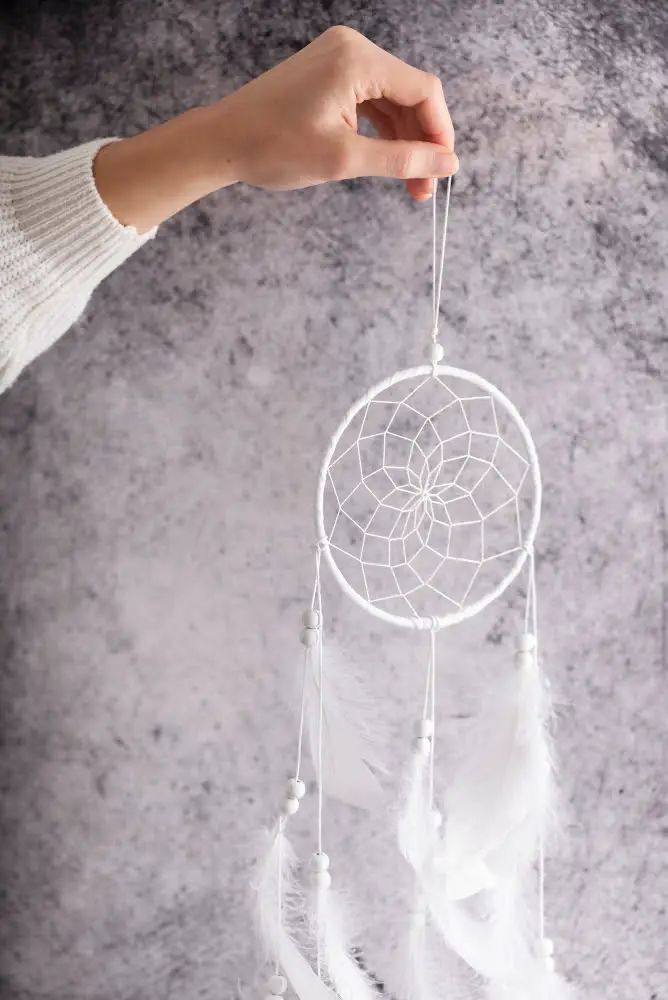
Make the Center Web of the Dream Catcher
To craft the centerpiece or the “web” of your dream catcher, start by tying a loose knot with your chosen yarn around the top of the hoop. This is where your weaving begins. Be sure to leave a small loop to hang your dream catcher later.
1. Hold the yarn tight and guide it to another point along the hoop, wrapping it around before leading it off to another point. This creates a loose pattern across the hoop, mimicking the look of a spider web.
2. As you’re weaving, remember to maintain even tension – this is crucial to keep the web symmetrical and avoid a wonky web.
3. Once you’ve created several “rings” of web, it starts to become a smaller circle. Always ensure you’re dragging your yarn through the middle of each section created by the yarn in the previous ring to give it a circular look.
4. If you wish to include a bead or charm, now is the time to thread it onto the yarn and place it somewhere within your webbing. Traditionally, these are believed to represent the spider in the web, the dream weaver’s companion.
5. Continue this weaving and stringing process until you’ve filled in the hoop or have achieved the desired pattern.
6. To finish the webbing, make a loop with the yarn at the final point, and tie a secure knot. Trim any excess yarn length.
Voila! you’ve created the intricate web of your dream catcher.
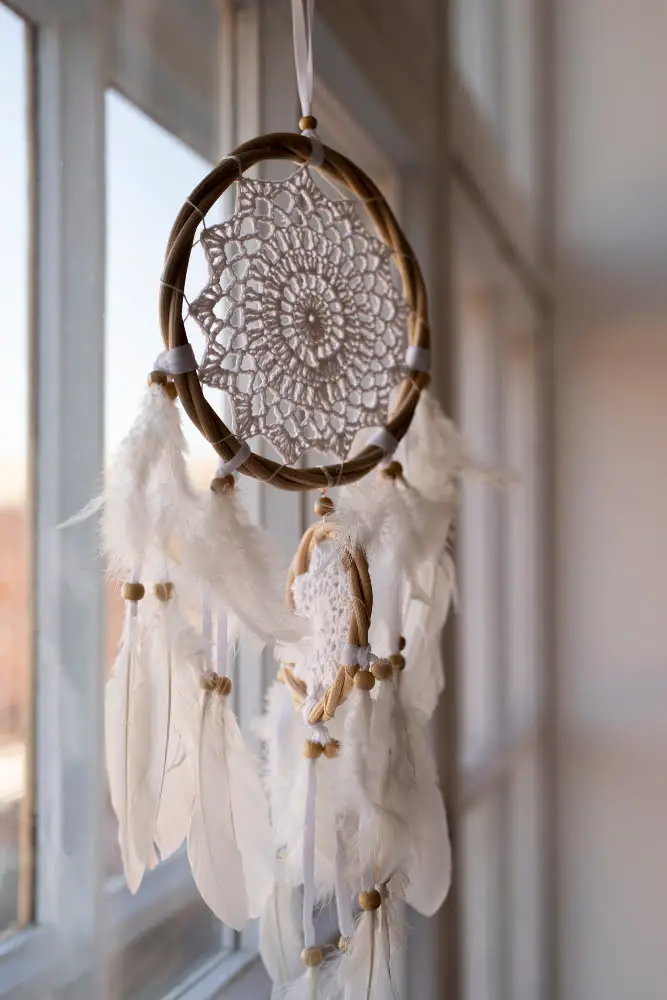
Different Dream Catcher Variations
Traditional dream catchers are usually fashioned with a willow hoop, but modern crafters also use other materials like embroidery rings and metal hoops. Yarn work within the hoops can also vary, with some favoring intricate web-like patterns, while others choose simplistic designs.
Adorning your dream catcher can add more personality, feathers and beads are common embellishments but there’s scope for innovation with use of lace, fabric strips or even small charms.
You may opt to create a single-tier dream catcher or go for a more complex, multi-tier design. It’s also possible to fashion dream-catchers into different shapes like hearts or triangles, stepping away from the common circular design.
Another fascinating addition can be glow-in-the-dark yarn or paint, for a spectacular night-time effect. The beauty of creating your own dream catcher is its open-ended nature that lets you embrace diverse creative avenues.
How to Make a Dream Catcher With Yarn Step By Step
Let’s dive right into the heart of the process:
1. Select your yarn. Prioritize durability and color, according to your choice.
2. Prepare the hoop. Wrap the yarn around your hoop in a consistent, tight manner until fully covered. Secure the end with a knot.
3. Begin the web. Tie the end of a new piece of yarn onto the hoop. Drape the yarn across the hoop to form a segment length of your choice, looping it around the hoop to secure.
4. Continue creating the web. Make segments evenly spaced around the hoop, connecting each to the center. You should end up with a pattern similar to a spider’s web.
5. Add embellishments. Intersperse beads on your yarn while creating the web, these will be secured when you loop the yarn.
6. Create hanging strings. Attach several lengths of yarn to the bottom of the hoop, add decorations like feathers or additional beads.
Remember, equal tension throughout the web is crucial to maintain the dream catcher’s shape and strength. Incremental adjustments as you progress will aid in achieving this. Next, we’ll explore options for personalizing your dream catcher. Happy crafting!
Paint the Dream Catcher

After you’ve assembled your dream catcher, add your personal flair to it with a touch of paint. Choose colors reflecting your taste or the decor of the room where it will hang. Acrylic paint works well, as it adheres to a variety of surfaces and dries quickly.
Follow these steps to paint your dream catcher:
- Get all materials ready. These include paint, water, brushes, and a cloth to clean spills.
- You may decide to paint only the hoop, the yarn, or both. Make sure the design complements the dream catcher without detracting from its elegant weaving.
- Apply paint gradually. It’s always easier to add than to subtract color. A second coat might be preferable if you want a denser color.
- Allow the paint to dry completely before moving to the next step.
Remember that painting is optional. Some prefer their dream catchers with the natural colors of the materials used. Whether you choose to add paint or not, the dream catcher will remain a lovely piece of handmade art.
Meaning of a Dream Catcher
Traditionally, dream catchers are crafted by the Indigenous people of North America to protect individuals from negative dreams, while letting positive ones pass through. The positive dreams would slip through the hole in the center, glide down the feathers and gently reach the sleeping person below. Conversely, negative dreams would get caught up in the web, and expire when the first rays of the sun struck them.
Today, these handcrafted pieces serve more as inspirational and aesthetic items found in homes worldwide. Despite this shift, the foundational beliefs and symbolic elements continue to permeate: the hoop signifies strength and unity, the web conceptualizes our life’s journey, and the feathers symbolize airy spirits and the breath of life.
Each dreamcatcher is a unique creation, deeply rooted in cultural symbolism, that invites positivity into your space.
How to Make the Dream Catcher Glow in the Dark
Once you have completed crafting your dream catcher with yarn, making it glow can infuse an enchanting charm. Follow these simple steps:
- Acquire a glow-in-the-dark paint. You can find it online or at your local craft stores. Opt for non-toxic variants for safety.
- Apply the glow paint to the areas of the dream catcher you wish to highlight. This could be the web, feathers or beads.
- Use a small brush or a sponge. Ensure the application is even for a seamless glow.
- Let it dry in a well-ventilated area. The drying time depends on the brand and type of paint.
- Charge the dream catcher under bright light. The photoluminescent particles in the paint absorb light and then emit it as glow.
Although a simple process, applying glow-in-the-dark paint can remarkably enhance your yarn dream catcher, giving it both aesthetic appeal and whimsical glow.
DIY Dream Catcher Tutorial
Begin with the hoop. This structure is the foundation of the dream catcher and can be any size or shape – a circle is traditional but be creative. Wrap the hoop tightly with yarn, securing with a simple knot at each end.
The intricacies of the dream catcher are formed by weaving a web of yarn inside the hoop. Start at one point, tying a loose knot, and work around the perimeter of the hoop, looping the yarn around the frame at regular intervals. The tension should create a radial pattern – think of a spider web or a wheel with spokes.
For additional flare, weave coloured beads or small feathers into the web. When placing these additions to your web, consider their symbolic significance in the dream catcher’s greater role, such as protection, comfort, or a personal symbol of importance.
Finally, craft the fringes for the bottom of your hoop. Make a series of tassels using different yarn colors and lengths, and attach them securely to the bottom of the hoop. These tassels can be adorned further with beads, charms, feathers or other tokens of significance to finish off your unique dream catcher.
Remember: The beauty of a dream catcher is in its uniqueness, created by your personal touch and creativity.
Video Instructions to Make a Dream Catcher
Online tutorials prove immensely helpful for visual learners, providing real-time demonstrations of the dream catcher crafting process. Popular platforms such as YouTube host a variety of these resources, catering to all skill levels.
1. Basic weaves: Find tutorials that focus on the fundamental process of weaving the inner web of the dream catcher, crucial for beginners mastering the art.
2. Advanced designs: As your skills progress, embrace instructional videos showcasing intricate patterns, adding complexity, and charm to your creations.
3. Yarn choice: Detailed guides often delve into the types of yarn suitable for dream catchers, an essential factor affecting the project’s aesthetic and durability.
4. Creative extras: Enhance your dream catcher’s appeal by seeking out tutorials that incorporate feathers, beads, or glow-in-dark elements into the design.
5. Problem-solving: Video tutorials can help troubleshoot common issues, such as maintaining tension in the yarn or securing the web to the hoop.
Remember, while video instructions provide a great visual guide, putting your unique spin on your dream catcher will truly make it your own. Watch, learn, and most importantly, enjoy the creative process.
FAQ
Can you make dream catchers with yarn?
Yes, you can create dream catchers using yarn in the center.
What kind of yarn do you use for a dreamcatcher?
For a dreamcatcher, one could use embroidery floss, worsted or bulky-weight yarn, suede string, soft cotton sheared into thin strips, hemp cord, simple butcher’s twine, or artificial sinew thread from craft stores.
What are the rules for dream catchers?
The rules for dream catchers are to hang them over the bed or crib where they are exposed to sunlight to capture bad dreams and only let good thoughts and dreams enter the unconscious mind.
What is the significance of the dream catcher’s design in yarn crafting?
The dream catcher’s design in yarn crafting signifies a spiritual tradition, used for filtering dreams, it includes elements like a woven web to snare bad dreams, feathers to allow good dreams through, and beads symbolizing the spider that wove the web.
How many yards of yarn are typically required to create a dreamcatcher?
The typical dreamcatcher requires approximately 20-30 yards of yarn, depending on the diameter of the hoop and the intricacy of the pattern.
What other materials are needed in the process of crafting a dreamcatcher with yarn?
In addition to yarn, crafting a dreamcatcher requires a hoop or ring, feathers, beads, and a needle or strong thread for weaving.


