Learn how to tie off your crochet project to secure your stitches and give your work a polished finish.
Key takeaways:
- Secure your stitches and give your crochet work a polished finish.
- Use the basic row method to tie off, weave in ends, and add extra security.
- Maintain the shape and integrity of your crochet project with the continuous round chain method.
- Fasten off a crochet round neatly by creating a fasten-off knot and weaving in the tail.
- Weave in ends meticulously to keep your project tidy and secure.
Basic Row Method
First, complete your final crochet stitch in the row as usual. Then, cut the yarn, ensuring you leave a tail about six inches long. This extra length is handy for weaving in ends later.
Next, yarn over with the tail and pull it through the loop on your crochet hook. Pull gently to tighten the loop, securing the yarn’s end and preventing your work from unraveling.
Now, it’s crucial to properly weave in this end to keep your work neat and durable. Use a yarn needle to weave the tail back and forth through several stitches on the wrong side of your project. This method disguises the yarn end well and adds an extra layer of security.
If you want it extra secure, weave the end in one direction, then double back a few stitches. This “backtrack” locks the tail in place and helps your finish withstand more wear and tear.
Lastly, trim any excess yarn after weaving to keep your work looking tidy. This simple process not only secures your crochet project but also enhances its overall neatness and durability.
Continuous Round Chain Method
Switching from traditional rows to working in rounds opens up a new world of crochet possibilities, such as hats or amigurumi. Here, understanding how to properly tie off becomes crucial to maintain the shape and integrity of your project.
When you reach the end of your final round, cut the yarn, leaving a six-inch tail. Pull this tail through the last stitch on your hook to securely fasten it. This simple action prevents the stitch from unraveling.
The goal now is to make this fastening invisible. Thread the tail onto a yarn needle and weave it through the stitches adjacent to the last stitch. Mimicking the path of the yarn in the surrounding crochet can help camouflage the tail. After several stitches, pull gently to adjust the tension and ensure the tail is neatly tucked away without distorting the fabric.
This method not only secures your crochet rounds but also enhances the overall finish, making your creations look polished and professional.
How to Fasten Off a Crochet Round
When you reach the end of your crochet round, slip stitch into the first stitch of the round to join it neatly. Cut the yarn, leaving a six-inch tail. Pull this tail through the loop on your hook and tug gently to secure it; this is your fasten-off knot. To ensure your project looks polished, weave this tail back into several stitches of the round using a yarn needle. Hide the tail well to avoid unraveling and to maintain the integrity of your piece. This technique keeps your finished projects looking clean and professional.
How to Weave in Ends in Crochet
Weaving in ends can be as satisfying as putting the final puzzle piece in place. Here’s how to keep your project tidy and secure:
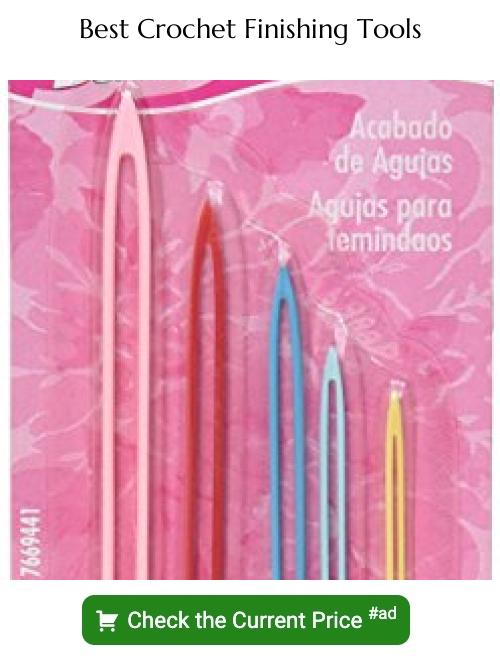
First, grab a yarn needle. You’ll want one with an eye large enough for your yarn to fit through easily, yet thin enough to slip into your stitches without stretching them.
Start by threading the needle with the loose end of your yarn. If it frays, twist the fibers tightly or dampen them slightly with water to make threading easier.
Gently guide the needle through the stitches on the wrong side of the work to hide the yarn tail. Follow the path of the stitches for about 2-3 inches to secure it well.
Try to mimic the stitch pattern. This helps the tail blend seamlessly into the fabric, making it virtually invisible from the right side.
Once you’ve woven in enough length, trim the excess yarn close to the fabric. Be careful not to cut your actual project. A close snip ensures the end won’t poke out awkwardly.
A little tip: if your project will undergo lots of wear and washing, consider weaving through different directions. Pass back through some of your original path. This creates extra security, tying the end in a subtle, efficient knot.
Now, with your ends neatly tucked away, your piece not only looks cleaner but also holds together with grace under active use.
Learn How to Block Crochet
Blocking is the final touch that shapes and sizes your crochet project to give it a professional finish. You can choose from wet blocking, spray blocking, or steam blocking depending on the fiber content of your yarn and the intended shape of your project.
For wet blocking, submerge the piece in water, gently squeeze out excess water without wringing, then pin it to the correct dimensions on a blocking mat.
Spray blocking involves pinning the dry project to a mat and then spritzing it with water until it is damp. This method is ideal for items that might be too delicate to submerge.
Steam blocking requires a steam iron. Hover the iron over the fabric without touching it, allowing steam to penetrate the fibers. This technique is effective for fibers that can withstand heat.
All methods require the crochet to dry completely while pinned, ensuring the yarn sets in the desired shape. Remember to use rust-proof pins to avoid any unwanted staining or damage.
Related Posts
 Easy Crochet Gnome Pattern Free: Transform Yarn into Whimsical Friends
 Crochet Star Blanket: A Stellar DIY Guide
 How to Crochet Slippers for Beginners Step by Step with Pictures: Cozy Feet Awaits
 Adjustable Ring Crochet: Master the Magic Circle
 How to Crochet Without a Hook: Hands-On Creativity