Learn how to use a crochet ring to enhance your stitching technique and speed up your crocheting projects.
Key takeaways:
- Choose the right crochet ring for your project
- Place the crochet ring on your finger for comfort and control
- Thread yarn through the crochet ring for smooth stitching
- Adjust yarn tension with the crochet ring to achieve even stitches
- Troubleshoot common issues with crochet rings for a seamless crocheting experience
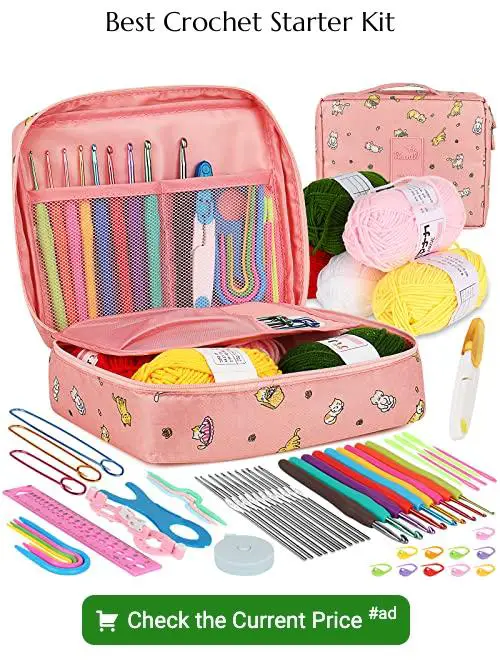
Choosing the Right Crochet Ring for Your Project
When selecting a crochet ring, consider the material. Metal rings are durable and offer a smooth yarn glide, while silicone rings provide comfort and flexibility. The size of the ring is crucial; it should fit snugly on your finger without constricting blood flow. Think about the yarn gauge you’ll use most often. A larger ring may be better for bulky yarns, whereas a finer ring suits thinner, delicate yarns. Lastly, personal preference plays a part—choose a ring design that sparks joy every time you pick up your crochet project.
Placing the Crochet Ring On Your Finger
When placing a crochet ring on your finger, it’s a bit like giving your hand its very own crafting sidekick—functional yet surprisingly fashionable. The ring typically sits on the index finger of your dominant hand, but feel free to experiment if it feels more comfortable on another finger.
Ensure the ring fits snugly; a ring that roams freely while you crochet can turn your relaxing yarn session into a wild goose chase. However, it shouldn’t cut off circulation or inspire any new finger gymnastics. If it slides too much, adjust the size, often possible with adjustable rings, or add a ring pad for a better fit.
Once positioned comfortably, make sure the yarn guide faces outward, ready to be the loyal gatekeeper to your yarn flow. This proper alignment makes controlling tension much easier, which in turn, helps maintain consistent stitches throughout your project.
Threading Yarn Through the Crochet Ring
First, take your chosen yarn and cut a length that’s manageable, typically no more than a few yards to prevent tangling. Hold the tail end of the yarn between your thumb and the ring, leaving a short tail sticking out. This acts as an anchor and will help you start crocheting without the yarn slipping.
Next, wrap the long end of the yarn around the ring. The trick here is not to pull it too tight; you want some mobility. One or two wraps should suffice at first. As you get more comfortable, adjust the number of wraps to suit the tension you need for your project.
Finally, start to crochet as usual. The ring will help feed the yarn smoothly, allowing for even stitches and reducing hand strain. Remember, practice makes perfect. If the yarn slips or the tension feels off, simply rewind and try again!
Adjusting Yarn Tension With the Crochet Ring
Using a crochet ring not only jazzes up your knitting session but also saves you from the dreaded yarn tension tangle. Imagine it as a tiny personal assistant, snugly perched on your finger, guiding your yarn faithfully as you crochet away.
First off, slip the ring onto your less dominant hand – that silent hero of your crochet battles. Loop the yarn through the ring, ensuring it slides with the grace of a determined sloth on a mission. This setup allows you to manage the yarn’s tension effortlessly without engaging in a thumb war with your supplies.
Adjust the flow by tightening or loosening the yarn as it feeds through the crochet ring. It’s akin to adjusting the volume on your radio; find the right level where the music of your stitches flows harmoniously. If your stitches are tighter than a high-security bank vault, loosen up a bit. If they’re looser than a gossip’s lips at a tea party, then it’s time to tighten that yarn’s journey through your ring.
By mastering the art of tension adjustment, you’ll ensure that every stitch is a step towards a perfectly balanced crochet piece. Keep practicing, and soon you’ll be adjusting tension as naturally as blinking!
Troubleshooting Common Issues With Crochet Rings
Even the craftiest of us can encounter a hiccup now and then, especially when a crochet ring refuses to play nice. If you find yourself in a stitch of trouble, here are a few quick fixes:
- Slippery Situations: If your ring keeps slipping off your finger like a fish on a waterslide, consider padding the inside with a bit of silicone or double-sided tape for extra grip. Also, ensure you’re using the correct ring size; a snug fit should solve this slippery ordeal.
- Yarn Tangles: More tangles than a mystery novel? Slow down and ensure the yarn freely moves through the ring without bunching. If congestion occurs, it might be time to clean the ring or to check for any rough spots that could be catching the yarn.
- Too Tight or Too Loose: Getting the Goldilocks level of tension can sometimes be tricky. If your project is tighter than a drum, loosen the yarn slightly in the ring. On the flip side, if it’s looser than a gossip’s lips at a tea party, tighten it up by using the ring to pinch the yarn a tad more.
Remember, every tool has its quirks, and mastering them takes a pinch of patience and a dash of practice. Happy crocheting!
Related Posts
 Easy Crochet Gnome Pattern Free: Transform Yarn into Whimsical Friends
 Crochet Star Blanket: A Stellar DIY Guide
 How to Crochet Slippers for Beginners Step by Step with Pictures: Cozy Feet Awaits
 Adjustable Ring Crochet: Master the Magic Circle
 How to Crochet Without a Hook: Hands-On Creativity