Master the art of yarn over in knitting because it unlocks the door to complex knitting patterns and beautiful, lacy designs.
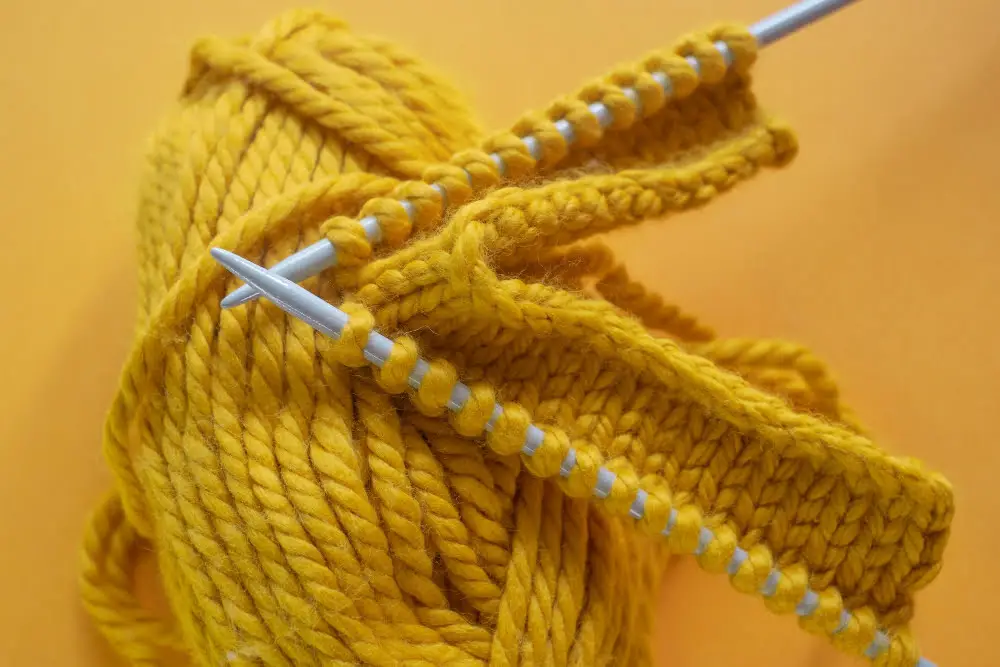
Yarn over (often abbreviated as yo) is a technique that creates an extra loop on your knitting needle, adding a new stitch to your work and creating a little hole, perfect for lace patterns or buttonholes.
It’s a simple technique, but can be a bit tricky for beginners. However, once you understand the process, it can be a great tool to enhance your knitting projects.
This article will guide you step by step through the yarn over process, ensuring you get it right every time, whether you’re knitting or purling.
So, let’s unravel the mystery of the yarn over together!
Key takeaways:
- Yarn over creates extra loop and decorative hole
- Yarn overs are key for lace and intricate patterns
- Yarn overs can be knitwise or purlwise
- Different effects achieved by wrapping yarn differently
- Yarn overs can be single, double, or triple for different effects
Understanding a Yarn Over
The yarn over (YO) is a unique increase method in knitting that intentionally creates a small hole in the fabric for decorative purposes or as part of lace patterns. Realizing its potential requires knowing its nuances:
1. It introduces a new stitch on your needle, thus increasing your total stitch count.
2. It breaks uniformity by creating an intentional decorative hole in the design.
3. It’s a key component in making intricate lace patterns.
4. Notably, YOs can be performed both knitwise and purlwise.
5. Depending on how the yarn is wrapped over the needle, different effects can be achieved – a key aspect to consider for project planning.
6. Alongside standard YOs, there also exist double or even triple yarn overs for bigger holes or wrapped stitches.
7. Reading patterns involving YOs, like ‘yo, k2, ssk’ would mean you’ll need to yarn over, knit two stitches, then slip, slip, knit. Understand these essential knitting abbreviations for successful patterns relating to YOs.
Understanding these concepts is crucial to mastering the yarn over technique and progressing to more complex patterns. The next sections will provide a step-by-step guide to execute different types of yarn overs, learn when and why to use them in your knitting projects.
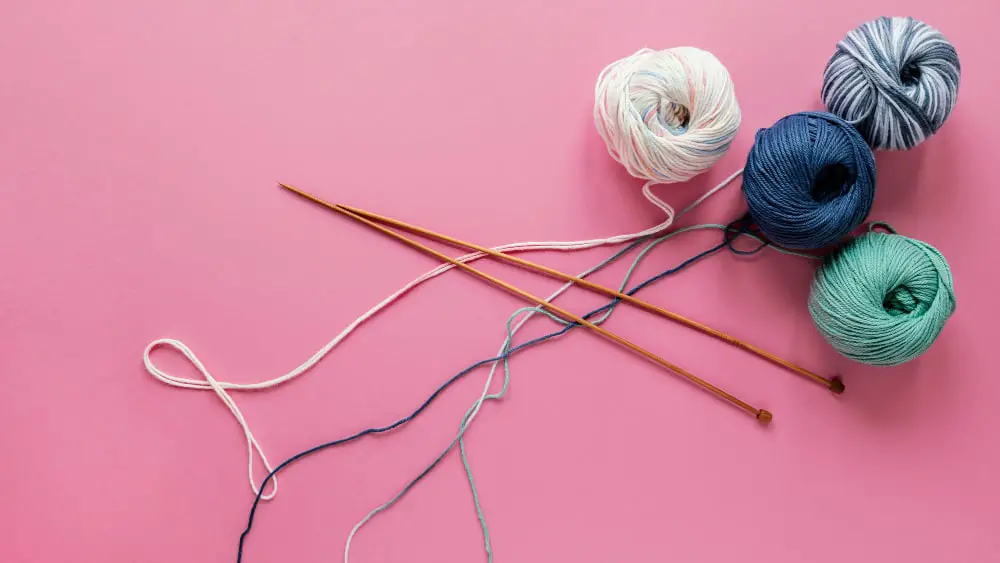
Materials Required for a Yarn Over
For your yarn over endeavor, you need the following materials: first, a pair of knitting needles appropriate to the thickness of the yarn that you’re working with. The size of the needles is always specified on the yarn label. The larger the needle size, the looser the yarn-over will be, and vice versa; secondly, a yarn of your choice. Bulky yarns make yarn-overs more visible and are excellent for practicing purposes.
Lasty, consider having a stitch marker or two on hand. While not absolutely necessary for yarn-overs, stitch markers can be useful to mark the beginning or the end of a pattern repeat, particularly for lace knitting where yarn-overs are most common. Remember, the most fundamental material is patience as along with practice will make your yarn overs perfect.
Tools Necessary for a Yarn Over
To execute this technique effectively, two simple tools are primarily needed: a pair of knitting needles and yarn.
1. Knitting Needles: The size and type of your knitting needle will depend on the specific project and the type of yarn you are using. Generally, US 8 (5mm) knitting needles are versatile and perfect for beginners.
2. Yarn: The yarn should be compatible with your knitting needles. Bulky yarns require larger needles, while thin yarns will need smaller ones. It’s usually recommended to match the yarn thickness with the needle size for optimal results.
In addition, a stitch holder or locking stitch marker can prove helpful in marking the place of your yarn over, especially while you’re still learning the process. However, these are not necessary but can be beneficial to beginners.
Yarn Over: Step-by-Step Instructions
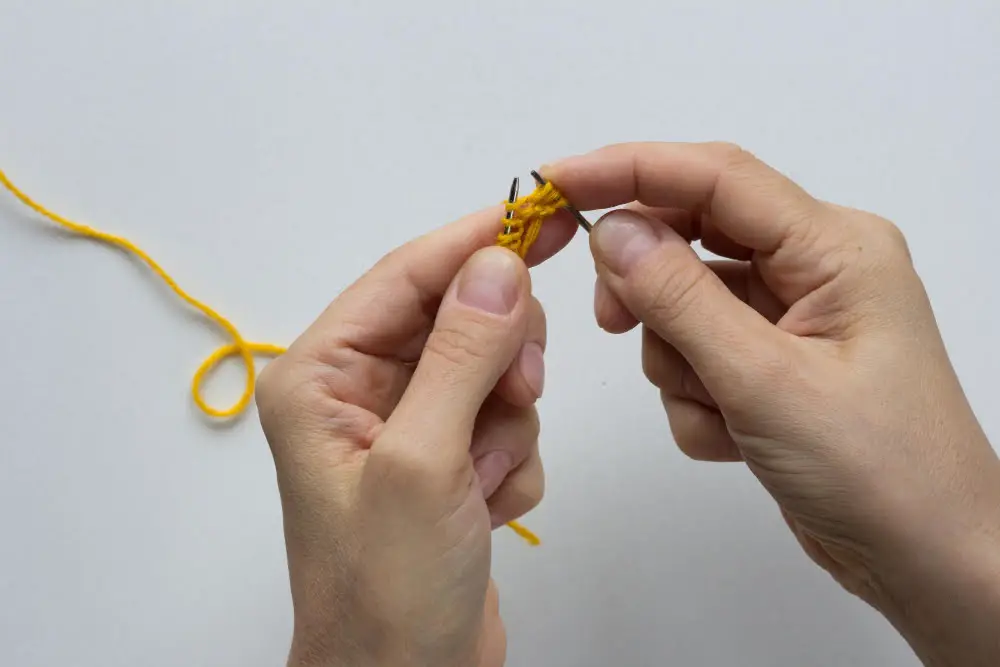
First and foremost, ensure your yarn is at the front of your work. Then, insert your right-hand needle into the next stitch on your left-hand needle as if to knit, just as you would for any knit stitch.
Next, wrap the yarn from back to front over the right-hand needle. Ensure the yarn wrap goes over and then under the right-hand needle, effectively making a loop on it.
Continue as you would with a standard knit stitch, pulling the right-hand needle and yarn through the stitch on your left-hand needle. Carefully slip the old stitch off the left-hand needle. You should now see an extra loop or stitch on your right-hand needle, which is your yarn over.
Remember, the purpose of this is to create an intentional hole in your knitting or to increase the number of stitches. So, don’t be alarmed by the additional loop on your needle or the gap it creates in your work.
Instructions for Knitting a Yarn Over (Knitwise)
Starting with the yarn at the back of your work, bring it over the right needle to the front. Now, knit the next stitch on your left needle while making sure the yarn over stitch doesn’t slip off. The yarn over stitch creates a loop over the right needle, effectively increasing by one stitch.
Continue as per your pattern. This technique may seem tricky initially but becomes second nature with a little practice. Keep the tension even on your yarn to avoid loose stitches.
If you are mid-row and need to yarn over between two knit stitches, simply wrap the yarn over the needle and knit the next stitch. This will naturally create a hole underneath the yarn over, which is leveraged in lace patterns or as a decorative element.
Learning to Knit a Yarn Over Purlwise
To begin, have your yarn resting at the front of your work. Insert your right needle into the next stitch with the tip pointing to the right. Bring the yarn up, over, and around the right needle. It should loop from front to back over the needle.
Next, purl as usually you would. As you take the right needle out of the stitch, the looped yarn will create a new stitch with a little hole beneath it. This is your yarn over.
Here’s a sum up:
- Yarn at the front of the work.
- Insert right needle into the stitch.
- Bring yarn over the needle.
- Purl as usual.
- After making the purl stitch, a hole appears under the new stitch, indicating a successful yarn over.
Depending on pattern requirements, Yarn over Purlwise can be used to create various knitting designs. Keep practicing with different patterns to familiarize yourself with the technique. Remember, the prime requirement is accuracy and consistency. Practice frequently to make your yarn over purlwise perfect.
Executing a Double Yarn Over
Double yarn over offers greater height than a single yarn over and is ideal for creating larger holes or extra slack in patterns. So, let’s dig into its process.
1. Begin just as in a single yarn over, by bringing the working yarn to the front of the work.
2. Instead of stopping after one wrap, continue to wrap the yarn around the needle a second time.
3. Proceed with the next stitch as indicated in your pattern. Mostly, the next stitch will be a knit stitch.
4. When working subsequent rows, you’ll encounter two loops where you executed the double yarn over.
5. Work into each loop individually to maintain the correct stitch count.
Remember, the double yarn over can be a bit tricky, especially when working the returning row. Be cautious not to drop the extra loop off your needle. Practice is the key to mastering this technique.
Exploring Different Types of Yarn Overs
Diving deeper, yarn overs can vary depending on how they’re inserted into the pattern. The most common types are yarn over knitwise and yarn over purlwise. In a yarn over knitwise, the yarn is passed over the knitting needle from back to front before knitting the next stitch. On the other hand, yarn over purlwise is done by passing the yarn over the needle from front to back before purling the next stitch.
Another intriguing type is the double yarn over, which involves wrapping the yarn around the needle twice in succession. This technique creates an extra-long loop, which is useful for patterns that call for larger, more open stitches.
Then, we have the closed yarn over and reversed yarn over. In a closed yarn over, the subsequent stitch is manipulated to close or tighten the yarn loop, resulting in a smaller hole. A reversed yarn over, on the contrary, forms a twist in the loop that’s helpful for certain stitch patterns.
Remember, each variety brings something unique to the table in terms of the texture and appearance of your knitting, so don’t hesitate to experiment!
Detailed Analysis of Closed and Reversed Yarn Overs
In the realm of knitting, two prominent yarn over techniques are the “closed” and “reversed” methods. While conventional yarn overs create an open, lace-like pattern, closed yarn overs, as the name suggests, produce a smaller, closely knit stitch. Using the same movements as a regular yarn over, the only difference lies in the manner the following stitch is knitted, which determines how closed or open the yarn over loop becomes.
On the contrary, the reversed yarn over method creates an elegant, twisted look in the knitting patterns. The procedure involves wrapping the yarn the opposite way around the needle, rendering a different loop orientation, and resulting in a distinct look in the knitted fabric.
To best use these techniques, it is essential to study patterns calling for either style, so one can visualize the overall appearance. Additionally, mastering these methods expands a knitter’s repertoire, paving the way for more intricate and diverse project designs. Practicing with different yarn textures and thicknesses can also broaden the understanding of their implications on the final result.
Complications and oddities can sometimes arise when following patterns which include these techniques; however, it’s all part of the craft and the learning experience, ultimately making you a more adaptable, skilled knitter.
Helpful Yarn Over Tips and Tricks
1. Maintain a Uniform Tension: Stitches following a yarn over can loosen if you don’t provide sufficient tension when you work the following stitches. The yarn over stitch should be just as taut as the stitches surrounding it to ensure uniformity.
2. Examine Your Work: Yarn overs create a deliberate hole in your fabric as a decorative function or as part of a lace pattern. Always check the front and back of your work to confirm the yarn over is correctly placed and that you’ve not created an unintentional yarn over.
3. Use Markers: If your pattern requires repeated yarn overs, markers can be a great help. Place one after each yarn over in a row, then remove them as you knit the next row to confirm you haven’t missed one.
4. Adapt to Yarn Thickness: The type of yarn can impact the size of your yarn overs; thinner yarns create smaller holes, while bulkier yarns have a more pronounced effect. You might need to adapt your yarn-over technique according to the yarn thickness.
5. Practise Knitting and Purling: Before you begin with yarn overs, make sure you’re comfortable with basic knit and purl stitches. Yarn overs involve transitioning between the two, so having a good grasp on these basic stitches is vital.
6. Master Direction: Remember that the direction of a yarn over matters. Standard yarn overs go over the needle from back to front. Treating this direction as a rule of thumb ensures your stitches don’t twist.
Understanding Knitting Patterns for Yarn Over
When following knitting patterns, recognizing the abbreviation for yarn over is essential. Typically, it’s signified by “yo“. The placement of “yo” can slightly change your approach. If it’s listed before a knit (K) or purl (P) stitch, complete the yarn over and then proceed with the noted stitch. If “yo” follows a knit or purl indication, first perform the stitch, then move onto the yarn over.
In lace knitting, yo often pairs with decreases to maintain stitch count. Always read pattern instructions carefully, as they might direct specific yarn over methods depending on the desired effect. The same rule applies when interpreting symbols in chart patterns. Each design has its key, but mostly a yarn over is presented as an “O” or a slanting line. Familiarizing with these symbols and abbreviations will simplify the knitting journey significantly.
Notes On Yarn Over Techniques
Knitting a yarn over (‘yo’) effectively requires understanding a few fundamental concepts.
1. Yarn Position: Whether you’re knitting or purling, the yarn must be in front before making a yarn over. This is because it needs to wrap around the needle to form the new stitch.
2. Stitch Direction: The direction of the yarn over differs based on the stitches surrounding it. For example, ‘yo’ between two knit stitches implies bringing the yarn front and wrapping it over the right needle.
3. Stitch Count: Always remember, a yarn over creates an extra stitch. This factor is crucial in maintaining the correct stitch count or when using ‘yo’ for decorative holes or shaping in lace and other patterns.
4. Visual Recognition: Recognizing a ‘yo’ in your work can help correct mistakes. It looks like a loop without a “parent” stitch at its base.
5. Practice: Use various yarn types and needle sizes to acquire a feel for the manipulation of the yarn during a ‘yo’. Not all yarn behaves the same way, and this practice will ultimately enhance your skills and understanding.
Remember these points as you incorporate the yarn over into your knitting projects. They’ll build a strong foundation that will aid in mastering this essential technique. Now, let’s move forward and discuss some recommended tools for yarn over knitting.
Recommended Tools for Yarn Over Knitting
Acquiring the right tools can significantly enhance your yarn over knitting experience. Primarily, you’ll need knitting needles – their size will depend on the yarn type and the pattern you’re working on. Bamboo or wooden needles are excellent for beginners due to their grip, aiding in controlling the yarn.
Next, there’s the yarn. Opting for a medium-weight yarn, such as worsted weight, when learning yarn overs could provide a fine balance between visibility and manageability.
While not essential, stitch markers may prove useful. If a pattern incorporates several yarn overs, the stitch markers can help identify these stitches, preventing any missed or accidental extra yarn overs.
Finally, a yarn needle for weaving in ends can be handy. Using a yarn needle ensures your finished project has a clean and polished look by neatly tucking in loose ends. Remember, meticulousness in tying up loose ends enhances the integrity of your knitted project over time.
Thus, knitting needles, medium-weight yarn, stitch markers, and a yarn needle shape an effective toolkit for any yarn over knitting endeavor.
FAQ
Is yarn over front to back or back to front?
A yarn over is created by bringing the yarn from the front to the back over the right needle.
What is the difference between a yarn over and a yarn forward in knitting?
A yarn over involves wrapping the yarn around the right needle to create a new stitch, while a yarn forward moves the yarn between the needles to the front of the work, positioning it for the next stitch.
How does a yarn over affect the overall pattern in a knitting project?
A yarn over in knitting introduces an extra loop into the pattern, creating a hole or eyelet, often used for decorative purposes or to increase the total stitch count, thereby influencing the design and dimensions of the knitting project.
Can you yarn over multiple times in a single stitch and if so, what effect does this have on the end result?
Yes, you can yarn over multiple times in a single stitch and this technique creates longer stitches that add extra volume and texture to the crochet piece.


