Learn how to increase single crochet stitches for your projects with these easy-to-follow steps and tips.
Ready to elevate your single crochet game? Whether you’re sculpting amigurumi masterpieces or crafting cozy blankets, mastering the art of increasing single crochet stitches is crucial. From strategic stitch placements that shape your creation to the stealthy invisible single crochet increase, we’ve got all the tricks. Stick around for step-by-step photos, and a video tutorial that will turn you into an increase wizard.
Key takeaways:
- Increase in single crochet by adding extra stitches.
- Strategic placement of increases shapes your project.
- Try the invisible single crochet increase for a clean look.
- Follow step-by-step photos for regular and invisible increases.
- Watch a video tutorial for visual instructions and tips.
How to Increase in Single Crochet
To create an increase in single crochet, you need to add extra stitches into your row or round. Think of it as crocheting one stitch, but then saying, “Hey, why not invite another stitch to the party?”
Here’s how you can do it:
- Insert your hook into the next stitch.
- Yarn over and pull up a loop.
- Complete your single crochet stitch.
- Now, instead of moving on, insert your hook back into the same stitch.
- Yarn over, pull up another loop.
- Finish another single crochet.
Voilà! You’ve turned one stitch into two. It’s crochet magic without the wand. Use this technique wherever you need to expand your project, whether it’s shaping an amigurumi or giving your scarf a dramatic flair. Keep practicing and soon it will be as natural as breathing… or binge-watching your favorite show while crocheting.
Where to Make Single Crochet Increases
Placement of single crochet increases can make all the difference between a crochet masterpiece and a yarn abomination. Strategic increases can shape hats, create lovely amigurumi, and even keep your blanket from looking like a wonky pizza slice.
- Edge Control: Near the edges of your project, increases can add width. Think of them as a personal trainer for your afghan, building fabric muscle.
- Shaping: When you’re crafting plushies, increases help form curves and bulges in all the right places. It’s like sculpting, but without the mess.
- Pattern Specific: Sometimes patterns ask you to increase in specific spots. Trust the pattern. It’s like getting crochet advice from a wise, yarn-loving sage.
- Even Distribution: For certain projects, especially when working in the round, evenly spaced increases prevent your work from turning into a bowl-shaped hat disaster.
So, whether you’re making hats, dishcloths, or an ambitious yarn sculpture, where you place those nifty increases will paint the final picture. Use them wisely, fellow yarn artist.
Invisible Single Crochet Increase
The magic behind the invisible single crochet increase lies in its stealth mode. You get a neat, clean look without those telltale bumps. It’s like a ninja—silent, but effective.
Here’s the secret recipe:
- Work your first single crochet as usual.
- Then, instead of diving back into the same stitch, you go into the front loop of the next stitch.
- Create your second single crochet there.
This wizardry minimizes bulk and blends in seamlessly. Think of it like hiding vegetables in your kid’s pasta sauce. It works, and no one’s the wiser.
Remember, the goal is to make it look like nothing extraordinary happened, even though you just pulled off crochet sorcery.
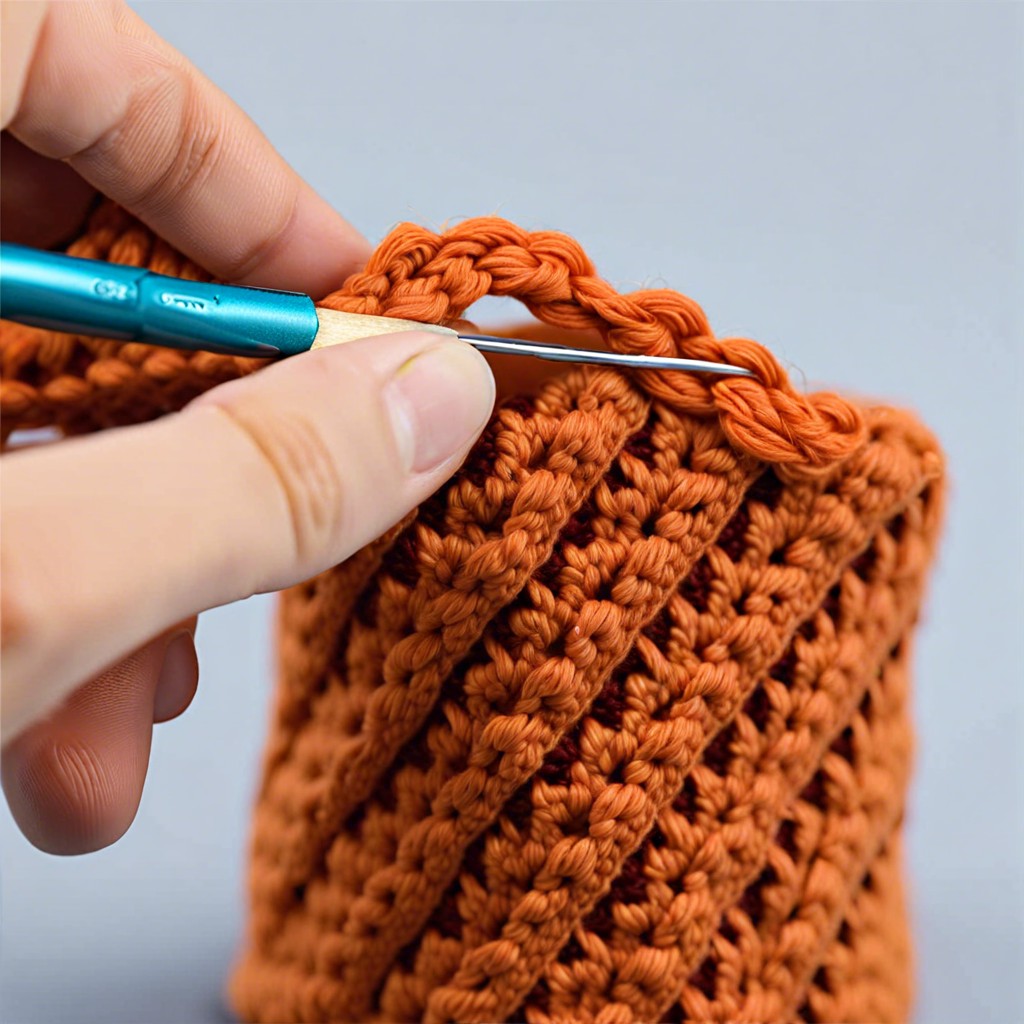
Step-by-step Photos: Regular Increase
Grab your hook and yarn, and let’s dive right in. To perform a regular increase, follow these easy steps:
Start with your existing single crochet stitch. Insert your hook into the next stitch. Yarn over, and pull up a loop.
Yarn over again, and pull through both loops on the hook. Congratulations, you’ve just made a single crochet!
But wait, there’s more! Insert the hook into the same stitch you just worked. Yarn over and pull up a loop. Yarn over and pull through both loops again.
You’ve now completed two single crochets in one stitch. Ta-da! You’ve increased!
Continue working your pattern as instructed. Repeat increases where needed to shape your project.
These photos can be your guide—just like breadcrumbs through a crochet forest.
Step-by-step Photos: Invisible Increase
- Start with a single crochet in the next stitch, as you normally would.
- Instead of completing the stitch, stop when you have two loops on your hook.
- Insert your hook back into the same stitch, as if you’re about to start a new single crochet.
- Yarn over and pull up another loop; now you have three loops on your hook. Juggling, anyone?
- Yarn over and pull through all three loops on your hook. Voilà! You’ve invisibly increased without the glaring “hey, look here!” sign.
The result is a subtle increase that blends seamlessly into your work. Perfect for when you want your stitches to look smooth as butter.
Common Questions About Increasing in Crochet
Why does my work ripple when I increase? This usually happens when there are too many increases in one spot. Try spacing them out more evenly.
How do I know when to increase? Follow the pattern, but if you’re freelancing, use increases to widen your project. Think of it like giving your work a comfy sweater instead of a straitjacket.
Can I increase in different stitches? Yes! While we’re just chatting single crochet, you can increase in any stitch. It’s like the universal language of yarn.
What if I lose count of my increases? Markers are your best friend here. Stick one in every increase and voilà, no more counting woes.
Why does my increase look messy? Make sure you’re not too loose or too tight with your tension. And hey, practice makes perfect—or at least, pretty darn good.
Single Crochet Increase Video Tutorial
Watching a video tutorial is like having a crochet buddy right there with you, except they don’t ask for tea every five minutes. Here are a few gems you’ll gain from watching a tutorial on this technique:
You’ll get a visual on where to place your hook. Spoiler: it’s not in your coffee mug.
Clear, step-by-step instructions that make even the trickiest stitches look like a piece of cake.
Motion captures! Seeing the yarn and hook in action helps demystify the process.
Pause and rewind features let you pace yourself. Think of it as the crochet version of time travel.
Find tutorials that show variations like the invisible increase – it’s like magic, but with yarn!
Save it for later. Bookmarking a good tutorial is like saving a favorite recipe, you’ll come back to it again and again.
It’s free! No need to sign up for an overpriced, “exclusive” crochet masterclass.
So, grab your hook, some yarn, and settle in for a fun and relaxing video session. Just try not to get too sidetracked by adorable cat videos in the process.
Related Posts
 Easy Crochet Gnome Pattern Free: Transform Yarn into Whimsical Friends
 Crochet Star Blanket: A Stellar DIY Guide
 How to Crochet Slippers for Beginners Step by Step with Pictures: Cozy Feet Awaits
 Adjustable Ring Crochet: Master the Magic Circle
 How to Crochet Without a Hook: Hands-On Creativity