Discover the various methods of joining yarn in crochet to seamlessly continue your projects without any visible knots or loose ends.
Joining yarn in crochet is a crucial technique that every crocheter must master. It’s a simple process that ensures your work looks neat and seamless.
In this article, we’ll explore various methods of joining yarn in crochet, such as the Russian Join, the Magic Knot, and the Invisible Join. Each method has its advantages and is suitable for different types of projects.
We’ll dive into the step-by-step process for each technique, along with tips for choosing the right method for your project. By the end of this article, you’ll have a comprehensive understanding of how to join yarn in crochet efficiently and effectively.
Key takeaways:
- Felted join: Ideal for same fiber type yarns.
- Russian join: No knots, seamless finish, suitable for all yarn types.
- Magic knot: Quick, secure, but can create noticeable bumps.
- Last yarn over method: Convenient and unobtrusive in most patterns.
- Consider type, texture, color of yarn and pattern when joining.
Selecting the Appropriate Method for Joining Yarn in Crochet
There are several key considerations to make when deciding on a suitable method to join yarn in crochet.
First, consider the type of yarn you’re using. Wool and wool blend yarns can be joined using a felted join. On the other hand, acrylic and cotton yarns are not suitable for this method.
Secondly, think about the texture and color of your yarn. If your yarn is variegated or textured, a simple Russian join can keep the colors and texture consistent across your project.
Next, consider the pattern. For example, if the pattern works in rounds or rows and at what point a new yarn should be joined. If it’s a complex pattern which requires you to join new yarn at specific points, it might be better to use a magic knot or last yarn over method.
Finally, take into account your personal preferences and skill level. If you are a beginner and feel comfortable with simple methods, a basic knot might be the best fit for you to start with.
Remember, picking the right joining method is vital to the final look and feel of your project. Testing different methods on a swatch of your project beforehand can help make an informed decision.
Choosing the Right Tools and Materials for Yarn Crochet Join
Having the following tools and materials at hand will make the process of joining yarn in your crochet work smoother and more efficient:
- Yarn: The first and foremost requirement is well-matched yarn. If you’re adding a new color or replenishing a diminishing skein, ensure the color, thickness, and texture match the original yarn closely, unless a contrast is intentionally sought.
- Crochet hooks: Choose a hook size that complements your yarn. Too large or small a hook can distort the pattern and tension of your work.
- Scissors: A pair of sharp ones will allow for clean yarn cuts, preventing fraying.
- Darning needle: This will come in handy for weaves and certain types of joins.
When selecting your tools and materials, consider the type of join you plan to use. Each join has its own set of requirements. For instance, a felted join is best with wool yarn, while a Russian join works well with most yarn types.
To maintain the cohesion and beauty of your crochet, always ensure your join is strategically placed and less noticeable. This involves careful planning before commencing your crochet.
Keeping extra materials on hand can also be useful. Practice the join on these first before proceeding with your main project. This helps to develop confidence and allows you to perfect your technique without the risk of ruining your work.
Step By Step Guide On Joining Yarn With the Magic Knot
Start with two lengths of yarn – the yarn attached to your project (old yarn) and the new yarn you are adding.
Create a loop with the new yarn over the old yarn, leaving a tail end. Hold the tail end and pull the long end through to form a knot.
Repeat the same process on the old yarn – make a loop over the new yarn end, hold the tail, pull the long end through the loop.
When you have two knots, pull both the long ends to slide the knots together forming the Magic Knot.
Trim the excess yarn close to the knot to maintain neatness in your project, ensure not to cut the working yarn.
To hide the knot, try to ensure it falls at the back of a stitch or is incorporated into the final piece.
Detailed Explanation On Using the Last Yarn Over of a Stitch to Join Yarn
Starting with a stitch that is almost complete can be a convenient way to join a new yarn. Here’s how it’s typically done:
Get close to the end of your old skein, stop when there are about six inches of yarn left. This remaining length is crucial as it ensures that you can join your new yarn securely without the stitch coming undone.
Next, initiate the final stitch with the old yarn. If, for instance, you are working on a double crochet, you would yarn over, insert the hook into the next stitch and yarn over again. If you drew through the loop now, you would have three loops remaining on your hook.
At this point, it’s time to introduce the new yarn. Drape it over your hook leaving a six-inch tail, then draw it through the two loops on the hook. Here, the last loop now becomes the new color or yarn type.
Use a crochet hook to weave in the tails of the old yarn and new yarn to maintain the integrity of your piece. Work these tails in as you go, or you can save them until you’re finished to weave in all at once. It’s important to remember to work in one direction so that the stitches look neat.
Proceed with your pattern using the new yarn. This process seamlessly weaves in a new yarn strand, keeping your work neat and secure, even as the yarn colors or types change.
This method is preferred because it is unobtrusive in most patterns, easy to perform and doesn’t require any additional tools.
Felted Join Method for Yarn Crocheting
The felted join, an ideal method for same fiber type yarns, creates a seamless, knotless union between yarn tails.
Ensure both yarns are 100% animal fibers – synthetic or plant fibers don’t felt.
Get the new yarn ready – untwist yarn ends. Apply water to each yarn end: this is necessary to activate the felting.
Then manipulate both dampened ends together – rubbing them between your hands creates friction, generating heat.
The heat, moisture, and agitation bind the fibers together in a process fairly reminiscent of felting wool for crafting purposes.
Leave the joined yarn to dry naturally. Once dry, it’s quite hard to detect the join, making it perfect for seamless projects.
Remember that this method does not work well with Acrylic yarn or non-feltable fibers, so it’s essential to check the yarn fiber content before initiating a felted join.
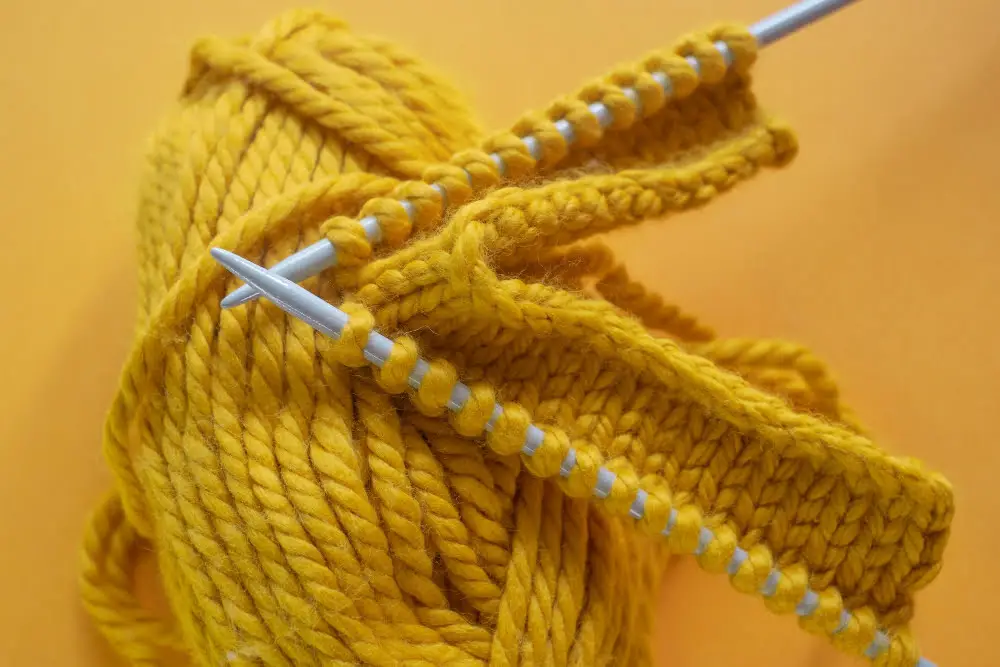
Russian Join Technique for Crochet
The Russian Join technique for Crochet is ideal for multicolored projects but works equally well with single color crochet work.
First, prepare both ends of the yarn you want to join by threading them into separate needles.
Thread each needle through its respective yarn strand, forming a loop. After pulling the needle through, you should still be able to slide the loop along the yarn.
Next, take the end of the second piece of yarn and thread it through the loop you created in the first piece then vice versa. Each piece of yarn should pass through the loop of the other.
Pull the ends of the yarn pieces to tighten the loops. Slide the loops towards each other until they’re snug. The ends of the yarn should be trapped inside the loops, providing a secure join.
Trim any excess hanging threads to create a neat finish. The beauty of the Russian Join is that it requires no knots, making your final crochet project appear seamless.
To start crocheting with the joined yarn, simply treat it like any other piece of yarn. This technique allows for a smooth transition of colors if working on a multicolored project.
Remember, patience and precision are crucial when working with the Russian Join technique. The effort invested in executing this technique will result in a polished, professional-looking final product.
Illustrating the Process of Joining Yarn Using the Russian Join
The Russian Join technique is a popular way to seamlessly connect two strands of yarn. It’s ideal for almost all yarn types, but shines particularly with cotton or wool.
Start by threading one end of the new yarn onto a yarn needle. Push the needle back through the yarn itself, creating a loop. Pull it tight, leaving a small loop on the end.
Now take the end of the yarn you were working with and thread it through the new yarn’s loop. Repeat the same process: thread the yarn back through itself, and pull it tight.
Gently pull both yarn strands, and the loops will slide together. Finish by cutting the yarn ends close to the join, ensuring you don’t accidentally snip your newly joined yarn, and the join is ready to be worked in your next stitch.
By using the Russian Join technique, you avoid the need for knots, giving your crochet project a seamless, professional finish.
FAQ
How do you join two pieces of yarn in crochet?
To join two pieces of yarn in crochet, lay the new yarn over the row or round you’re working on, work over it for a few stitches, then pick up the new yarn and continue working over the old yarn for a few stitches, and either work in the tail ends as you go or sew them in afterwards.
What are the most secure methods for joining a new ball of yarn in crochet?
The most secure methods for joining a new ball of yarn in crochet include the Russian Join, the Magic Knot, and the Frilled Standard Join, all of which minimize knots and ensure a seamless integration of the new yarn.
Can you change yarn colors seamlessly in the middle of crocheting, and how?
Yes, you can seamlessly change yarn colors in the middle of crocheting by introducing the new color in the last yarn over of the stitch before the color change, then continuing with the new yarn color.
What are the pros and cons of popular yarn joining techniques in crochet?
Popular yarn joining techniques in crochet have different pros and cons; the Russian join is exceptionally durable and discrete but can be tricky for beginners, knotless join allows for an invisible and seamless finish but might unravel if not done properly, and the magic knot is quick, secure but can create noticeable bumps in the finished product.
Related Posts
 Easy Crochet Gnome Pattern Free: Transform Yarn into Whimsical Friends
 Crochet Star Blanket: A Stellar DIY Guide
 How to Crochet Slippers for Beginners Step by Step with Pictures: Cozy Feet Awaits
 Adjustable Ring Crochet: Master the Magic Circle
 How to Crochet Without a Hook: Hands-On Creativity