Learn how to create fluffy yarn pom poms with simple steps and easy-to-find materials.
Creating yarn pom poms is a fun and easy craft that can be used for a variety of projects. Whether you want to adorn a knitted hat, create a festive garland, or add a whimsical touch to a gift, pom poms bring a pop of color and texture.
This article will guide you through the process of making yarn pom poms, from choosing the right materials to the actual crafting process. It provides comprehensive, step-by-step instructions, ensuring that you will be able to create beautiful and fluffy pom poms, regardless of your crafting experience level.
Let’s dive into the world of yarn pom poms and explore this fascinating craft together.
Key takeaways:
- Choose the right materials for making yarn pom poms
- Use additional tools like rulers or pom pom makers
- Experiment with different shapes and sizes of pom poms
- Consider texture, thickness, color, and fiber when choosing yarn
- Secure the yarn with a tight knot and trim for a
List of Materials Needed for Yarn Pom Poms
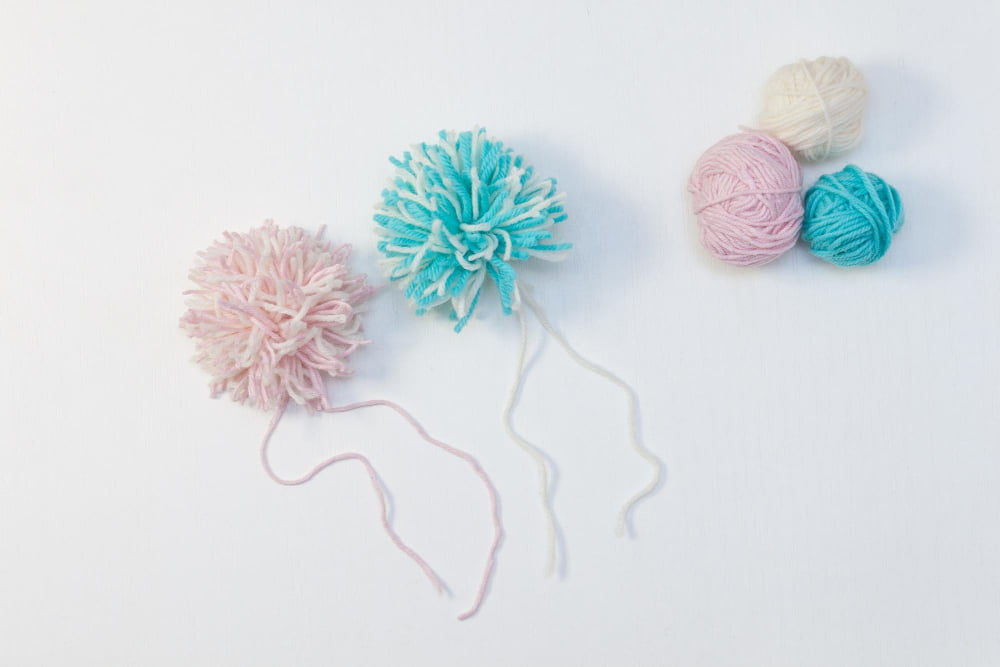
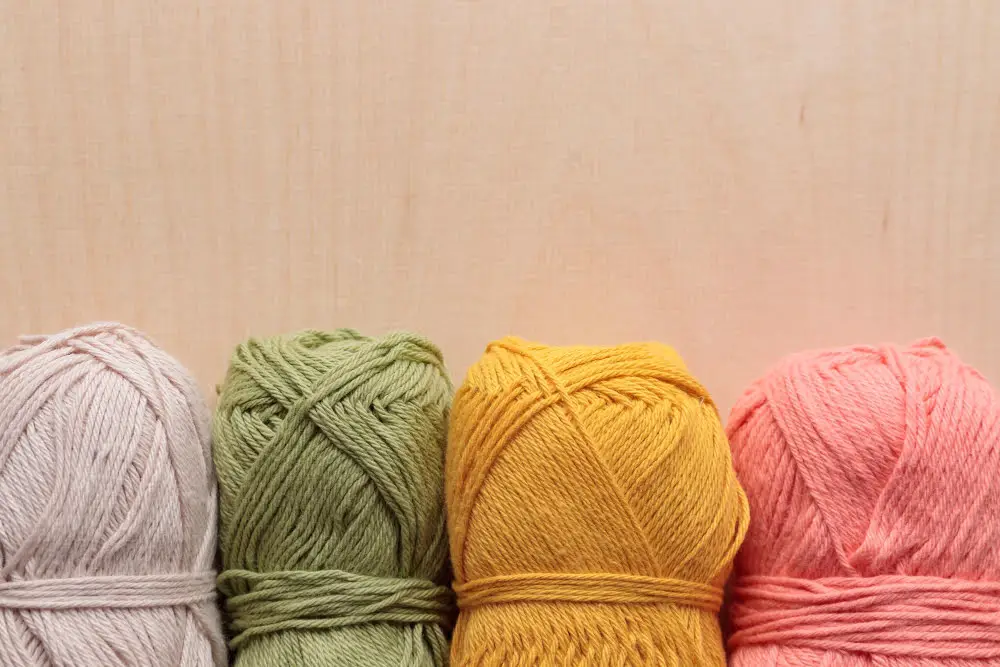
There are a few key items necessary when creating yarn pom poms, all relatively easy to find. Your main ingredient, of course, will be yarn. This can be any brand or color, the choice is truly yours dependent on the project you’ll be adding the pom pom to. Certain types of yarn, like worsted or bulky weight, will create fuller pom poms.
The next requirement is cardboard or a pom pom maker. Cardboard is the more cost-effective choice, but a pom pom maker can speed up the process.
Sharp scissors play a crucial role, not only in cutting the yarn but also in shaping your pom pom later in the process.
You’ll also need a ruler or tape measure. This will be used to measure the size of the cardboard circle for the pom pom, along with determining the length of yarn wrap.
Finally, a piece of thin wire or sturdy string will be needed. While your yarn will form the bulk of the pom pom, you’ll need this to secure the yarn in place, creating the classic pom pom shape.
Each of these items will be used during differing stages of the pom pom crafting process. They go hand in hand, ensuring the creation of beautiful, fluffy, yarn pom poms.
Additional Tools Needed for Making Pom Poms
Beyond yarn and scissors, crafting pom poms requires a small set of additional tools:
- Cardboard or Pom Pom Makers: These come in various sizes to facilitate crafting pom poms in different dimensions. While cardboard is easily accessible, pom pom makers are especially shaped for the task and can expedite the process.
- Ruler or Measuring Tape: To ensure consistency in size, especially when making multiple pom poms.
- Sharp, Pointed Scissors: They are essential for a neat pom pom. Dull or blunt scissors may result in uneven and jagged edges.
- Sewing Needle and Thread: If the pom poms are to be attached to another item, such as a hat or scarf, a sewing needle and thread in a matching or contrasting color may be needed.
- Small Hair Comb or Fork: These can be used to fluff up the pom pom and give it a more voluminous look.
Shapes and Sizes of Pom Poms
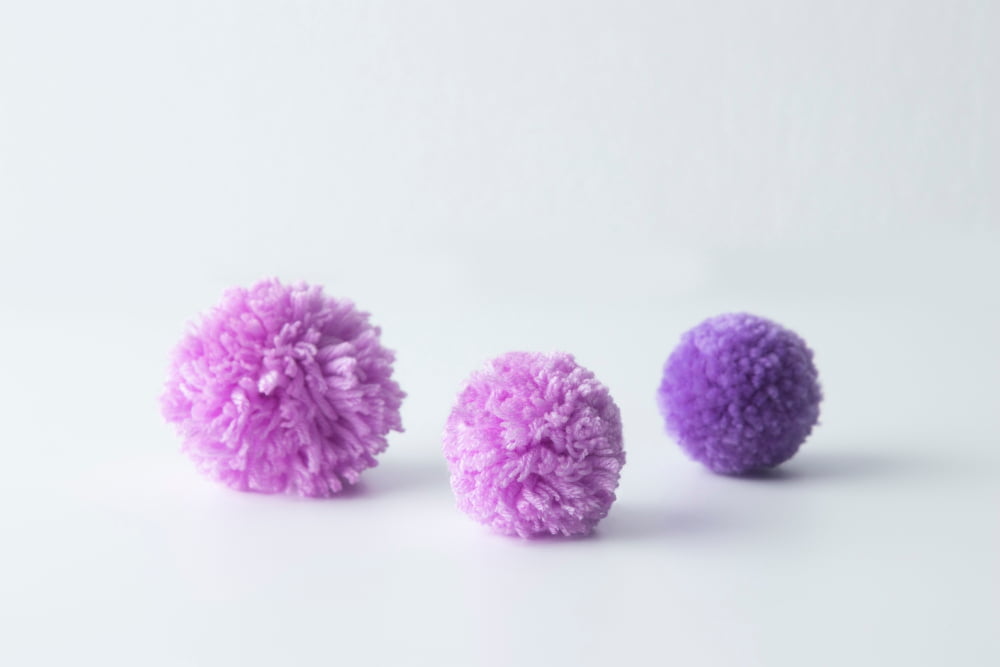
In making pom poms, the flexibility to explore various shapes and sizes is immense. Traditionally, pom poms are round, mimicking a perfect sphere. However, they can be innovatively shaped into ovals, squares, or even heart shapes—with a little extra care—by adjusting the way you trim the yarn.
Smaller pom poms are quite delicate and charming, perfect for attaching to hats or scarves as decorative accents. For these, you need a shorter length of yarn, tighter wraps, and smaller cardboard dimensions.
Medium-sized pom poms are versatile and can be used as keychains or hair accessories, requiring a moderate amount of yarn and medium-sized cardboard.
Large pom poms, with their lush and voluminous look, are perfect as an eye-catcher on a handbag or a festive garland. Here, more yarn and larger cardboard pieces are necessary to create a rich, full-bodied appeal.
Moreover, it’s important to remember that denser pom poms not only require more yarn but also more time to form and trim. The denser the pom pom, the more it retains its shape, making it ideal for durable decorations.
Experimenting with shapes and sizes of pom poms, albeit a tedious process, can result in a marvelous display of craftsmanship that is uniquely your own, offering numerous creative possibilities in your knitting and crocheting projects.
How to Choose the Right Yarn
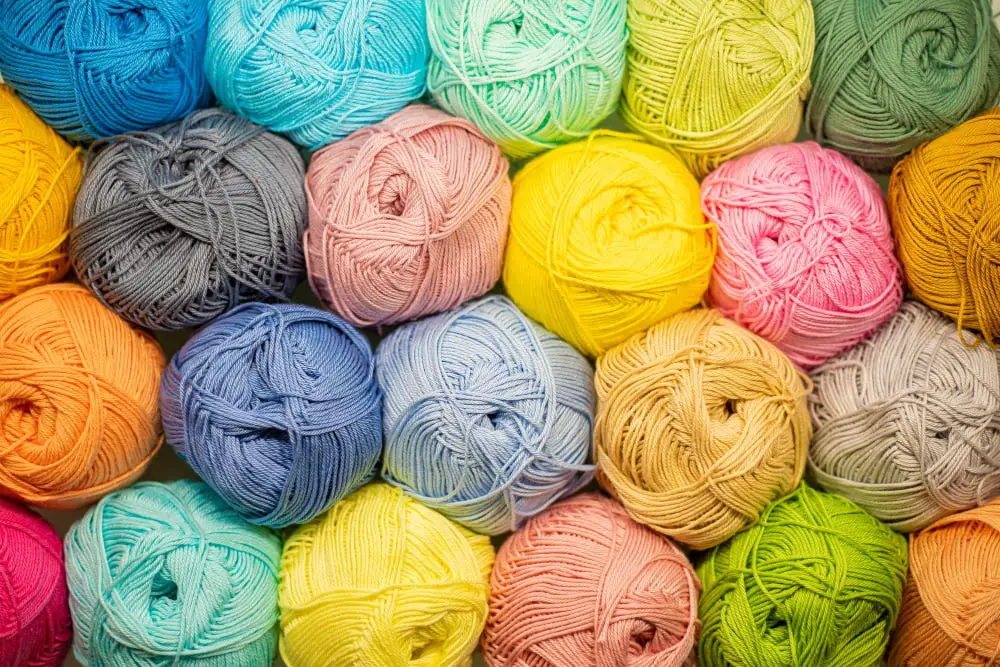
The type of yarn you select will heavily influence the look and feel of your pom poms. When choosing, pay attention to the following considerations:
Texture: Different types of yarns have varied textures, softness, and fluffiness. For instance, acrylic yarn often results in hardy and vibrant pom poms, while woolen yarn brings out a fluffy, softer feel.
Thickness: The diameter of the yarn strand, or its ‘weight’, also matters. Worsted or medium weight yarn is a versatile choice suitable for most projects. For bulkier pom poms, you can opt for chunky or bulky yarn.
Color: Yarn comes in a myriad of colors, from solid to variegated and self-striping. The choice depends on your desired appearance for the pom poms. Solid colors lend to uniformity while variegated yarns can lend a unique appeal with an array of colors.
Fiber: Yarn is made from a variety of materials, including wool, cotton, silk, and synthetic fibers. Each material gives your pom pom unique features. Acrylic yarn, being synthetic, is easy to manage and knot, while woolen yarn gives a high-end, luxurious feel.
Availability: Make sure to choose a yarn that is readily available in case you run out in the middle of a project. This applies especially when you need to make multiple pom poms of similar appearance.
Remember, the perfect yarn for pom poms should not only suit your design aesthetic but also the purpose of the craft project at hand. Keep in mind factors like the project’s intended use, decorative elements, or durability needs. This is how to ensure your hard work pays off in an adorable and fitting final product.
Starting the Pom Poms
Creating pom poms begins with a yarn selection that fits the desired pom pom size and color. Opt for a synthetic, wool, or cotton yarn, considering texture, weight, and hue. Consider the project where the pom poms will be used, as certain yarn types may better suit certain applications, like decorating a knit hat or adorning a throw pillow.
The first tangible step involves cutting two identical doughnut-shaped templates out of cardboard. The template size directly relates to the finale pom pom size, so choose accordingly. By placing both templates together and securing with a paper clip or clamp, you’re creating a guide for your yarn.
Next, start threading the yarn through the hole of the template, wrapping it around continuously. The more yarn wrapped, the fuller the pom pom will turn out. Ensure to cover the entire template evenly with yarn. Once satisfied with the thickness of wrapped yarn, cut the end of yarn from the ball. This marks the end of the initial process for creating pom poms.
As you progress in the craft, you may want to experiment with wrapping technique variations. This could result in more layered, multi-color pom poms, or different shapes. Remember to always have fun during the creation process.
Wrapping Yarn Around Cardboard
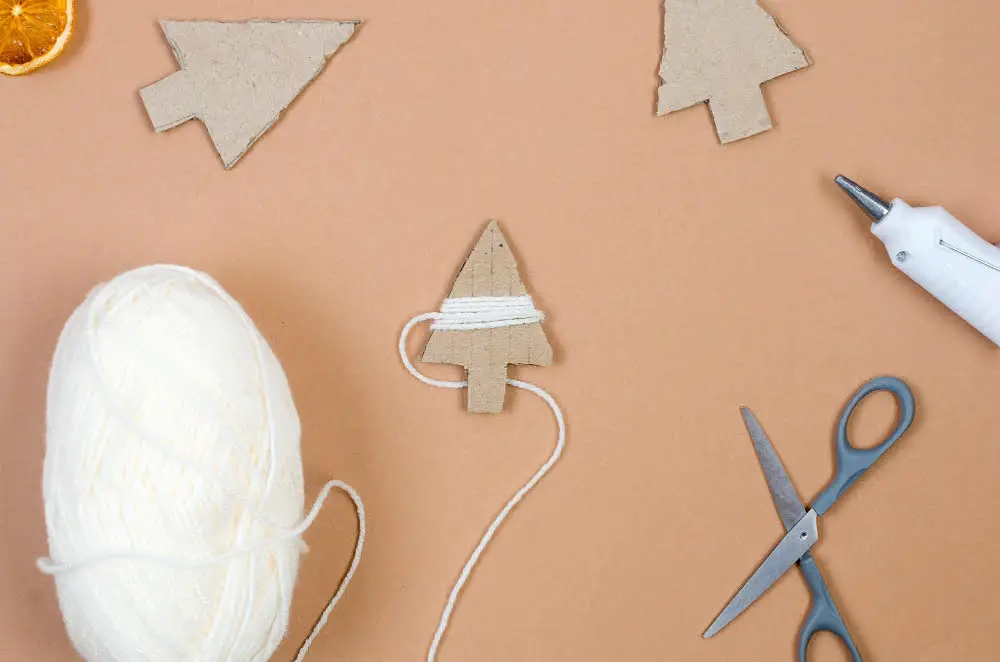
To construct the base of your pom pom, you’ll need a pair of cardboard circles. Begin by deciding the desired size of your pom pom, as this will determine the diameter of your circles. After cutting out two identical circles, you’ll need to cut a smaller circle in the center of each, forming two doughnut shapes. These will serve as your yarn wrapping guides.
Slide the two cardboard doughnuts onto the end of your yarn strand. Holding them together, start winding the yarn around the cardboard. This process may take time as the goal is to cover the entire cardboard surface, ensuring no cardboard is visible.
As you wrap, work in sections around your guide instead of wrapping in the same area repeatedly. Changing your direction occasionally can also help maintain an even distribution of yarn. This technique will help you achieve the thick, lush appearance often associated with quality pom poms.
Remember, the more wraps you add, the fuller your pom pom will be, so don’t hesitate to wrap until the opening in the middle of your cardboard guide is nearly full. You want your pom pom to be dense, so be generous with your yarn.
Cutting your yarn after winding doesn’t mean you’re done with this step. Be sure to leave a long tail at the end of your wrapping process, you’ll need this for tying off your pom pom in the next steps.
Note that the yarn used for wrapping doesn’t need to be the same you’re planning to use for your finished pom pom. If you’re trying to save your high-quality yarn, consider wrapping with a more affordable option or something from your scrap pile. This can be a cost-effective way to bulk up your pom pom without sacrificing quality.
Cutting the Yarn
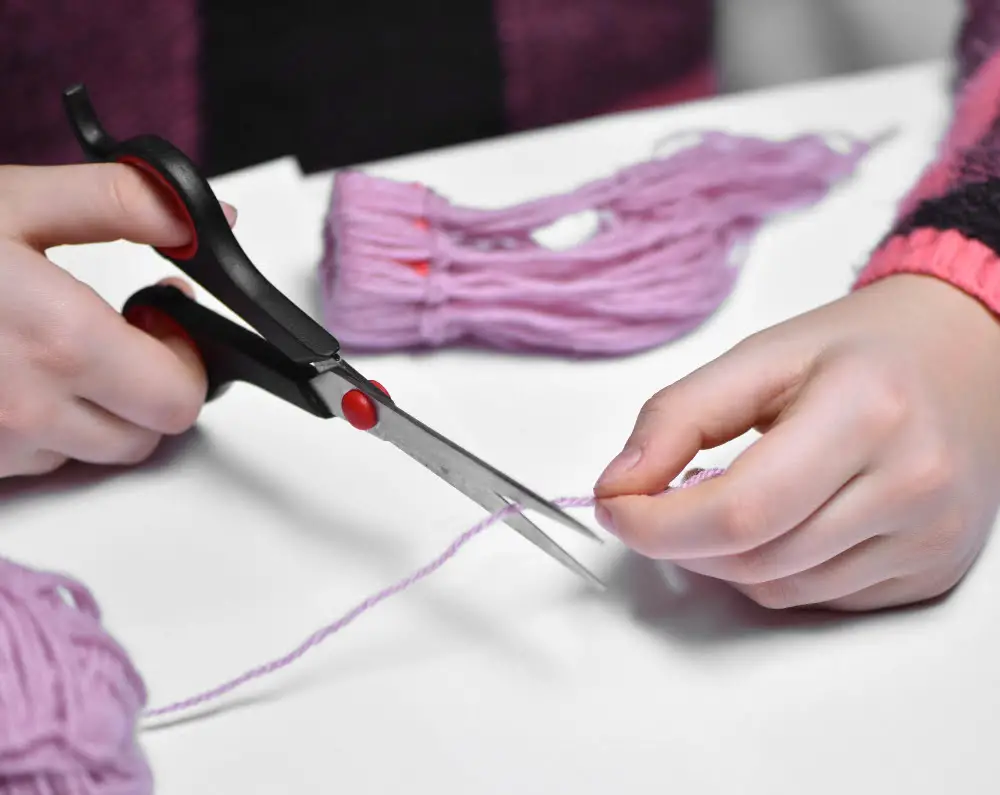
Once you’ve amassed a thick bundle of wrapped yarn around your cardboard piece, it’s time to take a sharp pair of scissors and carefully start slicing through the yarn. Here are the steps to follow.
- Get a firm grasp of your bundle of yarn to ensure it doesn’t slip away.
- While holding tightly, insert your scissor into your wrap and begin cutting. It’s advisable to cut in sections to make it more manageable. While cut half-way, you can adjust your grip to hold onto the already cut strands.
- Cut straight across along the edge of the cardboard to ensure an even cut.
- Proceed with caution when using scissors and maintain mindfulness of your fingers while managing the scissors and the yarn.
- Focus on keeping your yarn bundle in place to avoid any strands falling out of place, alongside the equally important task of cutting the yarn evenly. Uneven strands can create a shabby looking pom pom which might take extensive trimming to get a good shape.
- Ensure all loops are cut through entirely, any uncut loops can cause the pom pom to fall apart.
Remember, practice makes perfect. The more you practice, the better your technique will get, and soon you’d be honing your skill of cutting the yarn in a way that requires minimum subsequent trimming.
Securing the Yarn With a Knot
Once you have the right amount of yarn wrapped around your chosen tool, it’s time to secure it to prevent unravelling:
- Cut off a long piece of yarn from your skein. This will serve as your knotting strand.
- Gently slip off the wrapped yarn from your tool, being careful to maintain the shape.
- Lay the extra piece of yarn flat, then place the looped yarn that you slipped off your tool on top of it.
- Bring the ends of your knotting strand together and pass them through the looped yarn.
- Tie a secure knot. The diagram below shows how to tie a simple knot securely. You want to pull it as tight as possible without breaking the yarn.
- Flip the pom pom on its side, then tie another knot on the opposite side for added security.
- It’s important to double-check these knots. They hold your entire pom pom together, so they need to be super secure. If there’s any doubt about the knot, add a third one.
Next up, we’ll look at shaping the pom pom to achieve that perfect fluffy sphere.
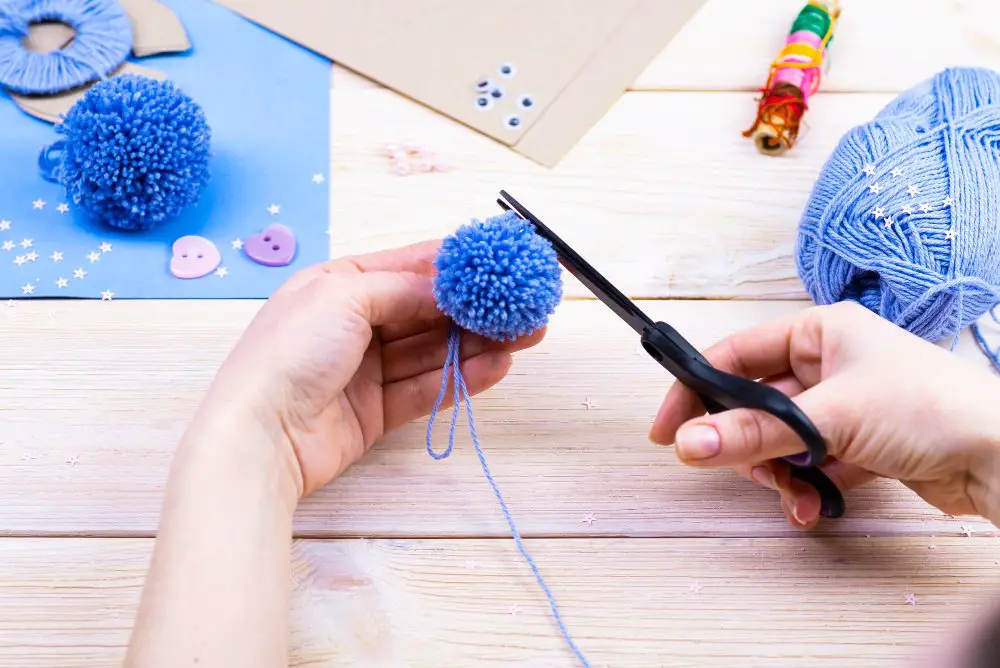
Trimming the Pom Pom Into Round Shape
After securing your yarn with a knot, your next step is to create a round shape. The pom pom currently looks rough and disheveled with uneven yarn strands sticking out. Trimming it into a round shape gives it the classic pom pom appearance.
First, hold your pom pom on one hand, and start to trim using a sharp pair of scissors in the other hand. It is recommended to start trimming a little at a time from the sides. This process is similar to giving a hair cut. Work your way around the pom, making sure to rotate it to get an even cut on all sides.
One tip to ensure an even round shape is to compare the pom pom with a small circular object like a coin or a button as a reference. Remember, it’s always better to trim less at first—you can always cut more if necessary, but you can’t put back what’s been cut off.
Trimming with caution also reduces the chance of cutting the knot that holds the pom pom together. If by chance, the center knot is cut, the entire pom pom could unravel.
Finally, remember to clean up the cut-off yarn fragments once you’re done trimming. These pieces can be sharp and present a hazard if not disposed of correctly.
By following these steps, you’ll turn a wild bundle of yarn into a well-shaped, perfect pom pom.
How to Make Small Pom Poms
To craft small pom poms, gather your yarn and necessary tools – a small piece of cardboard or pom pom maker, sharp scissors, and a yarn needle.
Begin by cutting a strip of cardboard to the size you want your pom pom to be, recognizing that the width of your cardboard will be the diameter of your pom pom. Wrap the yarn around the cardboard multiple times until you achieve your desired density.
Gently remove the yarn bundle from the cardboard. Using a second piece of yarn, tightly tie and secure the middle of your yarn bundle. Ensure the knot is secure for a well-formed pom pom.
Following this, cut through the loops at both ends of the bundle, ensuring not to cut the string holding it together. You’ll see your pom pom taking shape.
Finally, give your pom pom a “haircut.” Trim the yarn pieces to make a uniformly round shape. While trimming, be cautious not to cut the tie at the center. For small pom poms, precision will give a neater look.
Remember to adjust the wrapping count and trimming based on the size and fullness you want. Create more small pom poms and combine them for a playful, bouncy effect in your crafts.
Common Problems and Troubleshooting Making Pom Poms

In the process of crafting perfect pom poms, you might encounter a few snags, but it’s important not to get discouraged. Here are some common issues and their possible solutions.
Common problem: if the pom pom falls apart when cutting. This usually happens if the center knot is not tied tightly enough. The solution is to always double knot the center of the pom pom and pull as much as possible to secure the yarn.
Another issue you might run into is uneven pom poms. This is a result of inadequate trimming. The best course of action is to keep trimming gradually until you achieve the desired evenness. It’s helpful to remember that it’s better to undercut than to overcut.
You might notice that the pom pom lacks fluffiness. This could be due to the insufficient amount of yarn used when wrapping. Always remember that the more wraps of yarn, the fuller the pom pom will be.
Lastly, a common issue is inconsistent sizes. This can be simply solved by using a template or a pom pom maker to ensure consistent sizes. Measure out the size you want and make sure each pom pom has the same amount of yarn and the trimming process is consistent for all pom poms.
Practicing and patience are key in troubleshooting these issues. You’re sure to master the art of making pom poms with time and persistence.
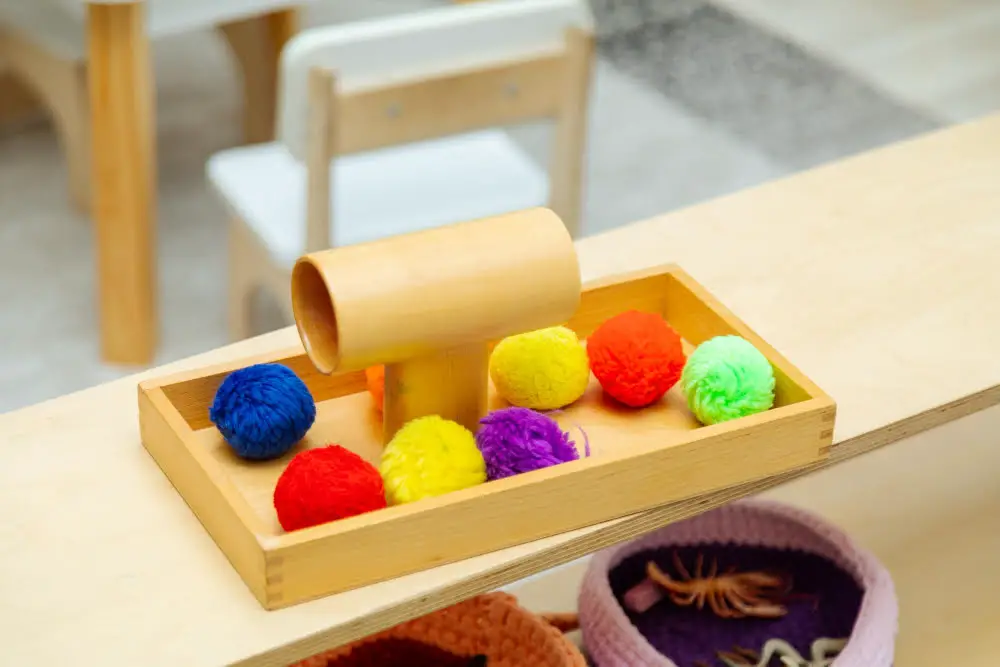
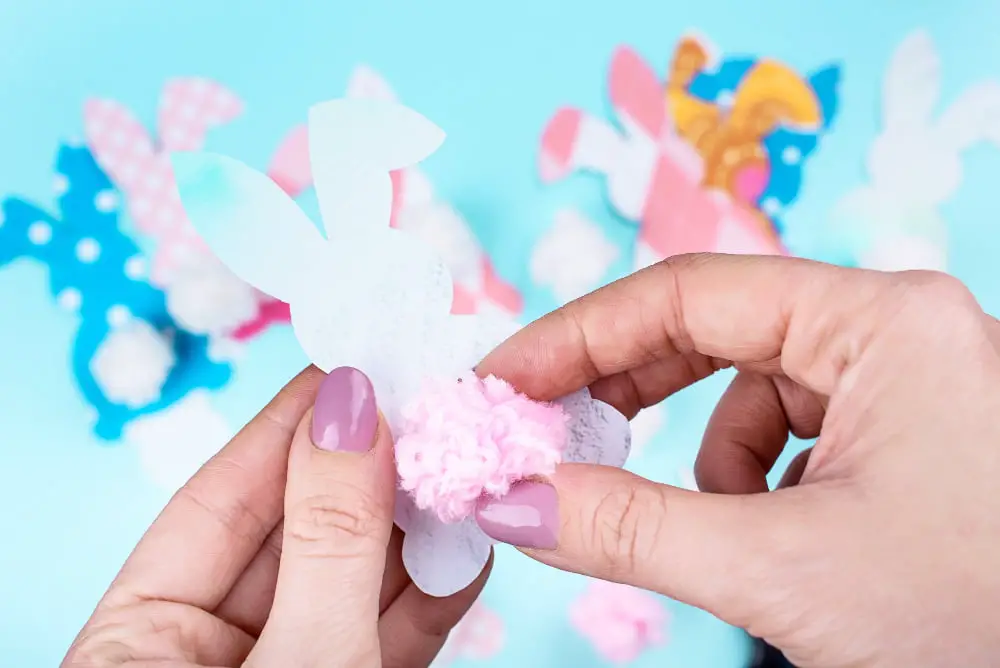
Adding Pom Poms to Crochet and Knitting Projects

Pom poms can add a whimsical touch to scarves, hats, blankets, or sweaters, transforming a simple piece into something eye-catching and unique. Here is a basic guide for incorporating these fluffy embellishments into your crafts:
Firstly, ensure the pom pom is securely fastened. While tying it off, leave a long tail of yarn that will be useful for attaching it to your project.
To affix the pom poms to a knitting project, use a yarn needle. Thread the yarn needle with the yarn tail from the pom pom, push the needle through the spot you want it on the knitting project, then tie the yarn ends on the wrong side of the work for a secure finish.
For crochet projects, you can use a hook instead of a needle. Insert the hook where you want the pom pom, hook the yarn tail, and draw it through. Create a knot, snip the excess yarn, and tug it gently to confirm its security.
In most cases, pom poms are added after the main project is completed to avoid unnecessary abuse during the construction process.
Avoid washing the project in a machine unless it’s necessary, as pom poms may become damaged. For longevity and durability, hand washing or spot cleaning is recommended.
As a bonus, pom poms can also be interchanged, as long as they are tied on using a bow. It makes it easy to switch them out and gives the project a fresh look whenever desired!
It’s worth thinking creatively about where to place them for maximum impact. Corners, edges, or intermittent placement throughout a design can create an eclectic and artistic effect. With a bit of imagination and trial and error, the sky’s the limit when it comes to pom pom placement, making it a versatile accessory to enhance any knitting or crochet piece.
Importance of Scaling and Measuring Yarn for Pom Pom Sizes
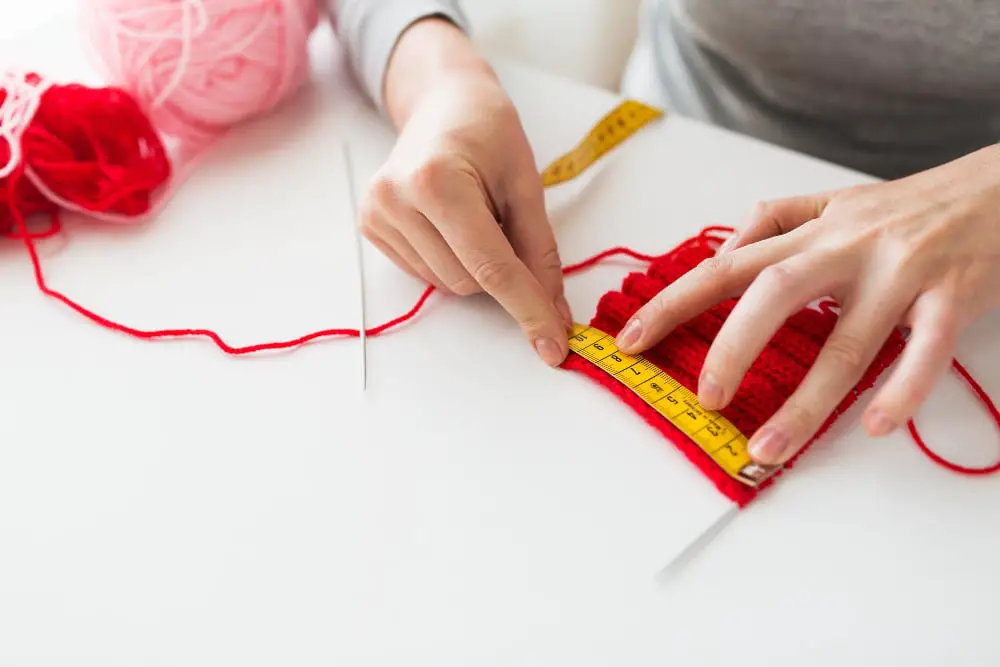
Ensuring you have the correct amount of yarn is vital as it affects the overall size and fullness of your pompom.
Firstly, the amount of yarn you use directly correlates to the size of your finished pom pom. Less yarn will result in a smaller pom pom, while more yarn will create a larger one.
The density of your pom pom is another factor influenced by the amount of yarn used. A sparse pom pom can be achieved with minimal yarn, whereas a densely packed pom pom requires much more yarn.
Moreover, measuring allows you to repeat the same size pom pom consistently. This is especially crucial when you’re making a set of pom poms for a single project and uniformity is desired.
Utilizing a digital kitchen scale can be an excellent tool for scaling your yarn. This allows for precise measurements, ensuring that you have the same amount of yarn for each pom pom.
Another strategy is counting the number of wraps you make around your cardboard template, ensuring that it’s the same for each pom pom. This allows for consistency in size even without a scale.
Creating samples and keeping records is also beneficial. This way, you can refer back to it in the future when you want to create more pom poms of the same size.
Lastly, keep in mind that the type and weight of yarn also impact the amount necessary for the desired size and fullness of your pom pom, so adjust your measurements accordingly.
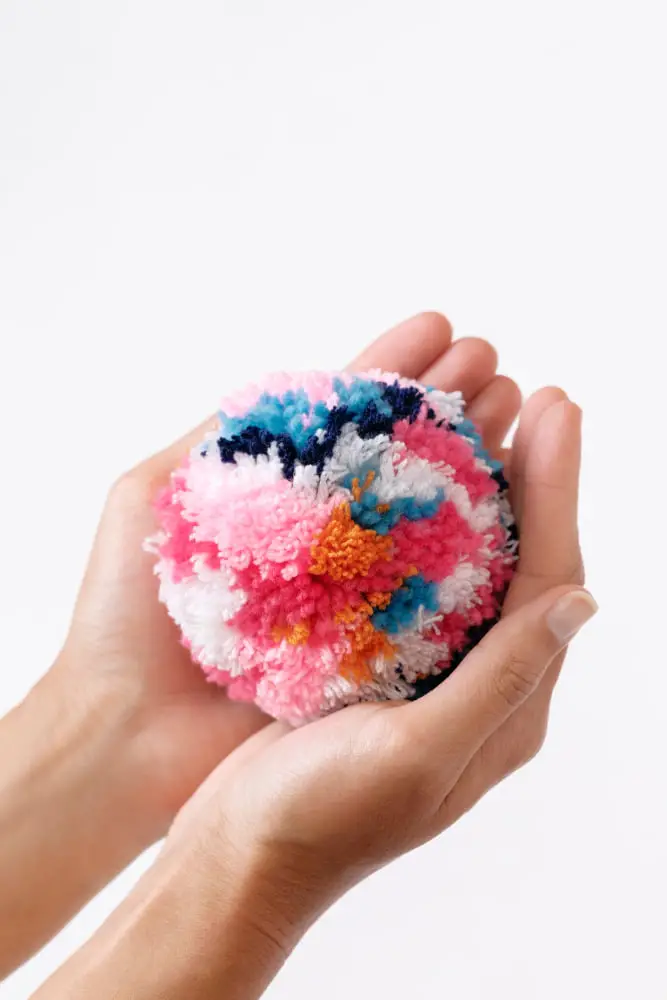
Making Multi-colored Pom Poms
To create multi-colored pom poms, some additional steps are involved in setting up the skeins of different colored yarn you’ve selected. Follow these easy steps:
- Start by deciding on your color scheme. Feel free to play with a mix of colors.
- Once you’ve chosen your colors, hold two or more colors of yarn together, treating them as one strand.
- Continue with the process of wrapping the yarn around your cardboard piece as usual, but this time, you are wrapping multiple strands of yarn together. Keep in mind that wrapping more strands together will result in a bulkier pom pom.
- The other steps in making the pom pom remain the same. You cut and secure the yarn as you would in making a single-colored pom pom.
- After you secure the pom pom with a knot, and it’s time for trimming, be careful not to cut too much off. Doing so could ruin the overall design or the color proportion you were aiming for.
- Make sure all the colors of yarn are evenly distributed across the pom pom during the trimming process.
- Repeat the process for each color or pairings of colors you want in your multi-colored pom pom.
By following these steps, you will be able to create vibrant, fun, and unique multi-colored pom poms that can add a pop of color to any project or accessory.
How to Preserve and Store Yarn Pom Poms
Making sure yarn pom poms stay lush and in shape entails proper preservation and storage methods. These meticulous but straightforward actions help maintain their vibrant colors and fullness.
First, keep pom poms dust-free by storing them in closed containers, such as plastic boxes or ziplock bags. This precaution not only saves them from dust but from moths as well, which could cause significant damage to the yarn.
Second, remember to store them in a cool, dry place away from sunlight. Excessive light and heat could potentially fade the yarn’s colors and ruin the fibers, affecting the overall texture and appearance of the pom poms.
Lastly, avoid squashing the pom poms when storing them. Give them enough space in the storage container. This helps prevent them from losing their round shape and stiffness. Add tissue paper or bubble wrap between pom poms for extra protection if needed.
If pom poms get a bit squished during storage, don’t fret. Lightly dampen your fingers and gently shake the pom pom to restore its shape. Once happy with the look, leave it to air-dry completely before storing it away again.
Remember, meticulous care and storage extend the lifespan of your yarn pom poms, keeping them vibrant and fluffy for a long time.
Safety Precautions When Making Pom Poms
Ensuring safety during the pom pom crafting process is of supreme importance. The main focus should be on safeguarding your fingers from sharp objects like scissors or blades and maintaining a clean, orderly workspace to prevent mishaps.
When using scissors, make sure to have a firm grip and take your time while cutting the yarn. Fast, hasty cuts can lead to slippage and possible accidents. Opt for scissors with a rubber or plastic handle to ensure a firm, slip-free grip.
Do remember to always cap your sharp tools when not in use, and keep them out of reach from children.
A neat and organized work area can greatly reduce the risk of tripping over materials or knocking over sharp tools. Clear away any unnecessary items and keep your essential tools within comfortable reach.
Exercise caution while using hot glue or any adhesives which might cause skin irritation or burns if mishandled. It’s prudent to wear a pair of crafting gloves to protect your skin.
Making pom poms involves handling small pieces of yarn that might scatter around and become choking hazards. Always clean up after crafting, and keep your workspace free from tiny, spread out yarn pieces.
Last but not least, remember to take regular breaks to rest your hands and eyes. Exhaustion and eye strain can lead to decreased focus and may increase the chances of an accident. So, pause often, refresh yourself, and continue crafting!
Troubleshooting Common Pom Pom Crafting Issues
Sometimes, despite following all the proper steps, you might encounter issues while crafting pom poms. In such situations, it’s good to have some common solutions at hand.
If your pom pom lacks fluffiness, it could be due to not wrapping enough yarn around the cardboard. Wrap more for a fuller pom pom.
Pom poms looking uneven after cutting? Spend the extra time to give them a proper trim. Keep rotating and snipping until you’re satisfied with the shape.
Suppose your pom pom is falling apart, most likely the center knot wasn’t tied tightly enough. For a stronger hold, double or even triple knot it next time.
Loose strands? This typically happens when the knot at the center isn’t secured. Ensure the knot is extremely tight, and trim any long pieces for uniformity.
Crafting smaller pom poms can be challenging because they require finer dexterity. You could use a fork instead of your fingers to wrap the yarn, creating a narrower space to work with.
Multi-colored pom poms not turning out as expected? Keep in mind that the first color you wrap will be at the center or the pom pom, and the last color will be at the outer edges.
Finally, to avoid pom poms losing their shape, consider using a higher quality, thicker yarn that can hold up to trimming and regular handling.
FAQ
What are the key steps to creating a multi-colored yarn pom pom?
To create a multi-colored yarn pom pom, thread different yarn colors evenly onto a pom-pom maker, layering colors as desired, before cutting and securing them into a pom-pom shape.
How can one like-size multiple yarn pom poms for consistent aesthetic in crafting projects?
To ensure consistent size across multiple yarn pom poms, trim them using a pair of sharp scissors and a template for uniform measurement.
What are some creative ways to use yarn pom poms in knitting or crocheting projects?
Yarn pom poms can be used in knitting or crocheting projects to add decorative elements to hats, scarves, blankets, and even as stand-alone keychains or accessories.


