Uncover the ease and efficiency of using a yarn swift because it has the potential to transform your yarn projects into seamless works of art.
A yarn swift is a handy tool for any knitter or crocheter, designed to hold a hank of yarn and rotate as you wind it into a ball or skein. It’s a simple device that can significantly streamline your crafting process.
This article will guide you on how to use a yarn swift effectively, from setting it up to winding your yarn. You’ll learn about the different types of yarn swifts, their parts, and how to use them in conjunction with a ball winder for the best results.
Stick around for a comprehensive breakdown of this essential tool.
Key takeaways:
- Understanding the different types of yarn swifts available.
- Considerations when choosing the right yarn swift for your needs.
- Alternatives to using a yarn swift for winding yarn.
- The purpose and benefits of using a yarn winder and swift.
- Tips for using a yarn winder and swift effectively.
Understanding a Yarn Swift
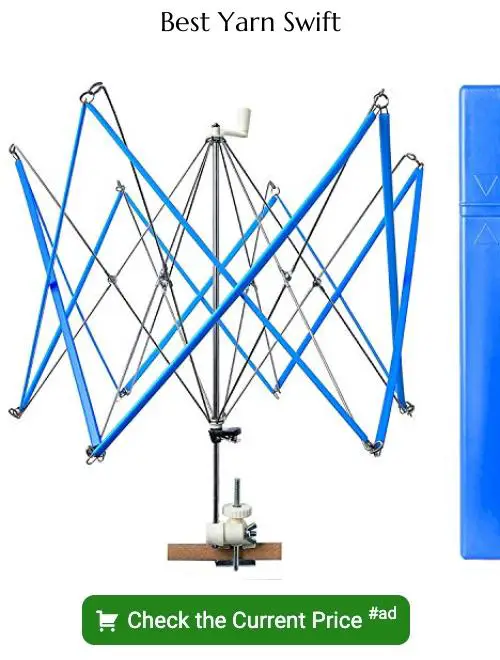
A yarn swift is an essential tool in the yarn craft industry, employed primarily for holding a hank or skein of yarn while it’s being wound into balls. This device comes in diverse patterns including umbrella-style, tabletop, and combination swifts.
These designs cater to different user preferences and workspace layouts. For example, an umbrella-style swift is adjustable and suitable for various yarn sizes, while a countertop model suits those with limited space. A combination swift provides flexibility, accommodating numerous hank sizes. Understanding these distinguishing features is crucial when choosing the right tool based on personal requirements.
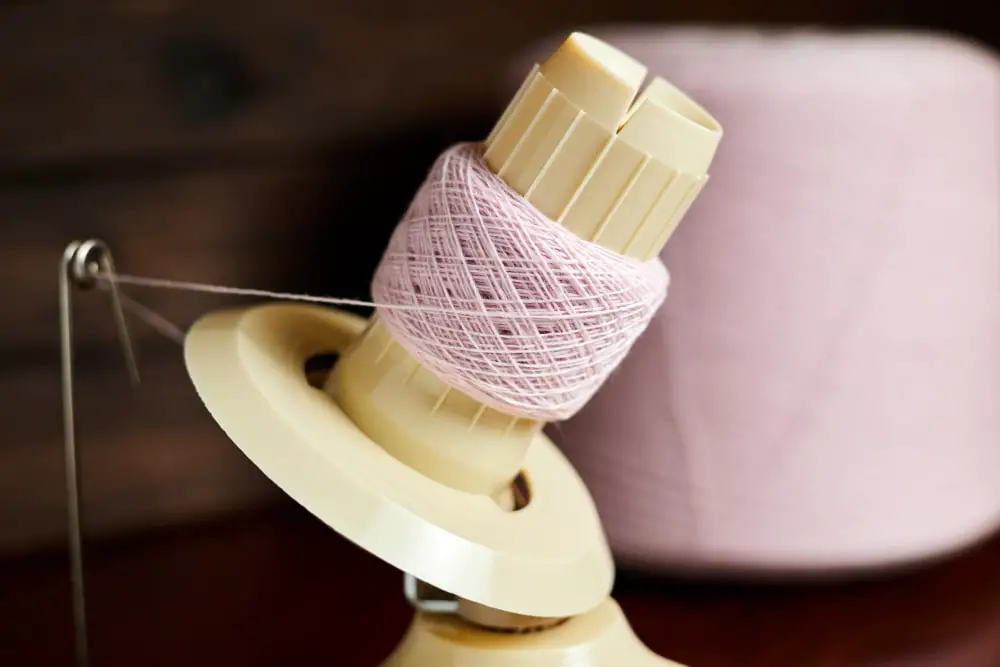
The swift’s operation is quite straightforward. It expands to hold the open loop of yarn and spins as you wind the yarn onto a ball winder or into a ball by hand. A swift prevents the yarn from tangling, making the winding process faster and easier.
Remember, while swifts can be used alone, pairing them with a yarn winder will streamline the yarn preparation process, saving you time and preventing unnecessary yarn strain or damage. This pair is particularly beneficial when dealing with larger hanks of yarn.
Choosing the Right Yarn Swift for Your Needs
When selecting a yarn swift, you might be faced with several options. However, your ultimate choice draws heavily on the nature of your projects and your working environment. Here are key aspects worth considering:
1. Size Capacity: A yarn swift’s size capacity indicates the skein circumference it can accommodate. Larger swifts work well with diverse yarn sizes, making them more versatile for various projects.
2. Material Considerations: Common yarn swift materials are wood and plastic. Wooden swifts often boast a long lifespan and aesthetic appeal. Plastic swifts, on the other hand, are lighter and more portable.
3. Design Style: Umbrella swifts are popular for their adjustability and foldability. Meanwhile, Amish or tabletop swifts, which lie flat, are lauded for their sturdiness and efficiency.
4. Ease of Assembly: A user-friendly yarn swift can be set up and disassembled quickly, enhancing your crafting experience.
5. Versatility: If you plan to wind different types of threads, look for versatile swifts that can accommodate varying yarn thicknesses and textures.
Yarn Swift Versus Alternatives: What Else Can You Use?
While a yarn swift is a popular tool, it’s not the only method to wind hanks of yarn into usable balls. Several alternatives can also do the job, albeit with some variations in ease and efficiency.
1. Hand-winding: This is perhaps the most basic method. It requires no special tools; just your hands and a bit of patience. However, it can be time-consuming and may lack uniformity of the final skein.
2. Chair method: Using the back of a chair to hold the hank while you wind the yarn is another simple alternative. Beware, however, as it may cause tension irregularities in the yarn.
3. Partner assist: A willing partner can hold the hank open with their hands while you wind, making this a fun, collective task. Here, remember to keep a consistent tension to avoid knots and tangles.
4. DIY yarn swift: Craft enthusiasts can create homemade versions of yarn swift using PVC pipes or wood. While this may be economical, it does require some crafting skills and tools.
Each of these options has its pros and cons. The choice depends largely on your personal preferences, budget, and how often you intend to use it.
The Purpose of Yarn Winders and Swifts
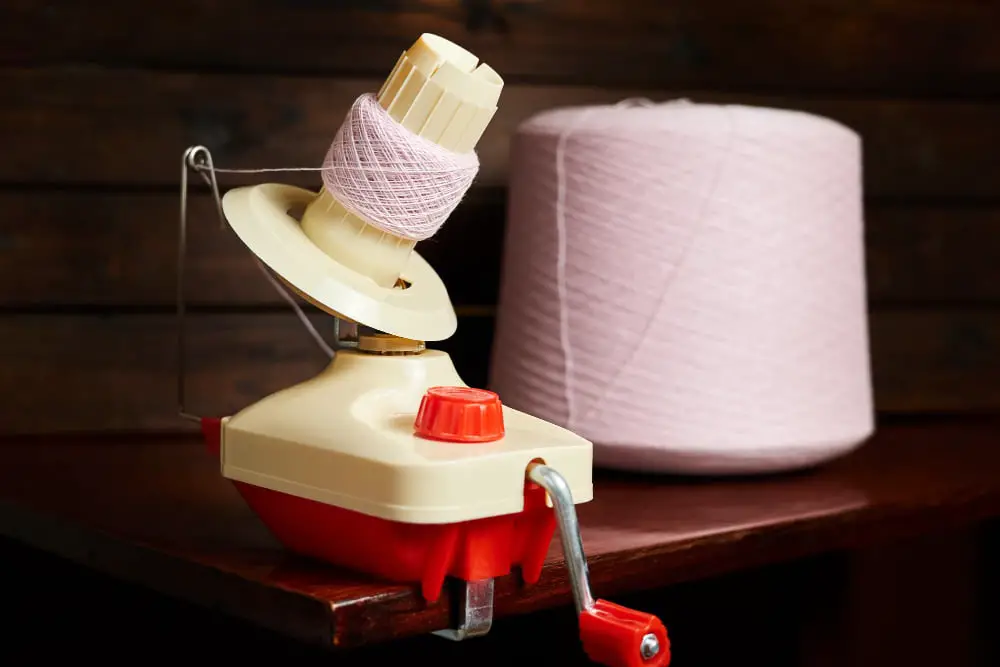
Yarn winders and swifts are knitting companions that seem notably complex but simplify the tedious task of hand-winding yarn balls. Their main role is to convert skeins or hanks into compact, user-friendly yarn cakes. These cakes not only store conveniently, but also feed the yarn smoothly as you knit or crochet, offering a thoughtless flow and preventing knots and tangles.
This optimal arrangement saves time and reduces the chance of yarn breakage. Notably, these devices help preserve the yarn’s tension integrity, avoiding too loose or too tight wraps. Furthermore, they are adaptable tools that can handle various yarn types and lengths, providing peace of mind for aspiring yarn crafters.
Importance of a Yarn Winder and Swift in Knitting and Crocheting

A yarn winder and swift form an essential dynamic duo in knitting and crocheting, and here’s why:
1. Efficiency: These tools expedite the yarn preparation process, converting hanks or skeins into neat, manageable balls. This saves substantial time and effort, allowing you to dedicate more to your actual crafting.
2. Prevents Tangling: The last thing any knitter or crocheter wants is to spend their time untangling yarn. A winder and swift keep your yarn structured and orderly, warding off pesky knots and snarls.
3. Enhances Storage: Wound yarn can be effortlessly stored and stacked. It will not unravel or lose its shape, making it a convenient storage solution.
4. Prolongs Yarn Life: Using a winder and swift reduces the risk of your yarn catching on something or wearing out due to heavy handling. It thus lengthens the lifespan of your yarn, safeguarding your precious crafting resource.
5. User-Friendly: Despite appearing complex, winders and swifts are surprisingly easy to navigate. With a bit of practice, they can become valuable assets in your knitting and crocheting toolkit.
Sourcing a Quality Yarn Winder and Swift

When sourcing a quality yarn winder and swift, keep in mind that durability is paramount. Swifts crafted from sturdy materials, like wood or metal, often provide greater longevity and smoother operation. The strength of the swift’s umbrella or table clamp, as well, can greatly affect its performance and lifespan.
The size of your swift must match the sizes of the hanks of yarn you commonly use. A swift with an adjustable diameter is a versatile option.
Additionally, consider the type of yarn winder that accompanies the swift. A quality winder will have a smooth operation and be able to hold the amount of yarn specific to your projects. Winders are typically manual, but automatic variants are available for those seeking greater convenience.
Lastly, product reviews can be an invaluable resource. Fellow yarn craft enthusiasts can provide insights on the efficiency and durability of products and may point out potential pros and cons not listed in regular descriptions.
Step-by-step Guide: Using a Yarn Winder and Swift
To start, secure the winder and swift to a sturdy surface to ensure stability. Both tools often come with clamps specifically for this purpose.
Next, place the loop of yarn over the rounded arms of the swift. Ensure the yarn is spread across the entire circumference of the swift for proper unwinding.
Before you begin winding, locate the end of the yarn from within the hank. This piece will be threaded onto the winder. Many yarn winders have a small metal guide where the thread should be inserted.
Now, slowly start turning the handle on the winder. As you do this, the swift will start to spin in sync, feeding yarn to the winder. Remember, the speed at which the yarn winds depends on this handle. Faster turning results in quicker winding.
Refine your tension as you progress. Too much can cause yarn to snap, while too little can lead to unsightly lumps in the yarn cake. Adjust your winding speed accordingly.
Finally, once your yarn is fully wound, it should be easy to remove from the winder. You’ll end up with a neat, compact “cake” of yarn, ready for your next project.
Attaching Your Yarn Winder and Swift to a Suitable Surface
Begin by identifying a sturdy, flat surface, such as a table or desk, that can comfortably accommodate your swift and winder. This surface should be spacious enough to allow the swift to rotate freely without any obstructions.
Next, ascertain that both the swift and winder come with clamps or a similar attachment mechanism. These are used to secure the tools in place during the winding process. Position the swift near one edge of the table with enough room for it to spin unimpeded and securely fasten it. For the best results, aim to mount the yarn winder slightly lower than the swift and towards the middle of the table to facilitate smooth yarn transfer.
Keep in mind that every model of swift and winder may have their unique clamping requirements. Therefore, refer to the manufacturer’s instructions provided, ensure both tools are firmly connected to the surface, and adjust the positioning as per your comfort.
Remember, alignment and positioning are key elements that drive the efficiency of the winding process. Therefore, take time to adjust until you have a setup that works seamlessly. Transfer the test yarn between the swift and winder to verify if they are working harmoniously before embarking on your actual project.
Untangling and Preparing Your Hank of Yarn
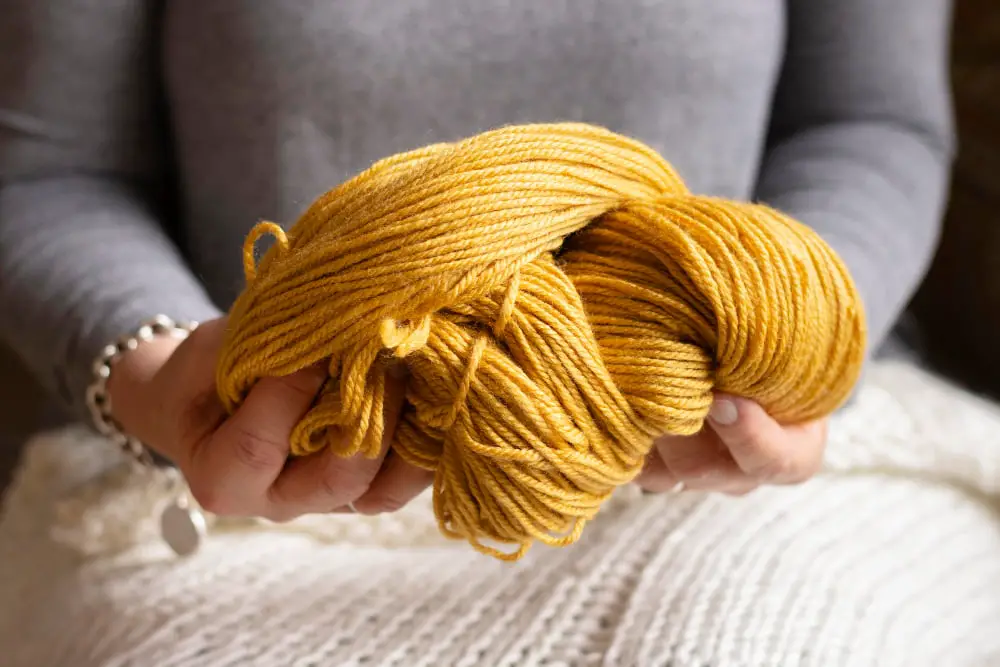
Before you can attach your yarn loop to the swift, it’s necessary to untangle and prepare your hank of yarn. Carefully rotate the hank to locate the ties that keep it in its coiled form. These ties are typically found in three or four places around the hank – cut these ties and put them aside for disposal.
Next, gently open your hank into a loop. This is typically a large circle of yarn. Try to keep it as free from twists and knots as possible. Brush through it with your fingers in case there are any snags or small tangles that you can easily remedy. If you find larger knots or tangles that require more work, do your best to untangle them. Patience is key here, as yanking or tugging can potentially damage the yarn.
Once your hank is opened into a loop and the entirety of the coil free from snags and major tangles, it’s ready to be placed on the yarn swift.
Securing Your Yarn Loop On the Swift
Carefully untwist your hank and drape it over the arms of the swift. Ensure the loop of yarn is hanging freely and doesn’t contain twirls or knots.
Begin to expand the umbrella of the swift so it’s stretching the yarn, but not too tightly. Double-check the hank to ensure it’s not twisted or tangled on the swift, as this could pull and damage the yarn as it’s wound.
Once you’re sure your yarn is correctly loaded, you can proceed with locking the swift in place. This secures the yarn and prevents it from moving around during the winding process.
To lock the swift, simply push the screw up until it fits snugly against the base of the umbrella. Now, you’re ready to start threading and winding your yarn.
Threading Your Yarn On the Winder

Once your yarn is secure on the swift, threading it onto the winder becomes your next task. Here are some important points to consider to properly accomplish this:
- Identifying the Yarn End: The end of the yarn that you will be winding typically drapes down from the swift. It is essential to locate this end so it can be threaded correctly to the winder.
- Thread Guide: Feed the yarn through the guide on your winder. This guide usually takes the form of a small metal eyelet or rod, specifically designed to reduce any tension created while winding the yarn.
- Winder Inlet: Place the yarn in the winder inlet, either through a slot or a hollow knob at the top of the winder.
- Creating Tension: Hold the yarn taut with a slight amount of tension as you begin to wind. This will ensure that the yarn is evenly wound and that no loops are slack.
Remember, the key here is a steady pace. Turning the handle too fast might cause the yarn to tangle or break, while going too slow might lead to loosely wound yarn which can cause droopiness in your eventual knit or crochet project. A steady, consistent pace yields the best results.
Winding Your Yarn: Getting the Best Results Every Time
As you start the winding process, it’s critical to keep a steady pace. If you rush, the yarn might become too tight or too loose on the winder. This inconsistency can lead to hurdles in your knitting or crocheting projects.
Keep a consistent tension as you wind the yarn. Don’t pull too hard; let the swift do the work. Ensure the yarn feeds evenly into the winder. If it starts to twist or over-twist, slightly adjust your speed.
Inspect the yarn ball regularly. Smooth out any occasional lumps or areas where the yarn may have wound too tightly.
Finally, as you reach the end of the yarn hank, slow down your winding speed to prevent the swift from quickly spinning once the yarn is used up, which could potentially damage the yarn swift or your yarn ball.
FAQ
Can you use a yarn swift with a skein?
Yes, a yarn swift can indeed be used with a skein to effectively wind the yarn into a flat, center-pull ball.
What are the different types of yarn swifts available and how to choose the right one?
Different types of yarn swifts include umbrella, tabletop, combination, Amish, and vertical swifts, and choosing the right one depends on factors such as the type of yarn skeins you use, how often you wind yarn, your workspace, and your budget.
How to correctly set up and use a yarn swift for optimal performance?
To correctly set up and use a yarn swift for optimal performance, securely fasten the swift on a sturdy table, adjust the umbrella to the width of your yarn hank, lock it in position, cut any ties, unwind your yarn onto the swift, and start slowly pulling the yarn for your project.
What are some common troubleshooting tips for using a yarn swift effectively?
Ensure your yarn swift is securely clamped to a stable surface, carefully unravel the hank of yarn before placing it on the swift, and gently guide the yarn off the swift to prevent tangles and maintain even tension.


