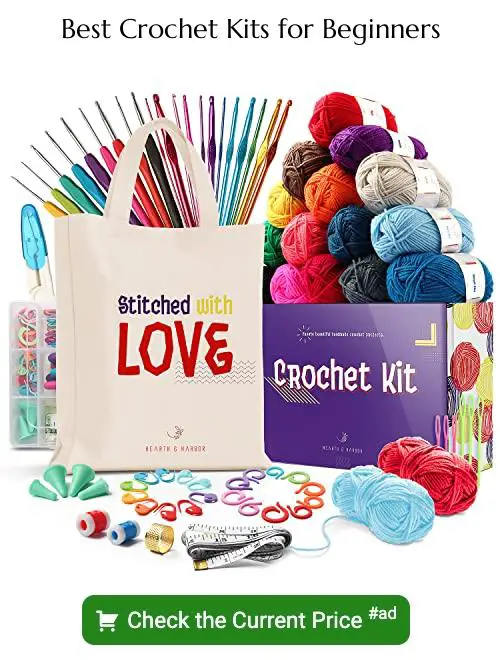
Discover the wonderful world of crochet as we delve into various types of stitches, perfect for beginners and experts alike, enhancing your skills in this timeless craft.
Crochet is a fascinating craft that has been around for centuries. It involves creating beautiful designs by interlocking loops of yarn with a crochet hook.
One of the most exciting aspects of crochet is the wide variety of stitches available to use. Each stitch creates a unique texture and pattern, making it possible to create an endless array of designs.
Whether you are new to crochet or have been practicing for years, learning about different types of stitches can take your skills to the next level. In this article, we will explore some popular types of crochet stitches and how they can be used to create stunning projects.
So grab your hook and let’s get started!
Basic Crochet Stitches
They are simple to learn and can be used in a variety of ways to create beautiful designs. The Slip Stitch is the most basic stitch, which is often used for joining rounds or creating a base chain.
The Chain Stitch is another fundamental stitch that forms the basis for many other stitches and patterns.
The Single Crochet (sc) stitch creates a dense fabric with little holes, making it perfect for items like dishcloths or scarves. Half Double Crochet (hdc) produces taller stitches than single crochet but shorter than double crochet, giving it more drape while still being sturdy enough for blankets and hats.
Double Crochet (dc) creates tall stitches that work up quickly; this makes them ideal when you need to cover large areas quickly such as afghans or shawls. Treble Crochet (trc), also known as triple crochet, produces even taller stitches than double crochets; they have an airy feel making them great choices when working on lacy garments like shawls or doilies.
A. Slip Stitch
It’s also great for creating a smooth edge on your work. To make a slip stitch, insert your hook into the next stitch or space, yarn over and pull through both loops on your hook in one motion.
While it may seem simple, mastering this technique can take some practice. The key is to keep an even tension as you work so that each slip stitch looks uniform.
Once you’ve got the hang of it though, there are many ways to incorporate slip stitches into your projects! You can use them as decorative elements by working them in different colors or using them to create interesting textures when worked in combination with other stitches.
Learning how to do a proper slip stitch will give you more control over your crochet projects and help elevate their overall quality.
B. Chain Stitch
It’s a simple stitch that creates a series of interlocking loops, forming the basis for more complex stitches. To create this stitch, you’ll need to start with a slip knot on your hook and then pull yarn through it to form another loop.
Continue pulling yarn through each new loop until you have reached your desired length.
One great thing about the chain stitch is its versatility; it can be used in many different ways depending on what type of project you’re working on. For example, if you’re making an afghan or blanket, chaining multiple stitches together will create rows that are long enough to cover your entire bed! On the other hand, if you’re creating something smaller like a coaster or dishcloth, chaining just a few stitches may be all that’s needed.
Another benefit of using chain stitches is their ability to add texture and dimensionality to any project. By varying how tightly or loosely they are made and by combining them with other types of crochet stitches such as single crochets or double crochets – intricate patterns can emerge!
C. Single Crochet
It creates a tight, dense fabric that is perfect for items like dishcloths, scarves, and hats. To work a single crochet stitch, you will need to start with a foundation chain of stitches.
Then insert your hook into the second chain from the hook (or first stitch if working in rounds), yarn over and pull up a loop so that you have two loops on your hook. Yarn over again and pull through both loops on your hook to complete one single crochet stitch.
One great thing about single crocheting is its simplicity; it’s easy enough for beginners but can also be used by experienced crocheters as part of more complex patterns or designs.
You can use this simple yet effective technique to create beautiful textures by varying where you insert your hook or how many times you wrap yarn around it before pulling through loops.
D. Half Double Crochet
It creates a slightly taller fabric than the single crochet, but not as tall as the double. This makes it perfect for creating textured patterns or adding some variety to your projects.
To work this stitch, begin by making a foundation chain of any length. Then, yarn over once before inserting your hook into the third chain from your hook (or second chain if you prefer).
Yarn over again and pull up a loop through the chain – you should now have three loops on your hook.
Next, yarn over again and pull through all three loops on your hook at once to complete one half-double-crochet (hdc) stitch. Continue working hdc stitches across each remaining chains until you reach end of row.
One great thing about this type of stitch is that it works up quickly due to its height compared with other basic stitches like sc or dc; thus making it ideal for larger projects such as blankets or scarves where speed is important without sacrificing quality.
E. Double Crochet
It’s a versatile stitch that can be used to create a variety of designs, from blankets and scarves to hats and sweaters. The double crochet stitch is slightly taller than the single crochet stitch, making it perfect for creating projects with more drape or flow.
To work a double crochet stitch, start by chaining two stitches as your turning chain (this counts as your first double-crochet). Then insert your hook into the third chain from the hook (or second if you’re working in rows), yarn over and pull up a loop.
You should now have three loops on your hook.
Next, yarn over again and pull through two loops on your hook. Yarn over once more and pull through the remaining two loops on your hook – this completes one double-crochet! Continue repeating these steps until you reach the end of each row or complete enough rows for desired length.
F. Treble Crochet
It’s perfect for creating lacy patterns or adding height to your project quickly. To create this stitch, you’ll need to yarn over twice before inserting the hook into the designated stitch or space.
Once inserted, yarn over again and pull through two loops on the hook three times until only one loop remains on the hook. This completes one treble crochet stitch.
The treble crochet can be used in various ways such as creating an airy shawl or scarf with its elongated stitches that add texture and dimensionality to any pattern. You can also use it in combination with other stitches like single crochets for more intricate designs.
Advanced Crochet Stitches
These stitches are more complex and require a bit of practice, but once you master them, they can add an extra dimension to your projects. Double Treble Crochet is one such stitch that creates a tall and airy texture perfect for shawls or scarves.
Triple Treble Crochet is another advanced stitch that produces even taller loops than double treble crochet.
A. Double Treble Crochet
This stitch involves wrapping the yarn around the hook four times before inserting it into the designated stitch. It may seem intimidating at first, but with practice and patience, you can master this beautiful technique.
The double treble crochet is perfect for creating lacy designs or adding height to your project. You can use it in combination with other stitches to create unique patterns or work rows of just double trebles for a stunning effect.
One thing to keep in mind when working with this stitch is that it uses more yarn than shorter stitches like single crochets or doubles crochets. So be sure to have enough yarn on hand before starting your project.
B. Triple Treble Crochet
It creates a tall, lacy fabric that can be used for shawls, scarves, and other delicate items. To work this stitch, you will need to have a good understanding of basic crochet stitches and be comfortable working with multiple yarn overs.
To create a triple treble crochet stitch (also known as double treble in some countries), begin by wrapping the yarn around your hook four times. Insert your hook into the designated stitch or space and pull up a loop.
Yarn over again and draw through two loops on your hook until only one loop remains.
Repeat this process three more times until you have worked all five loops off of your hook at once to complete one triple treble crochet.
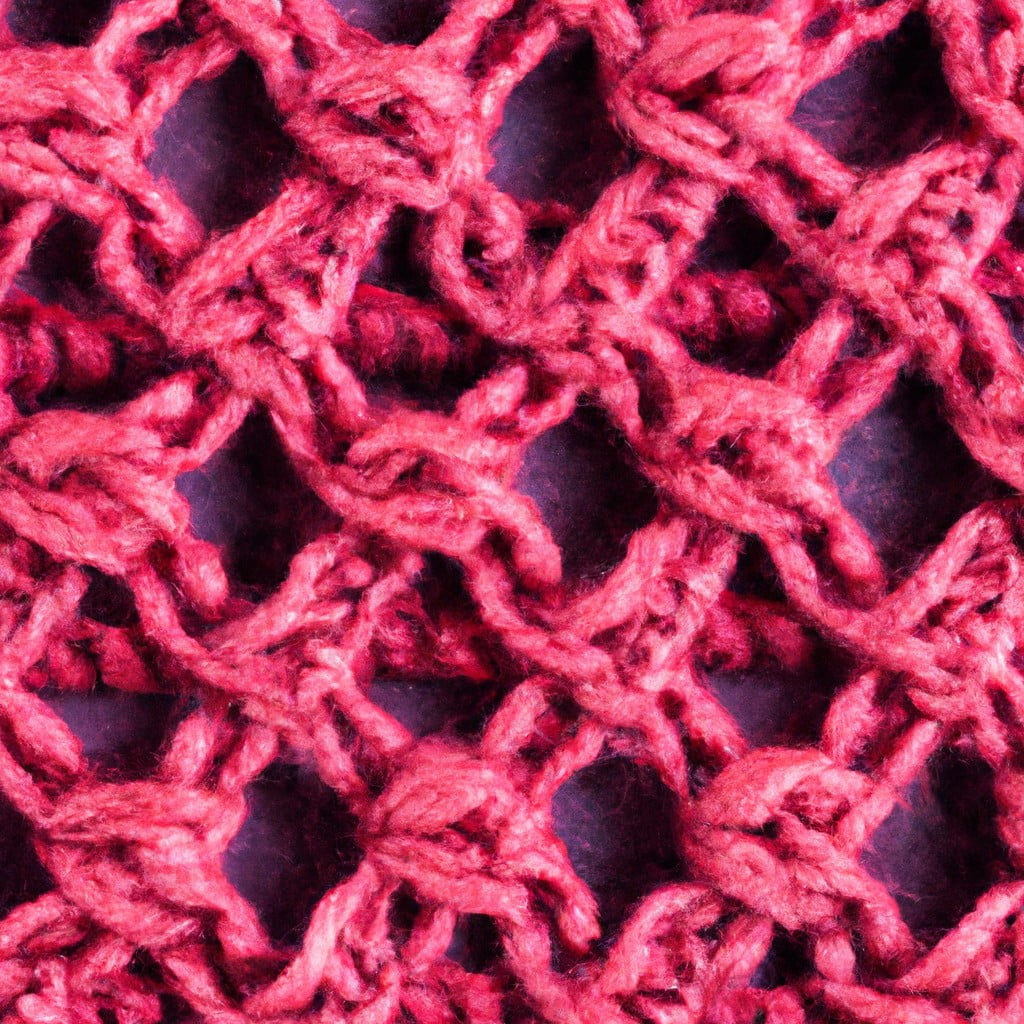
Textured Crochet Stitches
These stitches create unique textures that can be used for a variety of items, from blankets and scarves to hats and bags. Some popular textured crochet stitches include the Shell Stitch, V-Stitch, Bobble Stitch, Popcorn Stitch, Puff Stitch, Cluster Stitch and Spike stitch.
The Shell stitch is one of the most commonly used textured crochet stitches. It creates a beautiful scalloped edge that can be used as an edging or incorporated into larger designs like blankets or shawls.
The V-stitch is another popular choice for adding texture to your work. This stitch involves creating two double crochets in one space with a chain between them which forms the “V” shape.
If you’re looking for something more playful than traditional-looking patterns then try out Bobble or Popcorn Stitches! They both create small raised bumps on your fabric giving it an interesting look while still being easy enough even beginners will enjoy trying these techniques out themselves!.
Puff stitching adds volume by pulling up loops through several rows at once before completing each single-crochet (or other) step; clusters group together multiple yarn overs within one loop so they stand taller than regular ones when worked across many rows – perfect if you want some height variation without having too much bulkiness in certain areas such as sleeves cuffs where there’s limited space available.
A. Shell Stitch
It’s perfect for adding some dimension and interest to your projects, such as blankets, scarves, and shawls. The shell stitch is created by working multiple stitches into the same space or chain from the previous row.
To create this lovely pattern, you’ll need to know how to work basic crochet stitches like single crochets and double crochets. Once you have mastered these techniques, creating shells will be easy peasy!
One of the great things about using shell stitches in your projects is that they can be customized in many ways – larger or smaller shells can be made depending on how many stitches are worked into each space.
B. V-Stitch
It’s perfect for creating lightweight scarves, shawls, and blankets. To create the V-stitch, you’ll need to know how to chain stitch and double crochet.
To start the V-stitch row or round:
- Chain an even number of stitches.
- Double crochet in the fourth chain from your hook.
- Chain one stitch.
- Skip one chain space.
- Double crochet in next chain space.
Repeat steps 3-5 until you reach the end of your foundation row or round.
For subsequent rows/rounds:
- Chain three stitches (counts as first double crochet).
- Double Crochet into previous row’s “V” Stitch
- Chain One
- Work another DC into same “V” Stitch
Repeat steps 2-4 across entire row/round until last two stitches remain; work final DC into top of turning-chain from previous Row/Round.
C. Bobble Stitch
This stitch creates small, raised bumps that give the fabric a three-dimensional look. To create this stitch, you will work several double crochets into one stitch and then pull them all through at once.
The result is a cluster of stitches that pop out from the surface of your project.
One great thing about the bobble stitch is its versatility – it can be used in many different types of projects, from blankets to hats to scarves. You can use it as an accent or make an entire project using only this stitch for added texture.
To get started with the bobble stitch, you’ll need some basic crochet skills like chaining and double crocheting. Once you have those down pat, simply follow these steps:
- ) Chain any even number.
- ) Double crochet in each chain across.
- ) Chain 1 and turn.
- ) *Yarn over (YO), insert hook into next stich; YO again
- ) Pull up loop so there are 3 loops on hook
- )* Repeat step 4 four more times until there are six loops on hook
- )* YO again
- )* Pull yarn through all six loops at once
- )* Ch1
Repeat steps four through nine across row until end.
D. Popcorn Stitch
This stitch creates small, raised bumps that resemble popcorn kernels. It’s perfect for adding interest to blankets, scarves, hats or any other project where you want a little extra texture.
To create the popcorn stitch, you’ll work several double crochets into the same stitch or space and then “pop” them up by pulling the last loop of each double crochet through all of the loops on your hook at once. This will create a small bump on top of your work.
Once you get comfortable with this technique, there are many variations that can be made using different numbers of stitches in each group or working half-double crochets instead of doubles. The possibilities are endless!
E. Puff Stitch
It creates a raised, three-dimensional cluster of stitches that resembles little puffs or popcorns. This stitch can be used in various ways, such as creating polka dots on a blanket or adding dimension to an amigurumi toy.
To make the puff stitch, you will need to work multiple yarn overs (yo) into one stitch before completing it all at once. The number of yo’s will depend on the desired height of your puff.
Once you have mastered this technique, there are endless possibilities for incorporating it into your projects. You could use different colors for each row of puffs or alternate rows with other textured stitches like the bobble or popcorn stitches.
F. Cluster Stitch
It’s perfect for adding depth and dimension to your projects, making them stand out from the crowd. The cluster stitch is made by working several stitches into the same space, then joining them together at the top with a slip stitch.
To create this stunning pattern, you will need to know how to work basic crochet stitches such as single crochet and double crochet. Once you have mastered these techniques, it’s easy to learn how to make clusters.
The great thing about cluster stitching is that it can be used in many different ways. You can use it as an all-over pattern or just add clusters here and there for added texture.
Cluster stitching also works well when combined with other types of textured stitches like puff or popcorn.
G. Spike Stitch
This technique involves inserting the hook into a lower row of stitches and pulling up a loop to create an extended single crochet or double crochet. The result is a raised line that adds texture and dimension to your project.
One of the great things about the spike stitch is its versatility. You can use it in combination with other stitches, such as single crochets or double crochets, to create intricate patterns and designs.
It’s also easy to customize by adjusting how far down you insert your hook.
To make this stitch, start by working several rows of basic single crochets or double crochets in one color before switching colors for the spike portion. Then insert your hook into the desired row below where you want to place your first “spike.” Yarn over and pull up through both loops on top of this row before completing another regular single crochet or double crochet as usual.
Post Crochet Stitches
These stitches are worked around the post of a stitch rather than through the top loops, creating raised ridges on your fabric. There are two types of post crochet stitches: front post and back post.
Front Post Crochet involves working around the front of a stitch from right to left, while Back Post Crochet is worked around the back of a stitch from right to left. Both techniques create different textures that can be used in various ways.
Front Post Double Crochet (FPdc) creates an effect similar to ribbing and is perfect for adding structure or definition along edges or seams. It’s also commonly used in cable patterns as it helps create depth by pulling certain parts forward while pushing others backward.
Back Post Double Crochet (BPdc), on the other hand, creates an indentation that looks like little “V”s running down your work when viewed from above. This technique works well for creating textured fabrics with lots of visual interest such as basketweave patterns or cables where you want some areas pushed forward while others recede into shadowy depths.
A. Front Post Crochet
This stitch is worked around the post of a previous stitch, rather than into the top loops as you would with regular crochet stitches. The result is an interesting texture that can be used to create unique designs and patterns.
To work a front post double crochet (FPdc), insert your hook from front to back between the posts of two stitches in the row below, then bring it up again on the other side. Yarn over and draw through two loops on your hook twice to complete one FPdc.
B. Back Post Crochet
This stitch is worked by inserting your hook from back to front around the post of the stitch in the previous row, rather than through both loops as you would with regular stitches. The result is a ribbed effect that can add depth and dimension to any design.
This technique may seem intimidating at first, but it’s actually quite simple once you get used to it. It’s also versatile and can be used in many different types of projects, such as scarves, hats or even blankets.
To work this stitch:.
- Begin by making one or more rows of regular stitches.
- Identify which row you want to work into.
- Insert your hook from back-to-front around the post (vertical part) of each stitch in that row.
- Yarn over and pull up a loop so there are three loops on your hook.
- a: For double crochet (dc), yarn over again and pull through two loops twice until only one loop remains on your hook
- b: For treble crochet (tr), yarn over twice before step 3 above then after step 4 above yarn over again before pulling through two sets twice until only one loop remains
Repeat steps 3-5 for each subsequent Back Post Crochet Stitch.
Edging Crochet Stitches
There are many different types of edging stitches that you can use, each with its own unique style. Here are some popular options:
1. Loop Stitch: This stitch creates a fun and fluffy border by looping the yarn around the hook several times before pulling through.
2. Picot Stitch: A picot is a small loop that adds texture to your work, creating little peaks along the edge of your project.
3. Picot Single Crochet: Similar to the picot stitch but worked into single crochet stitches for added stability.
A. Loop Stitch
This stitch is perfect for adding fluffy accents to your projects, such as animal fur or hair. To create the loop stitch, you will need to work with two loops on your hook instead of one.
To make the loop stitch, start by making a row of single crochet stitches. Then, insert your hook into the next stitch and pull up a loop about 1 inch in length.
Hold this long loop in place with your fingers while you yarn over and pull through both loops on your hook.
Repeat this process across the row until all stitches have been worked into long loops. Once all rows are complete, use scissors to trim each long strand down to size so they match evenly.
B. Picot Stitch
This simple yet elegant stitch involves creating small loops on the edge of your work by chaining three stitches and then slip stitching back into the first chain. The result is a series of tiny bumps that resemble beads or pearls.
One way to use the Picot Stitch is as an edging for blankets, scarves, shawls or any other project you want to give an extra touch of elegance. You can also use it in combination with other stitches such as single crochet or double crochet for added texture.
To make this lovely little detail all you need are basic crocheting skills and some yarn! It’s easy enough for beginners but still interesting enough for experienced crocheters looking for something new.
C. Picot Single Crochet
It’s perfect for finishing off blankets, scarves, and shawls. This stitch involves creating small loops along the edge of your work by chaining one or two stitches before making a single crochet in the next stitch.
To create this lovely edging, start with a row of single crochet stitches along the edge of your work. Then chain one or two stitches (depending on how big you want your picots to be) and make another single crochet in the same stitch as before.
Repeat this process all around until you reach back where you started. The result will be an elegant border with evenly spaced picots that add just enough flair without being too overwhelming.
Patterned Crochet Stitches
These stitches use combinations of basic crochet stitches in unique ways, creating intricate patterns that can be used for blankets, scarves, hats or any other project you can imagine. Some popular patterned crochet stitches include the waffle stitch which creates a textured fabric perfect for cozy blankets; the basketweave stitch which mimics woven baskets and is ideal for bags or home decor items; and the star stitch which creates beautiful star-shaped motifs that look stunning on sweaters or shawls.
Another popular patterned crochet stitch is the granny square stitch. This classic design has been around since Victorian times but remains as popular today as it was then.
The granny square consists of clusters of double crochets worked into chain spaces forming squares with open centers.
The corner-to-corner (C2C) technique is another fun way to create patterns using basic double crochets worked diagonally from one corner to another in rows increasing until halfway through then decreasing back down again creating an interesting triangular shape.
A. Waffle Stitch
It’s perfect for blankets, scarves, and other cozy items. This stitch involves working in the front loop and back loop of each row to create the unique texture.
To work the waffle stitch, you’ll need to know how to single crochet (sc) and double crochet (dc). Start by chaining an even number of stitches for your foundation chain.
Then work one sc into each chain across.
For Row 2: Chain 1 and turn your work. Work *1 sc in first st., then dc in next st.* Repeat from *to* until end of row.
For Row 3: Chain 2 (counts as first dc), then turn your work around so you are facing it from behind; skip over first sc below on previous row; *work dc into next available space between two stitches below on previous row; skip over next single crochet*. Repeat from *to* until last two sts.; finish with one more double-crochet into final space before turning-chain at end of previous round.
Repeat Rows Two & Three alternately throughout project or desired length.
B. Basketweave Stitch
It’s perfect for creating cozy blankets, scarves, and even home decor items like pillows or baskets. This stitch involves working in groups of front post double crochets (FPDC) and back post double crochets (BPDC), which create the raised ridges that give it its signature look.
To work the basketweave stitch, you’ll need to have a basic understanding of how to work FPDC and BPDC stitches. Once you’ve got those down pat, it’s just a matter of alternating between them in specific groupings.
One popular way to create this pattern is by working 4 rows of FPDC followed by 4 rows of BPDC. You can also experiment with different numbers or try adding additional stitches between each set for added interest.
The basketweave stitch is an excellent choice for anyone looking to add some texture and depth to their crochet projects while keeping things relatively simple.
C. Cable Stitch
This stitch is perfect for creating cozy blankets, scarves, hats, and sweaters. The cable stitch involves crossing stitches over each other to create a braided effect.
It may seem intimidating at first glance but with practice and patience, you can master this technique.
To create the cable stitch in crochet, you will need to work with multiple stitches at once by holding some on your hook while working others before returning to those held on your hook. There are different variations of the cable stitch depending on how many stitches are crossed over each other.
One popular variation is called the 2/2 Left Cross Cable Stitch which involves crossing two front post double crochets (fpdc) over two back post double crochets (bpdc). Another variation is called 1/1 Right Cross Cable Stitch which crosses one fpdc over one bpdc.
D. Star Stitch
It’s perfect for adding interest to blankets, scarves, hats or any other project you can think of. The star stitch may look complicated at first glance but once you get the hang of it, it’s actually quite simple.
To create the star stitch, start with a foundation row of single crochets and then work your way up by creating clusters of stitches that resemble stars. This creates an intricate texture that looks stunning in any color combination.
One great thing about the star stitch is its versatility – it can be used as an all-over pattern or as an accent to other stitches. You could even use different colors for each “star” in your rows to create a rainbow effect!
E. Granny Square Stitch
It’s a versatile and easy-to-learn stitch that can be used to create blankets, scarves, bags, and more. The Granny Square Stitch consists of clusters of double crochets separated by chain stitches in the corners.
These clusters are then joined together to form squares or rectangles.
One of the best things about the Granny Square Stitch is its simplicity. Even if you’re new to crochet, you can easily learn this stitch with just a little bit of practice.
Once you’ve mastered it, there are endless possibilities for creating unique designs using different colors and patterns.
To get started with the Granny Square Stitch, all you need is some yarn in your favorite color(s) and an appropriately sized hook (usually between 4mm-6mm). Begin by making a slip knot on your hook and chaining four stitches before joining them into a ring with a slip stitch.
From here on out it’s simply alternating between chains spaces (corners) where three double crochets will be worked followed by another corner space until reaching desired size or number needed.
F. Corner-to-Corner Stitch
This stitch involves working in blocks or squares from one corner to another and gradually increasing the number of stitches until you reach the desired size. The beauty of this stitch lies in its versatility; it can be used to create blankets, scarves, shawls and even garments.
To work the C2C stitch, you will need to know how to chain and double crochet. Once you have mastered these basic techniques, creating beautiful designs with this versatile stitch becomes easy.
One great thing about using the C2C technique is that it allows for endless color combinations which makes your project unique! You can use different colors for each block or square or alternate between two colors throughout your design.
G. Moss Stitch (Granite Stitch)
This stitch involves alternating single crochets and chain stitches in each row to create a woven effect. The result is an intricate-looking fabric that can be used for various projects such as blankets, scarves or even sweaters.
One of the best things about this stitch is its versatility; it works well with any type of yarn and hook size. It’s perfect for beginners who want to try something new but not too complicated.
To start creating your own moss-stitch masterpiece, begin by chaining an even number of stitches (for example 20). Then work one single crochet into the second chain from your hook followed by one chain space.
Continue working *one single crochet into the next chain space followed by another chain* until you reach the end of your foundation row.
For subsequent rows: Chain one at beginning then work *single crochet in previous row’s ch-space followed by another ch-space*. End with sc in last st/ch-sp on previous row.
Repeat this process until you have reached your desired length or width.
The moss-stitch creates a dense fabric which makes it ideal for warm winter accessories like hats and mittens while still being lightweight enough to use during springtime when made using lighter weight yarns.
H. Granny Stripe Stitch
It’s perfect for creating blankets, scarves, and other projects where you want to use multiple colors. This stitch is similar to the classic granny square but worked in rows instead of rounds.
To create the Granny Stripe Stitch, you will need to know how to chain and double crochet stitches. The basic idea behind this stitch is simple: alternate between two or more colors of yarn every row while working double crochets into each space from the previous row.
One great thing about this stitch is that it’s easy to customize by changing up your color choices or adjusting the width of your stripes. You can also experiment with different types of yarns for varying textures and effects.
I. Elizabeth Stitch
It’s named after Queen Elizabeth I, who was known for her love of elaborate clothing and accessories. This stitch involves working multiple stitches into the same space, creating a raised diamond pattern that looks stunning on blankets, scarves, and other projects.
To create the Elizabeth Stitch, you’ll need to know how to work double crochets (DC) and chain stitches (CH). The basic pattern involves working two DCs in one CH space followed by one CH before repeating across the row.
On subsequent rows, you’ll alternate where you place your DCs so they line up with the spaces from previous rows.
This stitch may take some practice to master but once you get it down it can be used in many different ways! Try using this elegant stitch as an accent border or even as an all-over design for larger projects like afghans or shawls.
J. Primrose Stitch
It’s perfect for creating blankets, scarves, shawls, and other cozy accessories. This stitch involves working clusters of double crochets in the same space to create the petal-like effect of primroses.
To work this stitch, you’ll need to know how to chain (ch), single crochet (sc), double crochet (dc), skip stitches (sk st) and work into spaces between stitches instead of into the top loops.
Once you get comfortable with this technique, it can be easily modified by changing colors or adding more rows for different effects.
K. Lemon Peel Stitch
It’s perfect for adding interest to blankets, scarves, and other projects. This stitch is created by alternating single crochet and double crochet stitches in each row.
The result is a pattern that looks like the skin of a lemon.
To create the Lemon Peel Stitch, start with an even number of chains. Then work one row of single crochets followed by one row of double crochets until you reach your desired length.
This stitch may seem simple at first glance but it can add depth and dimension to any project when used creatively or combined with other stitches such as puff or popcorn stitches.
L. Waistcoat Stitch
This stitch resembles the look of knitting stitches but is created using only single crochets worked in a special way. The result is an interlocking pattern that looks like little V’s stacked on top of each other.
To work this stitch, you will need to insert your hook into the center of the previous row’s single crochet instead of under both loops as usual. Then you yarn over and pull up a loop through this center point before completing your regular single crochet.
This technique can be used to create various projects such as scarves, hats or even sweaters with its tight-knit texture providing warmth during colder months. It’s also great for creating intricate designs such as letters or shapes within your project.
M. V Double Crochet Stitch
It’s also an excellent way to add some variety to your work if you’re tired of using the same old stitches.
To create this stitch, start by making a foundation chain in multiples of two plus one. Then, skip the first three chains from your hook and double crochet into the fourth chain.
Next, yarn over twice before inserting your hook into the next chain space. Yarn over again and pull up a loop through that space.
You should now have four loops on your hook. Yarn over once more before pulling through just two loops on your hook (this will leave you with three remaining loops).
Repeat this step twice more until only one loop remains on your hook.
Now comes the tricky part: insert our needle under both strands of each “V” shape created by previous rows instead of going under just one strand as usual when crocheting double crochets or other similar stitches. Repeat these steps across each row until you reach end-of-row marker or desired length has been achieved.
N. Side Saddle Stitch
This stitch involves working into the side of the previous row’s stitches, rather than through both loops as in traditional crochet stitches. The result is an interesting diagonal line effect that adds depth and dimension to your project.
To work this stitch, you will need to have some basic knowledge of single crochet and double crochet stitches. Once you have mastered those techniques, it’s easy to learn how to create the Side Saddle Stitch.
Begin by chaining an even number of stitches for your foundation row. Then work one single crochet into each chain across the row.
For Row 2 (and all subsequent rows), chain 1 and turn your work. Work one single crochet into each stitch across until you reach the end of the row.
Next comes where things get interesting! Instead of turning your work again as usual for traditional crocheting methods, rotate it so that you are now looking at its side edge instead. Inserting hook from front-to-back under both loops on right-hand side edge st; yo with MC or CC (depending on which color was used in last sc made); draw up loop onto RS; [yo with same color] twice more; draw through all 4 lps on hook – sc3tog made.
Continue repeating this process until desired length is reached!
O. Aligned Cobble Stitch
It involves working clusters of double crochet stitches in between single crochet stitches, creating an aligned cobble effect. This stitch is perfect for adding texture to blankets, scarves, and other projects.
To work the Aligned Cobble Stitch, you will need to know how to chain and work basic crochet stitches such as single and double crochets. Once you have mastered these skills, this stitch can be easily worked up by following a simple repeat pattern.
This stitch works well with any type of yarn but looks particularly stunning when used with variegated or self-striping yarns that showcase the texture created by the clusters of double crochets.
Special Crochet Techniques
However, once you get the hang of them, they can add an extra dimension to your crochet projects. These techniques include Herringbone Crochet, Tunisian Crochet, Broomstick Lace, Hairpin Lace and Solomon’s Knot.
Herringbone crochet is a technique that creates a unique texture by working half double crochets in the back loop only. Tunisian crochet is similar to knitting as it uses an elongated hook with multiple loops on it at one time.
Broomstick lace involves using both your hook and a large knitting needle or dowel rod to create loops which are then worked into stitches creating beautiful lacy patterns.
Hairpin lace requires using two parallel rods (or sometimes just one) with yarn wrapped around them in order for you to work single crochets between each loop created by the rods.
Solomon’s knot creates openwork designs through looping chains together into knots before working single or double crochets around them.
A. Herringbone Crochet
It gets its name from the way the stitches slant to one side, resembling herringbone patterns found in textiles and flooring. This stitch can be used for various projects such as blankets, scarves or even garments.
To create this stitch, you will need to know how to work half double crochet (hdc) and slip stitches (sl st). The technique involves working hdc into the previous row’s sl st instead of directly into the top of each hdc like traditional crochet stitches.
The result is an elegant pattern with a slight stretch that makes it perfect for creating fitted garments or accessories. Herringbone crochet may seem intimidating at first but once you get started on your project using this technique, you’ll find it easy and enjoyable!
Learning different types of crocheting techniques can help take your skills up several notches while also allowing you to explore new designs and textures in your projects.
B. Tunisian Crochet
It creates a dense fabric with a distinctive texture that resembles woven fabric. Tunisian crochet uses an elongated hook called an afghan hook or Tunisian hook, which has a stopper on one end to prevent stitches from slipping off.
The basic stitch in Tunisian crochet is the simple stitch (TSS), which involves inserting the hook into each vertical bar of the previous row and pulling up loops onto it until all stitches are worked across. The resulting fabric looks like rows of knitted garter stitch but with more structure.
One advantage of Tunisian crochet is its versatility; it can be used to create anything from blankets and scarves to sweaters and bags. This technique allows for colorwork by changing colors at different points in your work.
If you’re new to this type of stitching, start with some simple projects such as dishcloths or coasters before moving on to larger items like blankets or garments.
C. Broomstick Lace
It involves using both a crochet hook and a large knitting needle or dowel, which gives the stitch its distinctive look. The name “broomstick” comes from the fact that early crocheters used actual broomsticks to create this stitch.
To make Broomstick Lace, you start by creating loops on your crochet hook and then pulling them up onto the knitting needle or dowel. You then work single crochets (or other stitches) into groups of these loops to create rows of lace.
This technique can be used in many different ways, from creating delicate shawls and scarves to adding decorative touches to blankets and pillows. Once you get the hang of it, Broomstick Lace can be an enjoyable way to add texture and interest to your projects.
If you’re new to this technique, there are plenty of tutorials available online that can help guide you through each step.
D. Hairpin Lace
This technique creates an intricate and delicate design that can be used for various projects such as shawls, scarves, and even blankets. The hairpin lace stitch requires two basic stitches: the single crochet stitch and the chain stitch.
To start with this technique, you will need a hairpin loom or fork-like tool with two parallel prongs connected by a bridge at the top. You will also need yarn in your desired color and weight.
Begin by creating loops on each side of the loom using chains; these loops are called “legs.” Then work single crochets across both legs until you reach the end of one side. Turn your work around to begin working back across both legs again.
As you continue working back-and-forth between each leg, use slip stitches to join them together periodically so they don’t become too loose or fall apart while working on other sections of your project.
Once finished with all rows needed for your project’s width (or length), remove it from its frame carefully without unraveling any strands before joining multiple pieces together if necessary – either through sewing or crocheting them into place!.
E. Solomon’s Knot
It involves creating a series of loops that are then joined together to form a chain-like pattern. This stitch is perfect for creating delicate shawls, scarves, and other lightweight accessories.
To create Solomon’s knot, you start by making a long loop with your yarn. Then you insert your hook into this loop and pull up another loop through it.
You continue pulling up loops in this way until you have created several chains on your hook.
Once you have enough chains on your hook (usually around 5-7), you begin working back down the chain by inserting your hook into each chain from front to back and pulling up another loop through it.
The result is an elegant knot-like pattern that can be used in many different ways to add texture and interest to any project.
Whether you’re new to crochet or looking for something more advanced, Solomon’s Knot is definitely worth trying out! With its intricate yet simple design elements combined with its versatility in use cases makes it one of our favorite stitches here at [insert blog name].
FAQ
How many types of crochet stitches are there?
There are over 150 types of crochet stitches or stitch patterns.
What is the hardest crochet stitch ever?
The hardest crochet stitch is generally considered to be the Jasmine Stitch due to its unconventional technique that can be challenging for people to learn.
What are the 5 basic crochet stitches?
The 5 basic crochet stitches are chain, single crochet, half double crochet, double crochet, and slip stitch.
What are the differences between popular crochet stitches?
Differences between popular crochet stitches include variation in appearance, texture, and stitch combinations, often based on the number of yarn loops and the order in which they are worked.
How can you combine various crochet stitches to create unique patterns?
Answer: By innovatively mixing diverse crochet stitches, one can generate unique patterns for a distinct and personalized design.
Which crochet stitches are best for beginners to learn and practice?
For beginners, the best crochet stitches to learn and practice are the chain stitch, single crochet, and double crochet.
Related Posts
 Easy Crochet Gnome Pattern Free: Transform Yarn into Whimsical Friends
 Crochet Star Blanket: A Stellar DIY Guide
 How to Crochet Slippers for Beginners Step by Step with Pictures: Cozy Feet Awaits
 Adjustable Ring Crochet: Master the Magic Circle
 How to Crochet Without a Hook: Hands-On Creativity