Crafting a yarn wreath is a rewarding experience because it allows for endless creativity while recycling leftover yarn from other projects.
Creating a yarn wreath can be a fun and rewarding project. This article provides a step-by-step guide on how to make your own yarn wreath, whether you’re a seasoned craftsperson or just starting out.
From selecting the perfect yarn and wreath base, to wrapping techniques and adding embellishments, you’ll find all the necessary details here. As you follow along, you’ll discover that making a yarn wreath is a simple process that offers plenty of room for creativity.
So, let’s dive right in and start crafting your unique yarn wreath.
Key takeaways:
- Select a foam or straw wreath form and thicker yarn.
- Secure the yarn to the form and wrap tightly.
- Add decorations like ribbons, flowers, or ornaments.
- Follow specific wrapping techniques for different effects.
- Choose embellishments based on the theme or occasion.
Supplies Needed for a Yarn Wreath
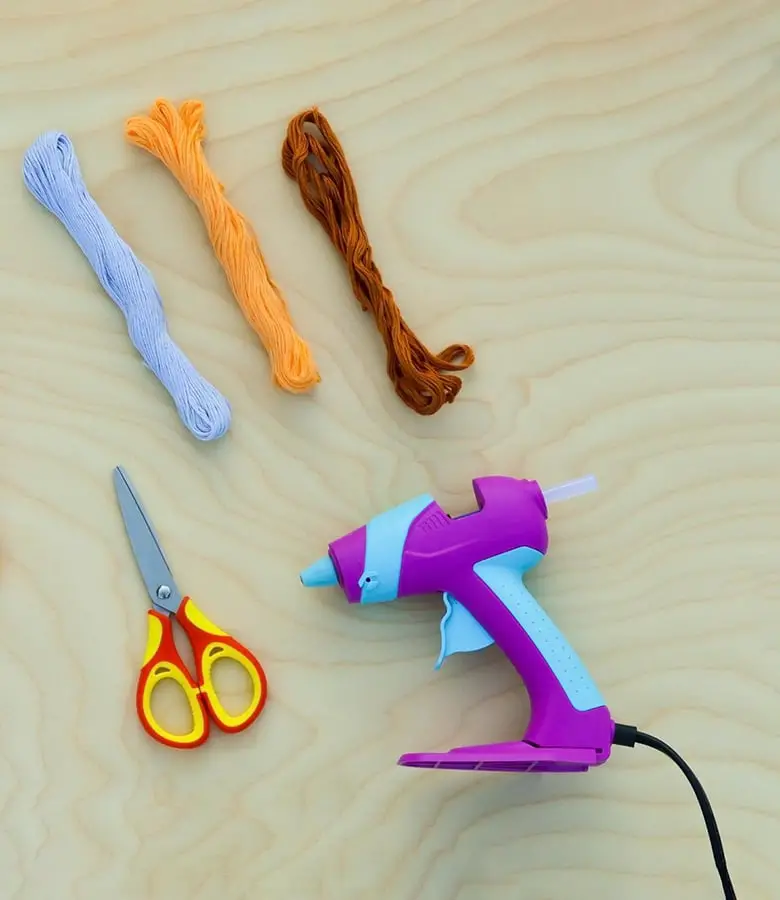
You will require a foam or straw wreath form, a skein of yarn in a color of your choice. Opt for thicker yarn as it gives a fuller look to your wreath and requires less time to wrap.
Other than this, a pair of scissors come handy in trimming the yarn. For decorations, a variety of embellishments can be used, ranging from silk flowers, ribbons, Holiday ornaments, or even felt decorations.
Remember to have a hot glue gun and glue sticks handy for securing the yarn and decorations to the wreath form. Depending on the design, you may also need a tape measure and a fabric pen for making accurate placements.
Select supplies to match your desired end result for the wreath, considering factors like the occasion, season, and colour scheme.
Detailed Instructions to Make a Yarn Wreath
Begin the project by choosing a wreath form that best suits your design. Foam or straw are good choices, but keep in mind that the latter might need extra yarn due to its textured surface. After gathering the necessary yarn colors, scissors, and a hot glue gun, you’re ready to get started.
Firstly, secure the yarn to the wreath form. This can be done effortlessly with a small dab of hot glue. Once the glue cools down and the yarn is anchored firmly, you can start wrapping your yarn.
Wrapping is the most time-consuming part of the project. Ensure your yarn is tight, but don’t pull too hard or the yarn could break or warp your wreath form. If using multiple colors, decide on the pattern beforehand. In case you want to switch colors, just cut the ongoing yarn, secure it with glue, and attach the new color similarly.
For the embellishments, they should be thoughtfully decided based on the theme of the wreath. They can be attached with hot glue. If you’re planning on making a bow – which is optional but adds a nice touch – make sure to choose a complementing color and texture.
Finally, to hang the wreath, a loop of yarn or ribbon can be secured at the reverse side of the top part of the wreath. Keep in mind, the loop should be strong enough to bear the wreath weight.
Remember, this is a creative project, feel free to experiment with different color combinations, textures, and embellishments.
Technique to Wrap Yarn Over the Wreath
To begin with, hold the end of your selected yarn against the wreath form, securing it in place with your thumb. Start wrapping the yarn around the wreath form. It’s best to keep the wraps close together and ensure that they overlap slightly to cover the wreath completely. This method is known as the “over-wrapping” technique.
1. Keep a firm but gentle grip on the yarn to maintain tension, preventing any loose or uneven wraps.
2. Your yarn wrapping direction should be consistent around the entire wreath, either always clockwise or counterclockwise for uniformity.
3. Try to limit the unwrapping of the yarn; use only what is needed to prevent tangling.
4. Always cover your previous wrapping to hide the wreath form underneath.
5. Periodically push together your yarn wraps to ensure full coverage and a snug, cozy appearance.
6. Incorporate different colors or textures by simply tying on a new ball of yarn and continuing the process.
Remember, the wrapping doesn’t have to be perfect, slight variances in tension or yarn placement can lend to the wreath’s handmade charm.
Process to Wrap Yarn Under the Wreath
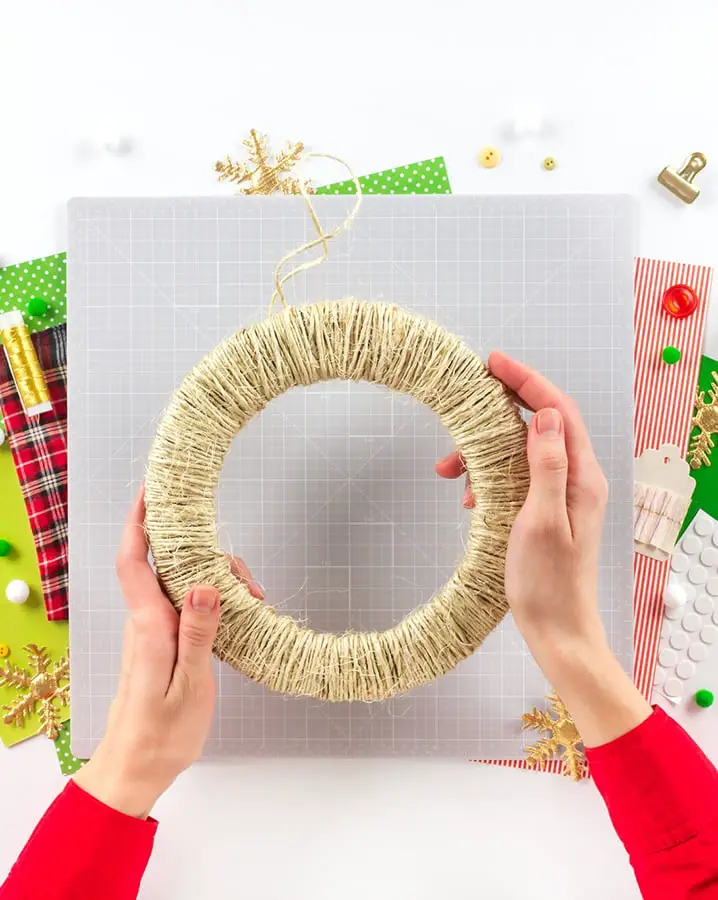
Begin by securing a loose end of your chosen yarn to the base of the wreath form with a knot or hot glue. Then, start to wind the yarn around the wreath, ensuring it’s taut but not so tight that it warps the structure of the wreath. Aim to keep it even, with each coil of yarn laying parallel to the next. This is to maintain a smooth and uniform appearance all around.
Keep in mind, it’s important not to leave any gaps where the wreath form shows through. If a gap appears, simply go back and wrap the yarn over the area again. However, remember not to bunch up the yarn or it might result in a lumpy texture.
Take regular breaks to help avoid hand fatigue and to ensure your work stays neat and attractive. When you’ve covered the entire wreath form to your satisfaction, trim off the excess yarn. Secure the end to the back of the wreath form with a knot or dab of hot glue.
Anticipate this procedure taking some time, depending on the size of your wreath form and the thickness of your yarn. Thus, enjoy this process as a relaxing, creative endeavor rather than a task to accomplish hastily. Plus, you can always mix different colors or types of yarn for a more interesting and decorative effect.
Finishing Wrapping the Yarn On the Wreath
Continuing where we left off, ensure that the last strip of wrappings is tightly secured. Cut off the extra length of yarn and conceal the loose end under the surrounding strips. This can be easily accomplished by tucking the yarn using a crochet hook. Make sure the end piece is well hidden to maintain the continuity and appearance of the wreath.
Next, examine your creation closely. You want to ensure the wreath base is completely covered and no gaps are visible. If you spot any bare areas, simply weave in more yarn until you achieve an even, full appearance. This careful attention to shape and consistency will allow your following decorations to shine.
Remember! The wrapping doesn’t have to be perfect, it all adds to the charm and character of your handmade yarn wreath.
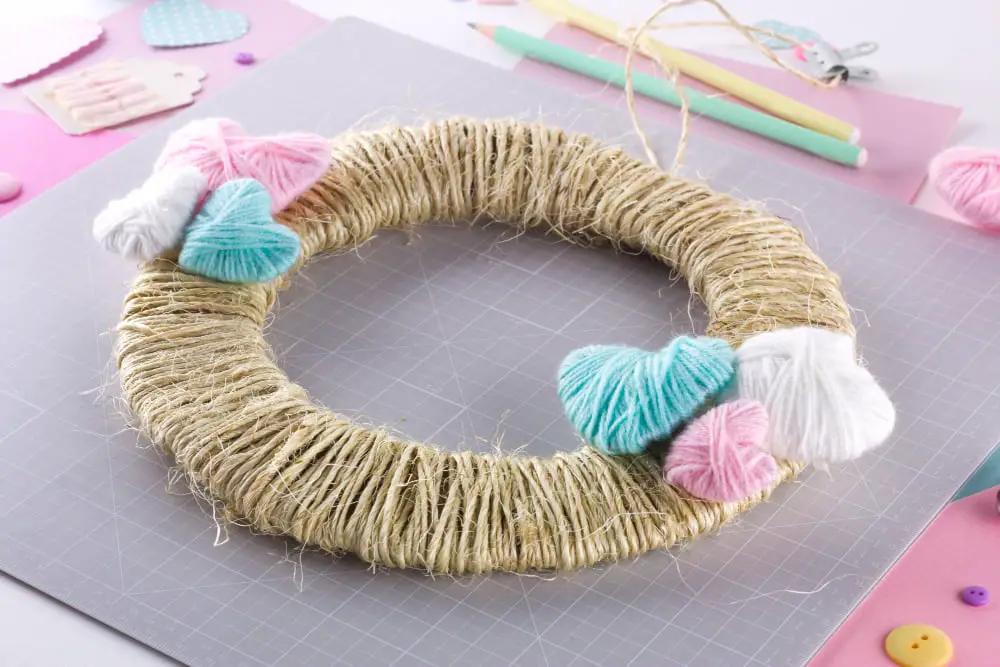
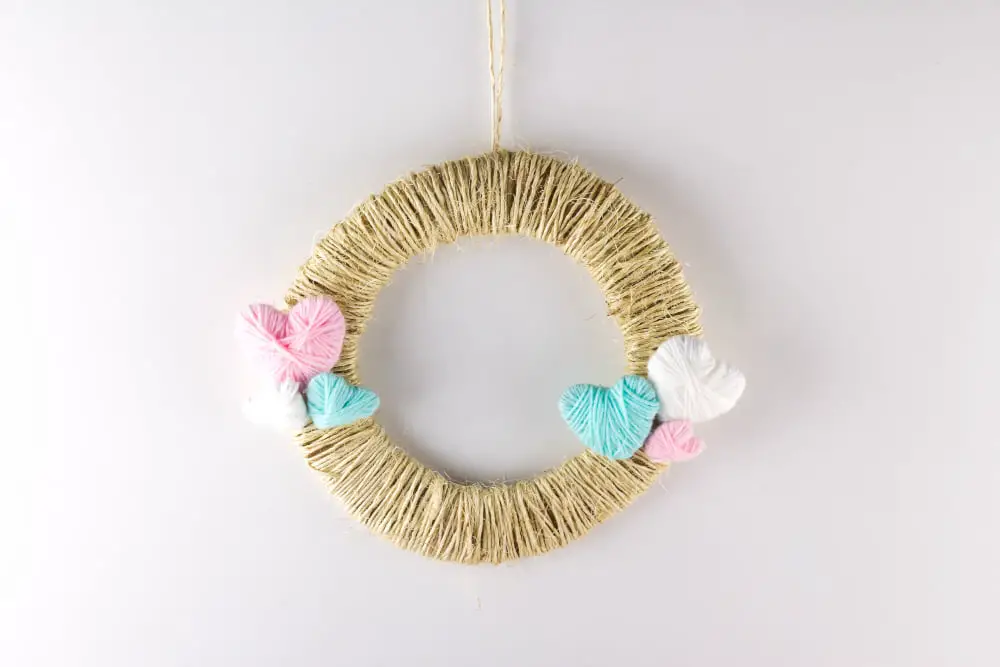
Ideas On How to Embellish the Yarn Wreath
With your yarn-wrapped base ready, your wreath can now be personalized with embellishments. These could range from season-specific accents to everyday elements.
Ribbons, felt flowers, small crocheted elements, or even vintage buttons can provide a unique twist.
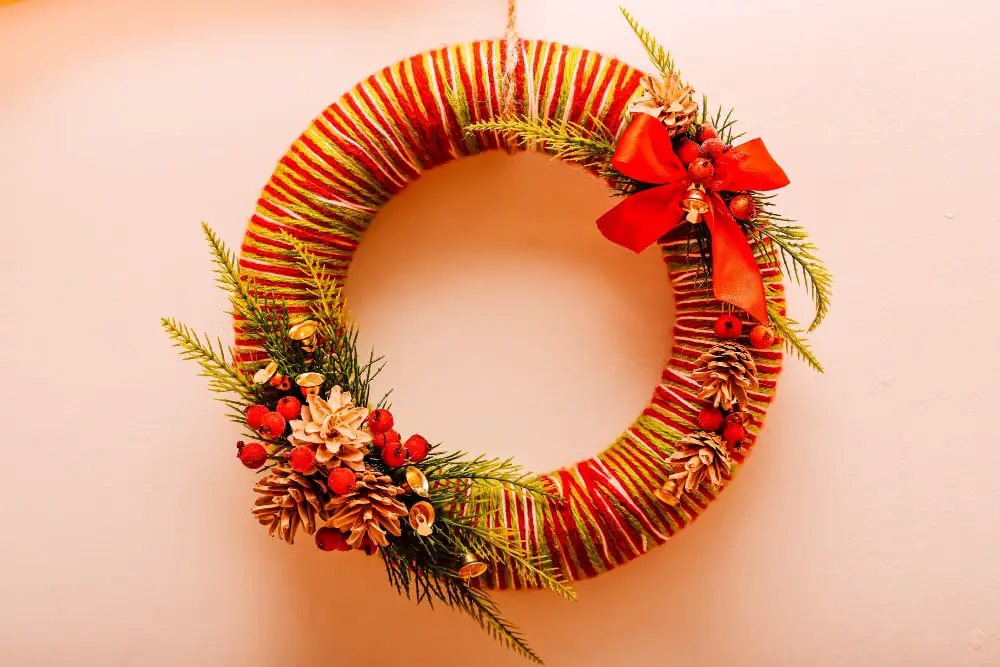
For a festive uplift, consider adding holiday-themed decorations like ornaments or pinecones.
Alternatively, lightweight plastic toys or tiny framed pictures can give a fun, whimsical touch.
Always secure your embellishments firmly, either by weaving them into the yarn or using hot glue.
Create a balance by spacing them out evenly or concentrate them in a particular section for a statement effect.
Remember, less is often more, so avoid overdecorating.
Stay creative and reflect your personal style in embellishing your yarn wreath.
Steps to Make a Bow for the Yarn Wreath
Start by selecting a different shade of yarn, or a ribbon for added contrast. Cut a long piece, roughly about 36 inches.
Next, fold the yarn in half, thereby creating two loops at both ends. Take one loop and pass it over and through the other, making a simplistic bow style. Keep changing the size of this bow until it meets your desired look.
Following this, secure the bow on the wreath by tying another piece of yarn or thread around the knot in the center.
Finally, trim any excessive yarn or ribbon off the ends. This variation in texture from the wreath adds a touch of artistry to your project, making it unique and eye-catching.
Remember to keep the bow proportionate to the size of the wreath. Too large can overshadow the wreath and too small may not stand out.
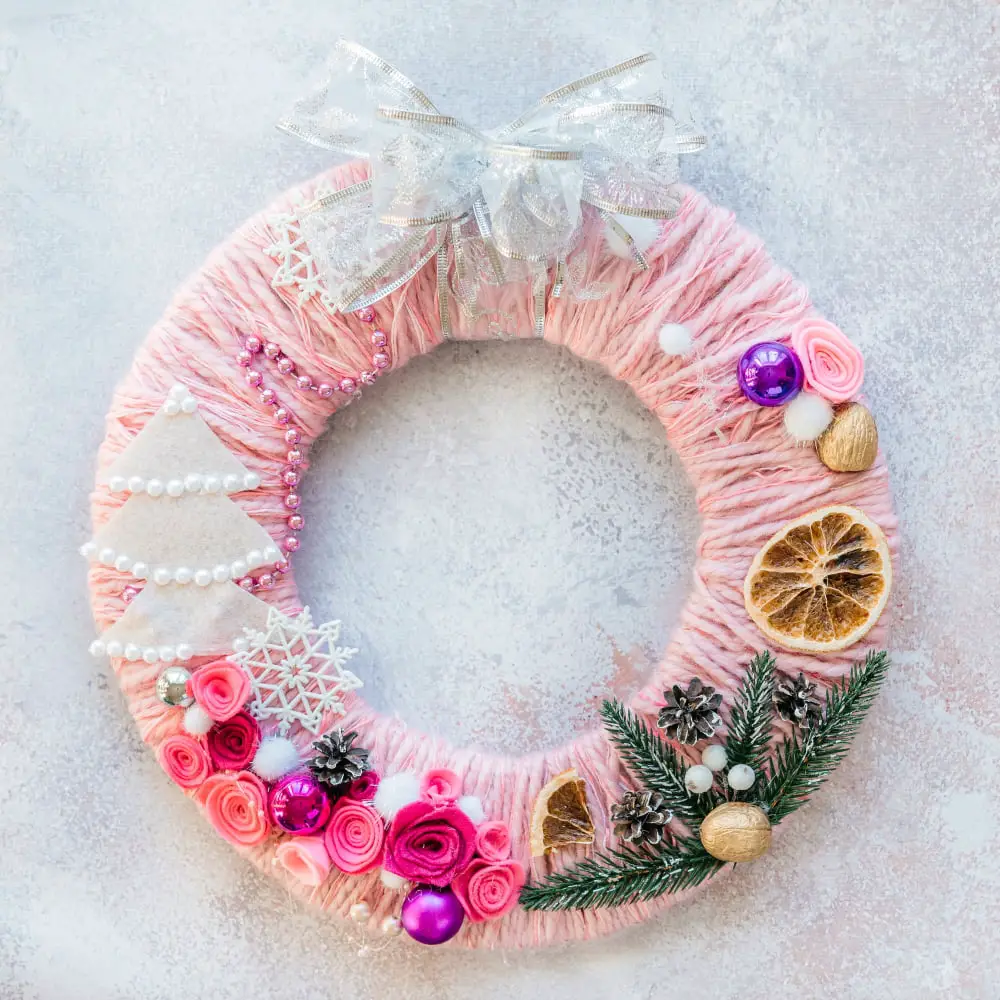
Presenting Your Final Yarn Wreath
Once your yarn wreath is complete and fully embellished, it’s time to find the perfect spot to showcase your creation. It could be the front door to welcome guests with a burst of handmade warmth, or maybe it earns a unique place on your fireplace mantle. Smaller wreaths find their home garnishing cabinets or window frames adding a cozy touch to your interiors.
An essential aspect is positioning. Hold your wreath against the background to find the best visual impact. Consider factors such as the color of the surrounding decor and the illumination in that spot.
Also, keep in mind, wreaths composed of delicate, plush yarns are best showcased indoors, away from the weather elements. Conversely, wreaths put together using rugged, weather-resistant yarn can stand as an enchanting exterior decoration. In the end, the objective is to emphasize the charm of your yarn artistry, making spaces homier.
Tips for a Successful Yarn Wreath Creation
Ensure your yarn is of good quality and not prone to frizz or unravel, for smooth and neat wraps around the wreath form. Choosing yarn in varying colors and textures can add depth and interest to the final product.
Keep your wraps consistent and tight. This helps avoid any gaps that may reveal the wreath form underneath. If a gap does form, simply loop the yarn over it and continue wrapping.
Take breaks if needed, especially if your hands get tired. This can prevent uneven wraps due to fatigue. Save your progress by securing the yarn with a knot or clip when pausing.
Don’t limit yourself to a traditional round wreath form. Experiment with different shapes for fun and unique outcomes. Likewise, explore options beyond just bows to embellish your wreath – think crocheted flowers, pompoms, or even small knitted items.
Remember that the back of the wreath should be as neat as the front, especially if it will be visible. Securing the yarn properly helps achieve this.
If using hot glue to attach embellishments, use it sparingly to avoid clumps that could distort the yarn wraps. Also, always apply it on the embellishment.
Be patient. The process can be time-consuming, but the results are undoubtedly rewarding. An excellent yarn wreath is built on meticulous attention to detail, careful crafting, and unbridled creativity.
FAQ
What are the essential materials needed to create a yarn wreath?
To create a yarn wreath, the essential materials required are a foam or straw wreath base, yarn in chosen colors, a hot glue gun with glue sticks, and any desired decorations like artificial flowers or ribbon.
Can you share a step-by-step guide on weaving a fall-themed yarn wreath?
Sure, a fall-themed yarn wreath can be crafted by selecting fall-colored yarns, wrapping them around a foam wreath base, and adding decorative elements like artificial leaves or miniature pumpkins.
What are some creative ideas for decorating a yarn wreath for various holidays?
For Christmas, decorate a yarn wreath with miniature ornaments and tiny lights, for Easter incorporate pastel colored eggs and spring flowers, for Halloween use spooky embellishments like faux spider web and little bats, and for Thanksgiving, adorn it with faux autumn leaves and miniature pumpkins.


