Explore the creative possibilities of yarn Christmas trees because they infuse festive charm into any space with their unique, handmade appeal.
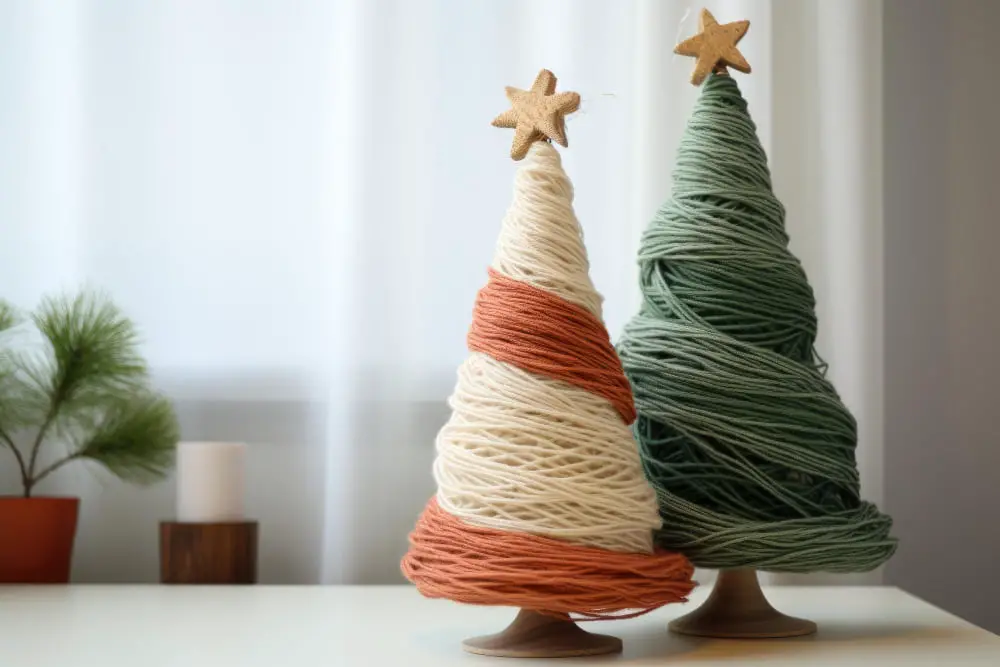
Creating yarn Christmas trees is a delightful way to add a cozy touch to your holiday decor. This craft project involves wrapping yarn around cone-shaped forms to create miniature trees, which can be decorated with beads, sequins, or tiny ornaments for a festive look.
This article will guide you through the process, from selecting the right type of yarn to adding the finishing touches. Whether you’re a seasoned yarn crafter or a beginner, you’ll find the detailed instructions and tips helpful.
So, let’s dive into the world of yarn Christmas trees and start crafting!
Key takeaways:
- Opt for soft and fluffy yarn in Christmas colors.
- Use cardboard or foam cones as the foundation.
- Secure the yarn with a hot glue gun.
- Decorate with beads, sequins, or small ornaments.
- Wrap the yarn tightly around the cone, leaving no loose ends.
Supplies Needed for Yarn Christmas Trees

For this craft you’ll require:
- Skeins of yarn: Opt for a soft and fluffy yarn, preferably in traditional Christmas colors like red, green, or white. However, let your creativity guide you to the colors you prefer most.
- Cardboard or foam cones: These will serve as the foundation, determining the size and shape of your yarn Christmas tree.
- Hot glue gun and glue sticks: These will secure the yarn onto the cone during the winding process.
- Scissors: For trimming the yarn at the starting and ending points.
Optional addons could include:
- Star Topper: To perch atop the tip of your yarn tree. You may also use a yarn pompom.
- Beads or small ornaments: For adding additional holiday sparkle to your yarn tree.
Remember, the type of yarn used can dramatically alter the look of these trees, such as chunky yarn for a rustic look or glitter-infused yarn for a twinkling effect.
Tools Necessary for Creating a Yarn Christmas Tree

In the lineup are several key tools that will make this wonderful Christmas craft achievable.
1. Crafting Yarn: Choose yarn colors that fit well with your Christmas décor. Green is a conventional choice, but don’t shy away from experimenting with different shades of reds, whites, or even pinks to add a festive burst of color.
2. Cardboard Cones: Various sizes are useful to create a group of trees for display. They are available at your local craft store or can be made at home with sturdy cardstock.
3. Hot Glue Gun: This tool is indispensable for securing the yarn to the cone. It offers quick adhesion and ensures neat finishing.
4. Scissors: A good pair of sharp scissors is required for clean yarn cuts.
5. Embellishments: Add a personal touch with additional decorations like glitter, sequins, or miniature ornaments.
Remember, these are just suggested tools. You have creative freedom to tweak the list based on the design you envision. After all, artistry is about personal expression.
Step-by-Step Tutorial to Make Yarn Christmas Trees
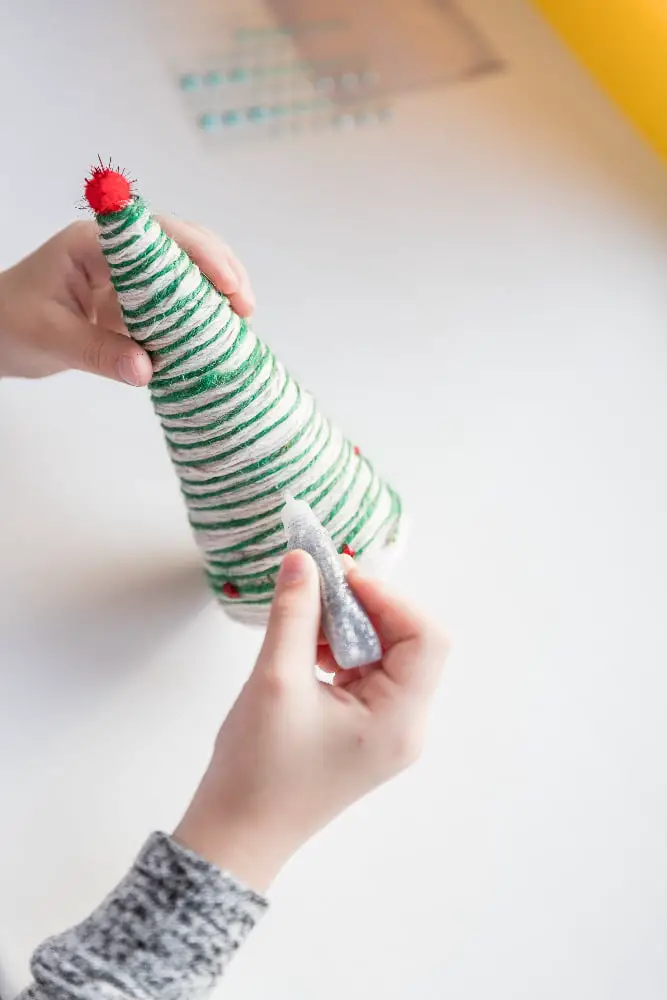
First, start by preparing your base. Use a foam or cardboard cone as your foundation. Wrap it entirely in plastic wrap if you’re planning on reusing the cone for other projects in the future.
Next, apply a small amount of glue at the top of the cone and attach the end of the yarn. From here, start wrapping the yarn around the cone. It should fit snuggly. Add a dab of glue every few wraps to make sure the yarn stays in place. You can choose to cover your cone completely or leave some gaps for a different visual aesthetic.
Then, when you reach the bottom, cut the yarn leaving an extra inch. Secure this last piece with glue, ensuring there are no loose ends. If you used a foam cone and want to make the tree stand upright, consider adding a wooden dowel or skewer to the bottom.
Lastly, it’s time to decorate and personalize your yarn tree. Use small ornaments, ribbons, beads, glitter or sequins. You could also add a star or bow at the top of the tree as a finishing touch. Remember – there’s no right or wrong way to do this. It’s all about adding your own personal touch.
Well done! You’ve successfully created your yarn Christmas tree.
How to Construct a Yarn Christmas Tree in Three Easy Steps

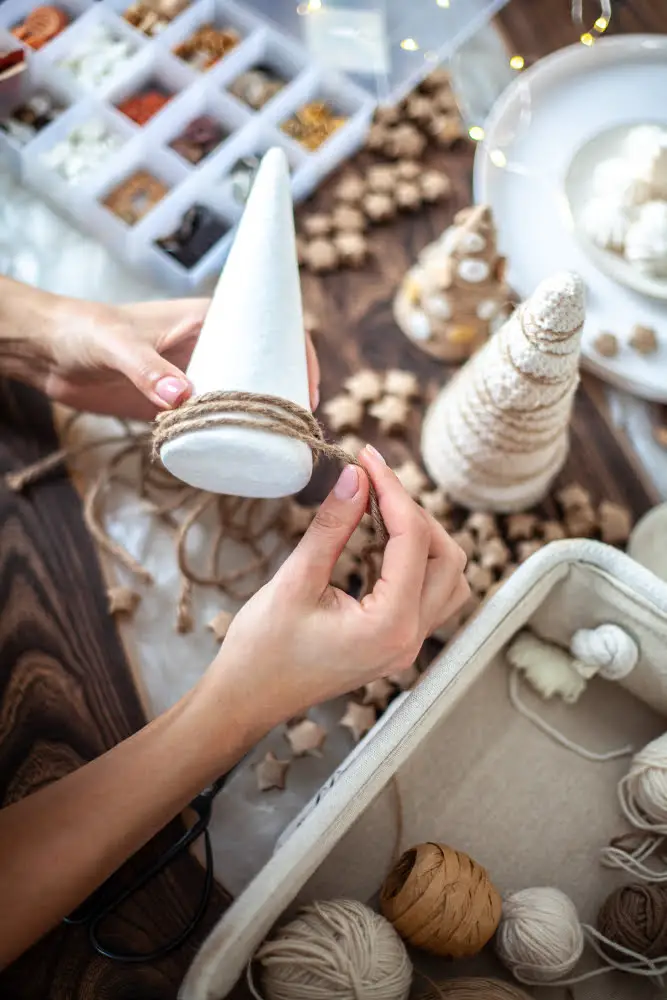
1. Create the Tree Frame:
Begin by forming a cone out of cardboard or poster board for your tree. This would serve as your tree frame. The height can vary based on preference, from miniature trees for decoration to larger, centerpiece-worthy ones. For added stability, use hot glue to secure your cone shape.
2. Prepare the Yarn:
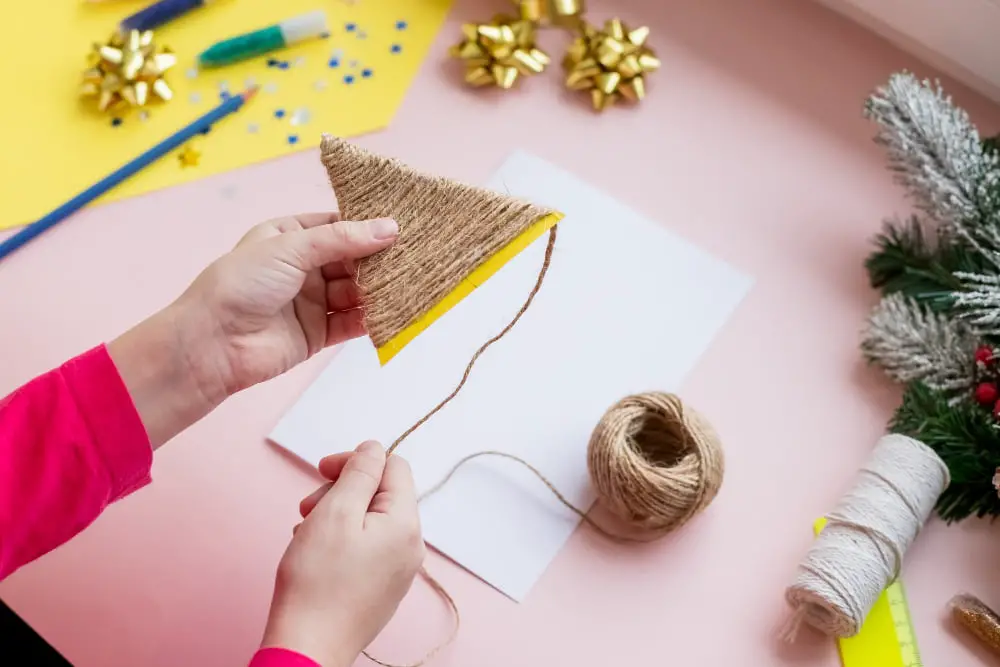
Choose your desired yarn. You can stick to traditional festive colors like greens, reds and whites, or venture out with pastels, metallic, or glitter-infused yarn. Cut your yarn into pieces. The pieces should be twice the height of your cone, plus some extra for an overflow-like effect.
3. Wrap the Yarn:
Apply a ring of craft glue around the base of the cone, then stick the midpoint of a yarn piece to it. Allowing the yarn to dangle from this midpoint creates fatter, fuller branches. Repeat this all the way around the base, and work upwards in layers until the entire cone is covered. Don’t worry about achieving perfect uniformity; the charm lies in the character of a homemade piece!
Remember to allow sufficient drying time before moving or arranging your yarn Christmas trees, to avoid disarraying your hard work. Follow these steps and you’ll have a unique, lovely previous Christmas tree that you’ll be proud of!
Yarn Christmas Tree Video Guide
A video guide can tremendously aid in crafting your Yarn Christmas Tree. This type of resource visually demonstrates each step, showing the techniques in real-time. Some key points this guide covers:
- 1. Set-Up: Organizing your crafting area and preparing your materials. Seeing this on-screen gives you an idea of a practical, efficient setup.
- 2. Crafting Techniques: Detailed displays of knotting, wrapping, and cutting techniques. This helps in mastering the tree shape.
- 3. Possible Variations: Showcases diverse designs you can create with different yarns and adornments.
- 4. Troubleshooting: Provides solutions for common issues, such as uneven yarn distribution or maintaining the tree form.
- 5. Pace: Allows you to follow along at a comfortable speed, with the ability to pause or rewind when necessary.
Remember, even though making Yarn Christmas Trees is a creative process, having a video guide can help in achieving the best possible results.
Elaborating On the Techniques Involved in Making Yarn Christmas Trees
Crafting a yarn Christmas tree involves a few key techniques. First and foremost, you’ll need to master the art of creating a cone, typically out of cardboard, which will serve as your tree structure. You’ll want to ensure the cone is well-constructed and sturdy as this will provide the necessary support for your yarn and adornments.
The next step is choosing and cutting your yarn. A variety of colors and textures can be used to provide character and depth to your tree. Cutting your yarn to the appropriate length will streamline the wrapping process.
Wrapping your cone with yarn is then the main activity. This can be done in many ways; some prefer a random approach, creating a more eclectic look, while others may choose a more organized, tiered look, emulating the layered appearance of a real-life pine tree.
The final technique involves decorating your tree. This is generally done with mini ornaments, sequins, or small pieces of ribbon. It’s up to personal preference and the design style you are aiming for. Be aware that delicate handling is required to ensure your decorations are secure, but not so secured that they squash the yarn underneath.
Remember, perfecting these techniques may take a few tries, but learning is part of the process. Be flexible and open to experiment with different yarn types and decoration placements until you’ve achieved your desired effect.
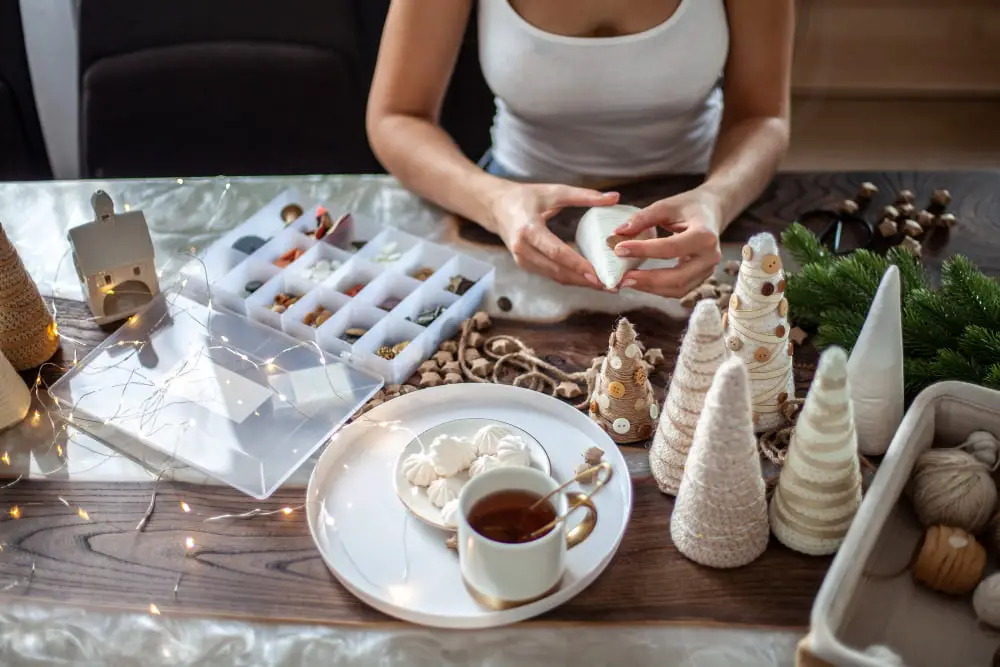
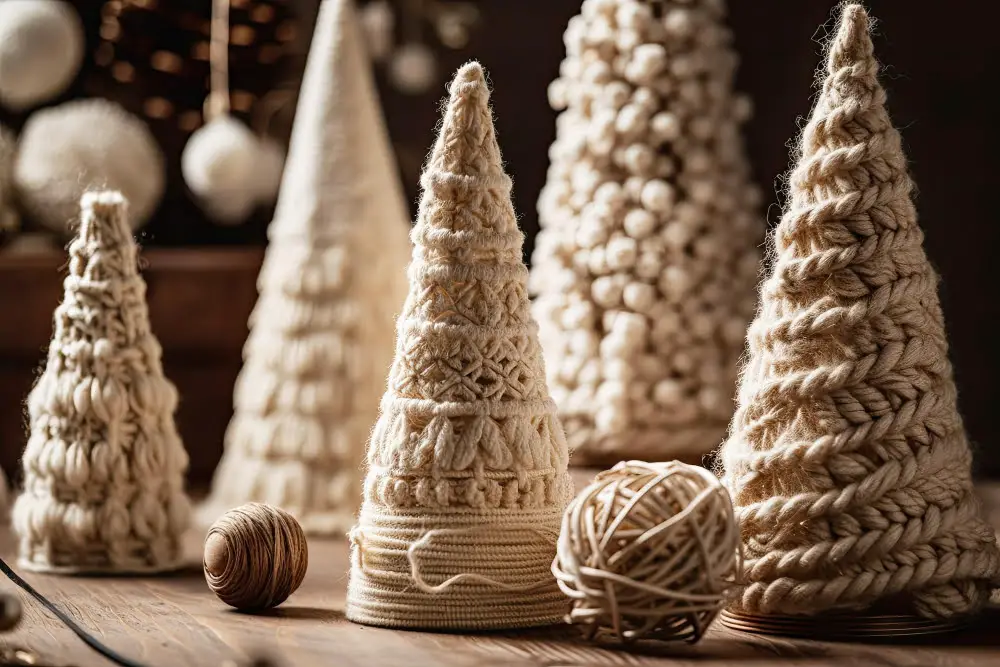
Ideas for Possible Variations of Yarn Christmas Trees
Diverse yarn types can alter the overall appearance of your Christmas trees, giving each one a unique style. Opt for a ruffled yarn to simulate pine needles, or use a tinsel yarn for a sparkly impact that doesn’t require extra decorations.
Playing with colours can add a vibrant flair. Traditional greens or reds are always a hit, but icy blues or stark whites can mimic a snowy scene. Stripes, rainbow yarn or using various shades of the same colour can create interesting patterns.
Incorporate embellishments into your design. Little ornaments, felted balls, or bows tied to the tips of the branches can add interest. A special tree topper can make a statement, like a bright star, or a rustic, natural pinecone.
Finally, altering the size and shape of your tree can create an engaging display. Miniature trees grouped together or a collection of towering spires of increasing height can enhance your festive decor. Feel free to experiment and let your creativity shine.
Boho DIY Yarn Christmas Trees Design Explanation
In the world of DIY and crafting, Boho style, or Bohemian style, references a design that is unique, artistic, and free-spirited. Incorporating Boho style into your Yarn Christmas Tree project adds a chic, eclectic flair.
1. Layered Fringe: This is the heart of the Boho style. Instead of wrapping the yarn tightly around your tree base, create rows of loose, multi-layered fringe.
2. Varied Yarn Texture: Mingle different types of yarn—think thick, thin, boucle, or even sparkly fibers—for a carefree, boho look.
3. Natural Color Palette: Opt for earth tones like beige, grey, olive, or amber. Keep in mind, no strict color rules apply in the Boho universe.
4. Add ons: Boho style welcomes the use of ornaments such as beads, feathers, tassels, or small charms.
To truly capture the Boho spirit, remember that perfection is not the goal. Let your creative spirit loose and create something that feels handmade and unique to you. A Yarn Christmas Tree in this style will surely radiate warmth and charm.
Utilising Yarn Christmas Trees in Christmas Decor
When it comes to holiday decorating, yarn Christmas trees provide a perfect opportunity to add a unique touch to your settings. They can be used as table centerpieces, mail mantle highlights, or as an addition to your traditional Christmas decor.
Place them by your windows for a charming display that can be seen from outdoors. A cool tip – jazz up your holiday table spots by using these trees as placeholders. Add a pop of color and texture to your guest bedrooms by placing a tree on each nightstand.
Moreover, these elegant pieces can be used to create a mini Christmas woodland scene. Just add a few miniature Christmas characters and voila – you’ve got a whimsical holiday display!
Tips On Where to Position Yarn Christmas Trees During the Holidays
Balancing your space with Yarn Christmas Trees is key. Here are few tips for their placement:
1. Central Focus: Choose your tree as the centerpiece on a dining or coffee table. Be sure to select an appropriate height so it doesn’t obstruct views.
2. Shelf Magic: An array of these trees on a shelf, mantle, or window sill creates a whimsical forest effect. Use varying sizes for added interest.
3. Table Setting: Smaller trees work wonderfully as unique placeholders on your holiday table. Each guest gets a festive souvenir!
4. Beneath Your Tree: Placing a few larger ones beside your traditional Christmas tree presents a fun, textured contrast.
5. Outdoor Charm: Sturdy, outdoor-friendly versions can adorn your front porch, welcoming guests with holiday cheer.
Remember, your placement should enhance your décor, never overpower it.
FAQ
How do you make a Christmas tree out of a blanket?
To make a Christmas tree out of a blanket, fold a standard size throw blanket into quarters, cut a circle in the center large enough for the tree trunk, and then cut across the indicated line to wrap it around the tree base.
How can you use yarn to create Christmas tree ornaments?
Yarn can be used to create Christmas tree ornaments by crafting them into shapes such as stars, balls, or miniature sweaters, often through techniques like knitting, crocheting, or looping yarn around wire frames.
What is the process of knitting a Christmas tree skirt?
Knitting a Christmas tree skirt involves selecting a pattern and yarn, knitting the individual sections following the pattern’s instructions, then joining them together and adding any embellishments.
Can you provide instructions for a Christmas tree made entirely from crochet?
To create a crochet Christmas tree, you need to start with a slipknot, chain six together with a slip stitch to form a ring, then alternate between single and double crochet stitches, increasing them in each row to create the Christmas tree’s form.


