Discover the world of crochet as we unravel the various types of loops, enhancing your skills and expanding your creative possibilities in every stitch you make.
Crochet is a wonderful craft that involves creating beautiful designs using loops of yarn. But did you know that there are different types of crochet loops? Each type has its own unique characteristics and uses, making it important to understand which loop works best for your project.
Whether you’re new to crochet or a seasoned pro, learning about the different types of loops can help take your skills to the next level. So, let’s dive in and explore the world of crochet loops!
Getting Started

Before we dive into the different types of crochet loops, let’s start with the basics. If you’re new to crochet, it can be overwhelming at first.
But don’t worry! With a little bit of practice and patience, you’ll soon be creating beautiful designs in no time.
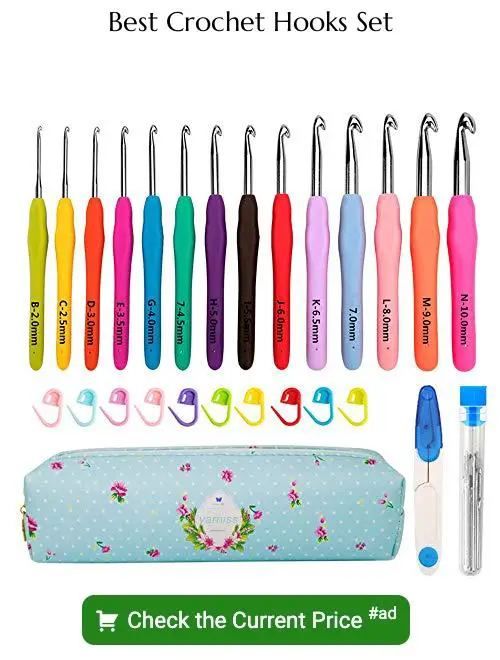
To get started with crocheting loops, you’ll need a few essential tools: a crochet hook and some yarn. The size of your hook will depend on the thickness of your yarn – thicker yarn requires larger hooks while thinner yarn needs smaller ones.
Once you have your materials ready, it’s time to learn how to make basic chain stitches. This is where all other types of loops begin from; therefore mastering this stitch is crucial for any beginner who wants to advance their skills in crocheting.
To create chain stitches:.
- ) Make a slip knot by looping one end over itself.
- ) Insert your hook through the loop and tighten.
- ) Hold onto both ends (yarn tail & working end).
- ) Twist or rotate wrist slightly towards yourself so that working end goes under/over top part (hook).
- ) Pull down gently until desired length achieved
- ) Repeat steps 2-5 as many times as needed
Chain Stitch Loops
They create a base for all other stitches to be built upon, and they’re also used to create decorative elements in many patterns. To make a chain stitch loop, you’ll need to start with a slip knot on your hook and then pull yarn through the loop on your hook until you have created as many chains as required by your pattern.
One of the great things about chain stitch loops is that they can be made in any size or length depending on what project you’re working on. For example, if you want to make an afghan blanket that’s 50 inches wide, then starting with 150 chains will give it enough width.
Another benefit of using chain stitch loops is their versatility; they can be used for everything from simple scarves and hats to intricate lace doilies or even amigurumi toys! Once mastered this basic technique opens up endless possibilities for creativity.
Mastering how-to crochet Chain Stitch Loops is essential when learning how-to-crochet because it forms the basis of most projects.
How to Crochet Chain Stitch
The chain stitch is one of the most fundamental stitches in crochet and is used as a foundation for many other stitches. It creates a series of interlocking loops that form a chain-like structure.
How to Crochet Chain Stitch.
To create a chain stitch, you’ll need to start by making a slip knot on your hook. Then, wrap your yarn over the hook from back to front and pull it through the loop on your hook (this is called “yarn over” or YO).
You’ve just made one chain stitch!
Repeat this process until you have created as many chains as needed for your project. Remember to keep an even tension throughout each loop so that they are all uniform in size.
Single Crochet Loops
They create a dense, sturdy fabric that is perfect for making items like dishcloths, scarves, and blankets. To make a single crochet loop, you will need to start with a foundation chain and then work into each stitch using your hook.
To begin working single crochets in the first row after your foundation chain:
- Insert your hook into the second chain from the hook.
- Yarn over (wrap yarn around your hook) once.
- Pull up one loop through both chains on top of it.
- You should now have two loops on your hook
- Yarn over again
- Pull through both loops
Repeat steps 1-6 across until you reach end of row.
In subsequent rows: Chain 1 at beginning turn, Insert Hook under front loop only (or back if pattern calls for it), Yarn Over, Pull Through Stitch, Yarn Over Again, Pull Through Both Loops On Hook.
How to Single Crochet
It creates a dense, sturdy fabric that’s perfect for making items like dishcloths, scarves, hats and more. To get started with single crochet loops, you’ll need to know how to make a foundation chain.
- Make a slip knot: Start by making a slip knot on your hook.
- Chain stitch: Next step is to create the foundation chain by chaining as many stitches as required for your project.
- Insert hook into second chain from hook: Once you have made your foundation chain row(s), insert the hook into the second stitch from the end of your row (not counting loop on hook).
- Yarn over and pull through loop: Wrap yarn around needle once (yarn over) then draw it through both loops on needle at once.
- Repeat steps 3-4 until end of row.
Half Double Crochet Loops
They are taller than single crochet loops but shorter than double crochet loops, making them versatile and perfect for creating texture in your projects. To create a half double crochet loop, you will need to start with a foundation chain of stitches before working the half double crochets into each stitch.
To begin, make a slip knot and then chain an even number of stitches. Next, yarn over your hook once and insert it into the third chain from the hook.
Yarn over again and pull through all three loops on your hook to complete one half-double-crochet stitch.
Continue this process across the row until you reach the end of your foundation chain or desired length. Remember to always work into both sides of each stitch when working back across rows.
How to Half Double Crochet
It creates a dense fabric with more texture than single crochet, making it perfect for blankets, scarves, hats and other projects.
To start an HDC stitch, make a foundation chain as long as you need for your project. Then yarn over once before inserting your hook into the third chain from the hook.
Yarn over again and pull through all three loops on your hook to complete one HDC.
Continue working in this way across each chain until you reach the end of your row or round. Remember to turn at the end of each row if you’re working flat.
Once you’ve mastered basic half double crocheting techniques, there are many variations that can be used to create unique textures or patterns in your work such as front loop only (FLO), back loop only (BLO), third loop HDCs among others.
Double Crochet Loops
This type of loop is taller than the single crochet, making it ideal for creating more open and airy designs. To create a double crochet loop, you will need to start with a foundation chain and work your way up row by row.
To begin, make sure that your foundation chain has an even number of stitches. Then, yarn over once before inserting your hook into the third stitch from the hook (the first two chains count as one double crochet).
Yarn over again and pull through the stitch so that you have three loops on your hook.
Next, yarn over again and pull through two of those loops on your hook. You should now have two remaining loops on your hook.
Yarn over one last time and pull through those last two remaining loops to complete one double crochet stitch.
Repeat this process across each stitch in the row until you reach the end where you will turn around to start another row using this same technique.
How to Double Crochet
It creates a taller stitch than single or half-double crochet, making it great for creating texture and height in your projects. To get started with double crochet loops, follow these simple steps:
- Begin by chaining two stitches.
- Yarn over the hook once before inserting the hook into the third chain from your hook.
- Yarn over again and pull through only one loop on your hook (this will create a base chain).
- Yarn over again and pull through two loops on your hook.
- Finally, yarn over once more and pull through the remaining two loops.
Repeat these steps until you reach the end of your row or project.
Treble Crochet Loops
Also known as triple crochet, this stitch is taller than the double and single crochets, making it perfect for creating lacy designs or adding length to your project quickly.
To create a treble crochet loop, you will need to yarn over twice before inserting the hook into the desired stitch. This creates an extra loop on top of your hook that you will work through during each step of the stitch.
Once inserted into the designated space, yarn over again and pull through two loops on your hook. Repeat this process until only one loop remains on your hook.
The treble crochet can be used in various ways such as working rows of tall stitches for scarves or shawls or incorporating them into intricate lace patterns for doilies or table runners.
How to Treble Crochet
It creates a taller stitch than double or single crochets and can be used to create lacy patterns or add texture to your work. Here’s how you can treble crochet:
- Begin by making two yarn overs around the hook.
- Insert the hook into the next stitch and make another yarn over.
- Pull this loop through the first two loops on your hook.
- Yarn over again and pull through two loops on your hook twice.
Congratulations! You have just completed one treble crochet stitch.
Remember that each pattern may have different instructions for working with treble stitches, so always read carefully before starting any project involving this type of loop.
Slip Stitch Loops
They are used to join rounds, create edges, or add decorative details to your project. Slip stitches can also be used as a foundation for other stitches like single crochet or double crochet.
To make a slip stitch loop, insert your hook into the next stitch and yarn over (wrap yarn around hook). Then pull through both loops on the hook in one motion.
This creates a small knot that secures your work without adding any height.
One advantage of using slip stitch loops is that they create an even edge with no visible bumps or ridges. This makes them perfect for finishing off projects like blankets, scarves, hats and more.
Another great use for slip stitches is creating surface designs on top of other crocheted fabric such as flowers or letters by working in rows across previously made chains.
How to Crochet Slip Stitch
They can be used to join rounds, create edges or seams, or even as a decorative element. To make slip stitch loops, you’ll need to start with a chain stitch loop.
To begin making slip stitches:.
- Insert your hook into the next chain stitch.
- Yarn over and pull through both the chain and loop on your hook.
- Repeat steps 1-2 until you reach the end of your row.
It’s important to note that slip stitches don’t add height to your work like other crochet stitches do; instead, they create a tight seam that’s perfect for joining pieces together or creating edging around an item.
Foundation Crochet Loops
This technique allows you to work both the foundation row and the first row of stitches at the same time, saving you time and effort. Foundation loops can be used for any type of crochet stitch, including single crochet, double crochet, treble crochet or even more complex stitches like shells or clusters.
To make foundation loops in single crochets (FSC), begin by making two chains instead of one as usual. Then insert your hook into the second chain from hook and pull up a loop (two loops on hook).
Yarn over again and pull through just one loop on your hook creating an extended chain that will serve as both base ch-1 space for next sc stiches in this row AND also counts as 1st sc stich itself. Continue working FSCs until you have reached desired length needed for starting rows with other types of stitches.
Front Loop Crochet
This creates an interesting texture and can be used to create ribbing or other decorative effects. To work in the front loop, simply insert your hook into the desired stitch from front to back, then yarn over and pull through as usual.
One popular variation of Front Loop Crochet is called Thick and Thin Front Loop Single Crochet Stitch. This technique alternates between working one single crochet stitch in both loops of a previous row’s single crochet (creating a thick section) with one single crochet worked only into the front loop (creating a thin section).
The result is an eye-catching pattern that adds depth and dimension to any project.
To try this technique yourself, start by chaining your desired number of stitches for your foundation row. Then work several rows of regular single crochets before beginning your first Thick/Thin Row: *work 1 sc into each st across until you reach last st; then work 2 sc sts together using both loops*.
Repeat from *to* until end. Continue alternating between regular rows and Thick/Thin Rows for as many times as needed for completing your project.
Back Loop Crochet
This creates an interesting texture and can be used to create ribbing or other decorative effects. To work in the back loop, simply insert your hook into the back loop of the stitch instead of both loops as you normally would.
This technique is commonly used for creating cuffs on hats or sleeves on sweaters because it creates a stretchy fabric that hugs tightly to your body. It’s also great for adding texture and interest to scarves, blankets, and other projects.
To try this out yourself, start with a simple project like crocheting a scarf using only single crochet stitches worked through just one back loop each row. You’ll quickly see how easy it is to create beautiful textures with this simple technique!
Thick and Thin Front Loop Single Crochet Stitch
This technique creates a textured fabric that alternates between thicker and thinner rows, adding depth to your project. To achieve this effect, you will work in the front loops only of each row, creating ridges on one side and bumps on the other.
To start this stitch pattern, begin with a foundation chain in any even number. Then work one row of single crochets across your chain using both loops as usual.
From there on out you’ll be working into just the front loop for every subsequent row.
This technique can be used to create anything from scarves to blankets or even garments like sweaters or hats! The possibilities are endless when it comes to incorporating this fun texture into your projects.
Mastering different types of crochet stitches opens up new avenues for creativity while also improving skills as an artisan crafter.
How to Crochet Thick and Thin Front Loop Single Crochet Stitch
This stitch creates a bumpy, almost 3D effect that looks great on scarves, hats, blankets or any other project you can think of.
To start this stitch, you will need to know how to do the basic single crochet (SC) stitch. Once you have mastered the SC technique, it’s time for some fun with loops!
Firstly make sure that your yarn is not too bulky as it may be difficult for beginners. Start by making a chain of stitches in multiples of two plus one extra chain at the end.
Next step is working into each front loop only across all chains until reaching the end where there should be one remaining back loop unworked.
Then turn around and work another row using only back loops until reaching again at last unworked front loop from previous row which should now become visible after turning around. Repeat these two rows alternately until desired length has been achieved while keeping tension consistent throughout every row worked.
This simple yet effective technique adds depth and dimensionality to any project without being too complicated or overwhelming for beginners.
Puff Stitch Loops
This stitch creates a raised, puffy effect that can be used in various ways, from creating cute little animals or flowers to adding interest to blankets or scarves.
To make the puff stitch loop, you will need basic knowledge of single crochet stitches. The technique involves working several incomplete single crochets into one stitch before completing them all at once.
This results in a cluster of loops that create the “puff” effect.
One thing you’ll love about this type of loop is its versatility – it can be worked with any yarn weight and hook size depending on how big or small you want your puffs to be! You can also experiment with different colors for each puff for an eye-catching design.
If you’re new to this technique, don’t worry! There are plenty of tutorials available online that provide step-by-step instructions on how to work the puff stitch loop.
How to Make a Puff Stitch
It’s created by working multiple stitches into the same stitch, then pulling them all through at once to create a “puff.” Here’s how you can make a puff stitch:.
1. Begin by chaining an even number of stitches.
2. Yarn over (yo) your hook, insert it into the second chain from the hook, yo again and pull up a loop.
3. Repeat step 2 in each chain across until you have as many loops on your hook as desired for one puff.
4. Yo again and pull through all loops on your hook at once.
- Chain one (ch 1) after completing each puff so that they are separated from each other.
- Repeat steps 2-5 across until you reach the end of row or round depending on what pattern calls for.
Bobble Stitch Loops
This stitch creates small, raised bumps that can be used in a variety of ways, from creating polka dots on a baby blanket to adding interest to the border of an afghan.
To create bobble stitch loops, you will need basic knowledge of single crochet stitches. The technique involves working several half-double crochets into one stitch and then pulling them all through at once.
This creates the signature “bobble” effect.
One great thing about this type of loop is that it’s versatile enough for both beginner and advanced crocheters alike. If you’re new to crochet or just looking for something simple yet effective, try using bobble stitches as accents throughout your project.
For more experienced crafters who want something challenging but rewarding – consider incorporating bobbles into intricate designs like flowers or geometric shapes.
Popcorn Stitch Loops
This stitch creates small, raised bumps that resemble little popcorn kernels. Popcorn stitches can be worked in any type of loop, from single crochet loops to treble crochet loops.
To work the popcorn stitch, you will need to make several double crochets (or other stitches) into the same loop or space. Then, you will close all of these stitches together with a slip stitch at the top.
One great thing about the popcorn stitch is that it’s very versatile – you can use it as an accent on a larger piece or create an entire project using only this one technique! It also works well for creating 3D shapes like flowers or leaves.
If you’re new to working with textured stitches like this one, don’t worry – practice makes perfect! Start by making small swatches until you get comfortable with how each row should look before moving on to bigger projects.
Shell Stitch Loops
It’s perfect for adding texture and interest to blankets, scarves, shawls, and more. The shell stitch is made up of multiple stitches worked into the same stitch or space to create a fan-like shape.
To work the basic shell stitch, you’ll need to know how to double crochet (dc) and chain (ch). Start by chaining an even number of stitches plus two extra chains for turning.
Then skip the first two chains from your hook and work one dc in each remaining chain across.
For row 2: Chain three (counts as first dc), then *skip next 2 sts; work [5 dc-ch1-5dc] all in next st; skip next 2 sts**, then repeat from * across ending last rep at **; turn.
Repeat row 2 until you reach your desired length or complete your project. There are many variations on this basic pattern such as treble shells or lacy treble shells which can be used alone or combined with other patterns like stripes for added visual appeal.
How to Work the Shell Stitch
It’s made up of several double crochets worked into the same stitch, creating a “shell” shape. Here’s how to work the shell stitch:
1. Start by chaining an even number of stitches.
2. Skip the first three chains from your hook, then work 5 double crochets in the fourth chain from your hook.
3. Skip two chains, then single crochet in the next chain.
4. *Skip two chains, then work 5 double crochets in the next chain.* Repeat this pattern across until you reach the end of your row.
5. Chain three and turn your work.
6. Work a single crochet into each space between shells across until you reach end of row.
7. Chain four (this counts as one treble), skip first sc; *work (1 tr,ch2 ,1tr) all in next sc for corner; skip 2scs ; repeat from* ending with ch-2 , join with slip stich at top pf beginning ch-3.
8. Slip Stitch over to center corner space.
9. Ch4( counts as one treble); *(work 3tr,ch2 ,3tr) all In center sp for corner ; skp nxt sp betwn shells ; repeat form* around ending with sl st at top pf beg ch-4.
10 – Continue repeating steps seven through nine until desired length is reached.
Ways to Use Shell Stitch
One of the most popular uses for the shell stitch is creating borders or edgings on blankets, scarves, shawls, and other items. The gentle curves of the shells add a touch of elegance to any project.
Another way to use the shell stitch is by incorporating it into larger sections of your work. You can create rows or rounds using only this loop for an all-over textured effect that looks great on sweaters, cardigans, hats and more.
You can also experiment with different variations such as treble shells or lacy treble shells which give you even more options when it comes to designing unique patterns.
In addition to these traditional uses for the shell stitch loops there are also some creative ways you could incorporate them into your projects like making jewelry pieces such as earrings or necklaces with small motifs made from this pattern repeat.
Treble Shell Stitch
This stitch consists of multiple treble crochets worked into the same stitch, creating a shell-like shape. The treble shell stitch is perfect for blankets, scarves, shawls or even as an edging on clothing items.
To work the treble shell stitch, you will need to know how to do a basic treble crochet. Once you have mastered this skill, working the treble shell becomes easy.
To start off with this pattern:
- ) Chain an even number of stitches.
- ) Skip 3 chains from your hook (these count as your first double crochet).
- ) Work 5 double crochets in next chain.
- ) Skip two chains then work one single crochet in next chain.
- ) *Skip two chains then work five double crochets in next chain; repeat from * across until there are three stitches left at end of row; skip two chains then make one half-double-crochet in last chain
- -8 rows: Chain three (counts as first dc), turn; skip first stiches and make five more dc’s into center sc between shells below;
- th Row: Repeat step 5
By following these simple steps repeatedly till desired length achieved creates beautiful patterns that can be used for various projects like afghans or baby blankets etcetera.
Mastering different types of loops opens up endless possibilities when it comes to creating unique designs using yarn crafts such as Crochet.
How to Work the Treble Shell Stitch
It’s made up of several treble crochets worked together in the same space, creating a shell-like shape. Here’s how to work the treble shell stitch:
- Start by chaining a multiple of 6 stitches plus 3 additional chains for turning.
- Skip the first three chains from your hook (these count as your first double crochet) and make one double crochet into each chain across.
- Chain three, turn your work, then skip the next two stitches.
- Work seven triple crochets into the next stitch (this creates one “shell”).
- Skip two stitches, then single crochet into each of the next three stitches.
- Chain three again before skipping another two stitches and working another “shell” with seven triple crochets in it.
Repeat steps four through six until you reach end-of-row or desired length.
Lacy Treble Shell Stitch
This stitch involves creating shells of treble crochets separated by chains, resulting in a lacy and open design. The lacy treble shell stitch is perfect for creating lightweight shawls, scarves, or even summer tops.
To work the lacy treble shell stitch, you will need to have some experience with basic crochet stitches such as chain stitches and double crochets. Once you have mastered these techniques, the process of working this intricate pattern becomes much easier.
To begin the Lacy Treble Shell Stitch:.
- Start with a foundation chain in multiples of 6 plus 3.
- Skip first three chains from hook (counts as first dc), then make one double crochet into each remaining chain across.
- Chain three (counts as first tr) turn your work around
- .Skip two dc sts from previous row; *work [5tr-ch2-5tr] all into next st; skip next two sts* repeat between ** until end of row ending last rep at third ch st;
- .Make one trc into top turning ch
Repeat steps four and five until desired length is reached.
How to Crochet the Lacy Treble Shell Stitch
This stitch creates a series of shells with open spaces in between, giving it its signature lacy look. To get started, you’ll need to know how to work the treble crochet stitch.
To begin the lacy treble shell stitch, chain a multiple of 6 stitches plus 3 additional chains for turning purposes. Then skip the first two chains from your hook and work one double crochet into each remaining chain across.
Next comes the fun part – creating those lovely shells! To do this, start by chaining three stitches (this counts as your first treble). Then skip two stitches from your previous row and work five more triple crochets into the next single crochet space.
After completing these six triple crochets in one space, create another chain-2 loop by skipping two more single crochets on either side of this group before working another set of six triples into that next available space again. Repeat this process until you reach end-of-row or desired length then finish off with one last double-crochet row at top edge.
Cluster Stitch Loops
This stitch is created by working multiple stitches into the same stitch or space, creating a cluster of stitches that stand out from the rest of the fabric. Cluster Stitch Loops can be worked in any type of yarn and with any size hook, making it versatile for all kinds of projects.
To create Cluster Stitch Loops, you will need to know how to work basic crochet stitches such as single crochet (sc), double crochet (dc), or treble crochet (tr). The number of stitches worked into each cluster will depend on your pattern’s instructions.
One popular variation is the 3-double-crochet-cluster stitch which involves working three double crochets together in one stitch or space. To make this cluster: yarn over once, insert hook into designated st/sp; pull up loop; yarn over again; draw through two loops on hook twice more until there are four loops left on your hook then finally pull through all four loops at once.
V-Stitch Loops
It’s made up of two double crochets and one chain stitch, which are worked together to form the “V” shape. This versatile stitch can be used in many different ways, from creating lacy shawls and scarves to adding texture to blankets and afghans.
To work the V-stitch loop, you’ll need to know how to double crochet (dc) and chain (ch). Here’s how it works:
- Chain an even number of stitches for your foundation row.
- Double crochet into the fourth chain from your hook.
- Chain 1.
- Skip one chain space.
- Double crochet into the next available space or stitch
- Chain 1 again
- Repeat steps 4-6 until you reach end of row
When working subsequent rows:
- Chain three at beginning as turning ch,
- Double Crochet in first ch-space,
- Ch-chain once more
- Work another dc-ch-dc combo in each ch-space across
Repeat these steps until you’ve reached your desired length.
How to Crochet the V Stitch
It’s made up of two double crochets worked into the same space, separated by a chain stitch. The result is a series of “V” shapes that create an open, lacy effect.
To get started with the V stitch, you’ll need to know how to work basic crochet stitches like chains and double crochets. Once you have those down pat, follow these steps:
- Chain an even number of stitches for your foundation row.
- Skip the first three chains (these will count as your first double crochet).
- Work one double crochet in each chain across until you reach the end of the row.
- Chain three (this counts as your first V-stitch).
- Work another DC in same stich where ch 3 was made
- Chain one
- Work another DC in same stich where previous dc was made
- Repeat step 5-7 till end
That’s it! You’ve just created your very own V-stitch pattern.
Experiment with different yarns and hook sizes to achieve different effects – try using thicker yarn for chunky blankets or scarves or thinner thread for delicate shawls or doilies.
V Stitch in Brick Repeat
This stitch involves working the classic V-stitch in a staggered pattern to create an interlocking brick-like effect.
To work this stitch, you’ll need to know how to make a basic V-stitch. Once you have mastered this technique, it’s easy to adapt it into the brick repeat pattern by simply staggering each row of stitches.
One of the great things about using the V stitch in brick repeat is that it creates an interesting texture while still being relatively simple and quick to work up. Plus, with so many different color combinations available for your yarn choice – from bold brights or soft pastels – there are endless possibilities when creating your project!
How to Crochet the V Stitch in Brick Repeat
This stitch creates an interesting texture that looks like bricks stacked on top of each other. It’s also easy to learn, making it perfect for beginners who want to try something new.
To start the V stitch in brick repeat, you’ll need to know how to work the basic V stitch. To do this, chain an even number of stitches and then skip two chains from your hook.
In the third chain from your hook, work one double crochet (dc). Chain one (ch 1), skip one chain and then work another dc into the next chain.
For row two onwards: turn your work around; ch 2; *work a v-stitch by working [1 dc + ch 1 + 1 dc] into space between previous row’s v-stitches* Repeat ** across until end with last st being worked under turning-ch-2. Repeat this pattern across every row until you reach your desired length or complete as per instructions given for any project you are working on.
Once you’ve mastered the basic V stitch, creating a brick repeat is simple! All you have to do is alternate where each set of stitches begins so they stack up like bricks when viewed vertically instead horizontally as seen in most patterns using regular rows or rounds.
Picot Stitch Loops
It’s often used as an edging or border for blankets, scarves, and shawls. The Picot Stitch creates small loops along the edge of your work by chaining three stitches and then slip stitching into the first chain stitch to create a tiny loop.
To make this stitch, you’ll need to have basic knowledge of how to single crochet and chain stitches. Once you’ve mastered these techniques, creating picots will be easy-peasy! You can experiment with different yarns and hook sizes until you find what works best for your project.
Picots are versatile in their use; they can be spaced out evenly or clustered together tightly depending on the desired effect. They also come in various sizes from small picots that add subtle texture all the way up to large ones that make bold statements.
Loop Stitch
It creates loops of yarn on the surface of your work, giving it a fluffy appearance. This stitch can be used for various items such as scarves, blankets, or even stuffed animals.
To create the loop stitch, you will need to insert your hook into the desired stitch and pull up a loop. Then wrap the yarn around your finger twice before inserting it back into that same stitch from front to back.
Next, grab hold of both loops with your hook and pull them through until they are about 1 inch in length. Repeat this process across each row until you have achieved the desired look.
The Loop Stitch is perfect for creating soft textures in baby blankets or adding some extra fluffiness to hats or scarves.
Magic Ring Loops
It creates a tight center that can be adjusted to fit any size and shape of your project. This technique is especially useful when making amigurumi or other small projects where you want to avoid having a hole in the center.
To create this type of crochet loop, begin by wrapping your yarn around two fingers twice. Next, insert your hook under both loops and pull up a loop through them.
Then chain one stitch before working single crochets into the ring until you reach your desired number.
Using this method will give you more control over how tightly or loosely closed your circle is at its center point than traditional methods like chaining multiple stitches together before joining them with slip stitches.
Adjustable Loop Technique
This technique allows you to create a tight center for your project that can be adjusted according to your needs. It’s perfect for projects like amigurumi toys and hats where you need a small and neat starting point.
To make an adjustable loop, begin by making a slip knot with your yarn leaving about 6 inches of tail. Hold the slip knot between your thumb and index finger with the tail end facing down towards you.
Next, wrap the working yarn around two fingers (usually index and middle) twice in an anticlockwise direction so that it crosses over itself at one point on top of both loops.
Insert hook under first strand from back-to-front then grab second strand from front-to-back using hook tip; pull through first strand creating chain stitch; this will secure both strands together forming circle.
Now insert hook into center of circle created by wrapping yarn around fingers earlier.
Grabbing working end again bring up another chain stitch through center hole made previously before pulling tight enough until desired size achieved while still keeping tension consistent throughout process.
This method creates an even tensioned foundation row which makes it easier when counting stitches later on in pattern repeats or rounds.
Crocodile Stitch Loops
This stitch creates a scale-like effect that resembles the skin of a crocodile, hence its name. The Crocodile Stitch is worked in two rows: the first row creates the scales, while the second row secures them in place.
To create this stitch, you will need to know how to work double crochet stitches and chain stitches. Once you have mastered these basic techniques, you can start experimenting with different yarns and colors for your Crocodile Stitch projects.
Some popular items made using this technique include hats, scarves, bags or purses as well as blankets or throws. You can also use it on smaller items like gloves or booties for babies.
Crochet Moss Stitch or Granite Stitch
It’s perfect for creating scarves, blankets and even dishcloths. The stitch pattern alternates between single crochet and chain stitches to create a woven effect.
To work the moss stitch or granite stitch, you’ll need to know how to single crochet (sc) and chain (ch). Start by chaining an even number of stitches for your foundation row.
Then sc in the second ch from hook and ch 1. Skip one st then sc in next st followed by another ch 1.
Repeat this pattern across until you reach the end of your row making sure that you end with an sc into last chain space before turning your work around.
For subsequent rows continue working alternating single crochets into each previous row’s chain spaces while chaining one between them all along till end of each new row.
How to Crochet the Moss Stitch
It’s perfect for creating scarves, blankets and even dishcloths. The moss stitch involves alternating single crochets and chain stitches in each row to create an interesting texture.
To start the moss stitch, you’ll need to begin with an even number of chains. Then work one single crochet into the second chain from your hook.
Chain one and skip one chain space before working another single crochet into the next space.
Continue this pattern across your foundation row until you reach the end of your chains. For subsequent rows, start by chaining two before working a single crochet into each chain-one space from previous rows.
Repeat this process until you’ve reached your desired length or size for your project. The beauty of using different colors when making this type of loop is that it can add depth to any design while still maintaining its simplicity.
Single Crochet Mesh Stitch
This stitch involves working single crochet stitches in alternating rows, creating an open mesh-like pattern. The Single Crochet Mesh Stitch is perfect for lightweight scarves, shawls, and summer tops.
To work the Single Crochet Mesh Stitch, you will need to know how to make a chain stitch and single crochet. Start by making a foundation chain of any even number of stitches.
Then work one row of single crochets across the entire length of your foundation chain.
For the second row, start with three chains (this counts as your first double crochet) then skip one stitch from the previous row and make two double crochets into next stich; repeat this pattern until you reach end-of-row marker or last 2 sts on which you should only do 1 dc instead. Repeat these two rows alternately until desired length is achieved.
How to Work the Single Crochet Mesh Stitch
It creates an open, airy fabric that is perfect for lightweight scarves, shawls, or even summer tops. To work the single crochet mesh stitch, you will need to know how to chain and make a single crochet.
To begin the pattern:
- Chain any multiple of 2 stitches.
- Single crochet into the second chain from your hook.
- *Chain one skip one chain then work a single crochet into next ch*
- Repeat step 3 across until you reach end of row
- Chain one turn
Repeat steps three through five until your project reaches its desired length.
It’s important to keep in mind that this stitch has more holes than other types of stitches so it may not be suitable for all projects such as items requiring warmth or privacy like hats or blankets but it works well with decorative pieces like curtains and table runners.
Staggered Spike Stitch
This stitch involves working single crochets in the row below, creating a “spike” effect that adds depth to your project. The spikes are staggered, meaning they alternate between being worked on the right and left sides of your work.
To create this stitch, you’ll need to have some experience with basic crochet stitches like single crochets and chains. Once you’ve mastered those skills, give the staggered spike stitch a try! It’s perfect for adding visual interest to scarves, blankets or even sweaters.
To work this technique in stripes: after completing one row of spikes on one side (right or left), turn your work around so that you can start working back across it again from right-to-left instead of left-to-right as usual.
How to Work the Staggered Spike Stitch in Stripes
When worked in stripes, this stitch creates a stunning effect that will make your project stand out. To work the staggered spike stitch in stripes, you’ll need to have some basic knowledge of crochet stitches such as single crochet, double crochet, and chain stitches.
To begin working the staggered spike stitch in stripes, start by creating a foundation chain with an even number of stitches. Then work one row of single crochets across the foundation chain.
For the second row (right side), start by chaining three (counts as first double crochet). Skip one st from previous row; *work 1 dc into next st; ch 1; skip next st*.
Repeat from *to* until last two sts remain on previous row then work 1 dc into each remaining st on previous row.
For third-row repeat second-row instructions but offsetting where you place your spikes so they are not directly above or below each other giving it its signature look. Continue alternating between rows two and three until desired length is achieved making sure to end with Row Two for symmetry purposes when changing colors or finishing off.
This technique works well for blankets scarfs shawls etc., adding depth without being too bulky while keeping it light enough for everyday use.
FAQ
Which loop do you crochet in?
Answer: Typically, you crochet by inserting your hook under both the front and back loops of the V, but sometimes the pattern may instruct you to crochet into the back loop only.
What is the hardest crochet pattern?
The hardest crochet pattern is often considered to be the Jasmine Stitch due to its unconventional technique and difficulty for people to learn naturally.
What are the differences between front loop and back loop crochet?
In crochet, the difference between front loop and back loop is that front loop involves working into the loop closest to you, while back loop involves working into the loop farthest from you.
How do various crochet loop techniques affect the texture and appearance of a finished project?
Various crochet loop techniques affect the texture and appearance of a finished project by creating different patterns, stitch heights, and densities, resulting in unique visual and tactile experiences.
Can you combine different loop styles within the same crochet pattern?
Yes, you can combine different loop styles within the same crochet pattern to create visually appealing and intricate designs.
Related Posts
 Easy Crochet Gnome Pattern Free: Transform Yarn into Whimsical Friends
 Crochet Star Blanket: A Stellar DIY Guide
 How to Crochet Slippers for Beginners Step by Step with Pictures: Cozy Feet Awaits
 Adjustable Ring Crochet: Master the Magic Circle
 How to Crochet Without a Hook: Hands-On Creativity