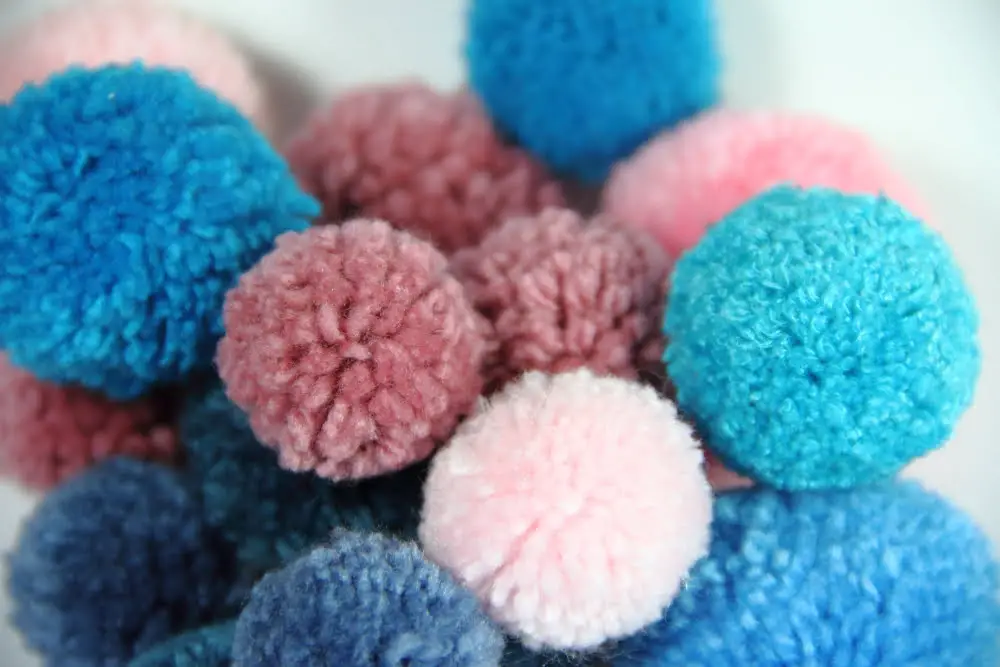
Discover the simple process of creating a delightful yarn pompom with just a few basic materials and easy-to-follow steps.
Creating a pompom with yarn is a simple, yet fun craft that adds a whimsical touch to any project. This article will guide you through the process, step by step, ensuring you can make a perfect pompom every time.
From selecting the right yarn, to wrapping, cutting, and trimming, every detail is covered to help you master this craft.
Whether you’re decorating a hat, creating a playful garland, or adding a finishing touch to a gift, this guide will help you create a fluffy, round pompom with ease and precision.
Key takeaways:
- Gather essential materials: yarn, scissors, cardboard, and string/yarn for tying.
- Use cardboard or a pom pom maker to create templates for wrapping yarn.
- Wrap yarn tightly around the templates, filling them evenly.
- Cut around the edge of the template to release the yarn and create a pom pom shape.
- Tie the cut yarn pieces together securely and trim the pom pom to the desired shape.
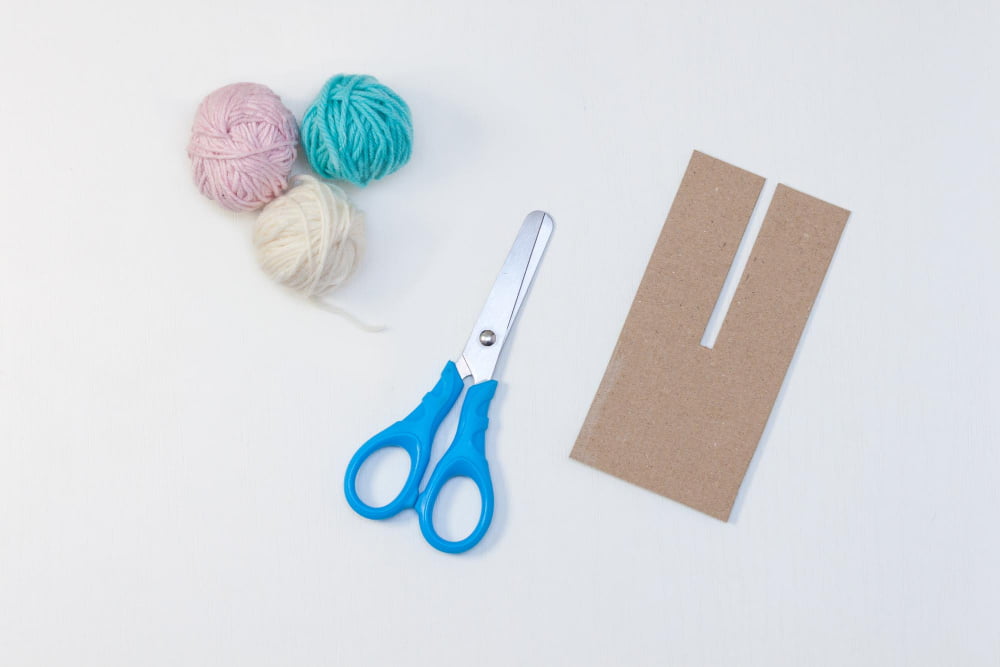
Materials for Making Pompoms With Yarn
To kick start your pom-pom creation process, gather all the essentials. The main material is yarn, which is quite pliable and comes in various textures and colors. Depending on the size and fluffiness of the pom-pom, the amount of yarn needed will vary. A standard skein would typically suffice for making a decent-sized pom-pom.
Often overlooked but crucial is a pair of sharply pointed embroidery scissors. They help in trimming the yarn into a rounded shape once it is wound around the template.
A cardboard, preferably stiff, is used to make the pom-pom template. However, you may opt for commercially sold pom pom makers, available in different sizes to suit personal preferences.
Finally, you will need a piece of string or yarn in a contrasting color to securely tie the pom-pom together. This string or yarn should be strong enough to hold the pom-pom pieces together, yet thin enough not to distort the shape of the finished pom-pom.
Having a yarn needle on hand can facilitate threading this tie yarn through the wrapped yarn.
Collecting all these materials in advance ensures your pom-pom making process goes smoothly without unexpected hitches. The right tools are vital for perfect pom-pom outcomes.
Essential Equipment/Tools for Creating Pompoms

To create fluffy and spherical pompoms, gather all necessary tools before beginning. Sufficient yarn in a chosen color or combination of hues forms the heart of the accessory. A sturdy pair of scissors are vital for trimming and shaping.
Cardboard for making the pom-pom template plays a crucial role, preferably thick enough to withstand the wrapping pressure but pliable enough to cut through. If simplicity is preferred, a ready-made pom-pom maker can replace the cardboard.
In addition, a tape measure or ruler helps to customize the size of the pompom, ensuring a seamless match with your project. Finally, incorporating a piece of string or strong yarn to secure the center of the pom-pom guarantees a tightly-knotted core.
Remember to use tools carefully to avoid damage to the pom pom, or potentially causing harm to yourself.
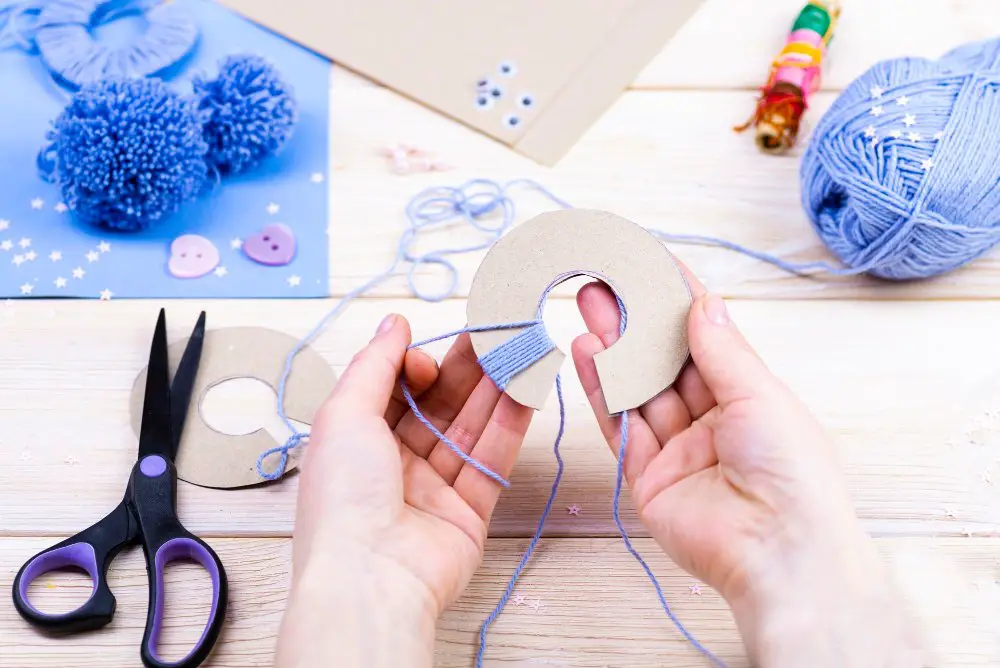
Making Your Cardboard Pompom Templates
To craft your cardboard templates for making pompoms, begin by finding a piece of thick, sturdy cardboard. Household items like a cereal box or delivery packaging are perfect. Your gathered cardboard should fold without tearing, but be strong enough to withstand repeated wrapping.
Your next step involves drawing two circles on the cardboard of the same size, using a household item such as a mug or jar as a guide. The size of the circles will dictate the size of your finished pompom. For example, a 4-inch circle would give a 4-inch pompom.
Inside each of these big circles, draw a second, smaller circle. A coin could serve as a helpful guideline with a width of about 1-1.5 inches. You have now created the overall shape of your pompom template – a large ring.
Now, using a sharp pair of scissors, carefully cut out the larger circles to form two cardboard rings. Take extra care when cutting out the small circle in the center, it needs to be neat and consistent in both pieces of cardboard.
In the next phase, you’re going to sandwich these rings together. These will serve as the guide for wrapping your yarn and will give your pompom a neat, uniform shape. Congrats, your very own DIY pompom template is ready! The next parts of this guide will walk you through how to wrap your yarn and craft a beautiful pompom.
Properly Cutting Out the Circles

In this step, you’ll need a pair of sharp scissors. Start by folding the cardboard in half to establish the center point, and from there, draw two concentric circles. The outer circle refers to the diameter of the desired pompom, while the radius of the inner circle needs to be about 1/3 of the outer circle’s radius.
Once the circles are correctly drawn, use your scissors to cut out the outer circle first. Next, cut a straight line from the edge of the outer circle to the inner one. This allows the template to be put around the yarn easier. Then, carefully cut out the inner circle. This results in a doughnut-shaped template crucial for creating pompoms.
Remember that precision in cutting your template is essential in this process, as a well-cut template adds to the evenness and fullness of the final pompom. While the shape should be retained, minor adjustments on the template can be made to fit the desired pompom size. Always ensure your scissors are sharp for clean cuts, guaranteeing an even, full-textured pompom.
Starting to Wrap the Yarn Around the Template
After creating the templates, place the two cardboard circles together. When the edges align, secure the yarn’s end on the outside rim of the circles with a comfortable grip to prevent it from slipping. Start wrapping the yarn around the circular mold; make sure you maintain the yarn’s tension for an even and snug wrapping. Move in a clockwise or counter-clockwise direction, whatever feels more comfortable.
If the yarn runs out during the process, don’t worry. Add a new piece by tying it with the old one and cutting off any excessive ends. Remember, the knot shouldn’t be too bulky to disturb the round shape of the template while wrapping. Continue this process until the inner circle is filled tightly with yarn. The strength of the pom-pom at the end greatly depends on this phase.
To ensure an almost perfect spherical shape, maintain a continuous and consistent wrap throughout the whole template. Avoid focusing too much on one place, as it might create an uneven density later.
In case there are any gaps between the yarn wraps, just fill in these spaces with more wraps of yarn. This provides a fuller and fluffier outcome. Don’t forget, the denser the wrap, the better the outcome of the pom-pom.
Be mindful to keep the yarn smooth while wrapping, to avoid any tangling which could complicate the process. Lastly, when you’re satisfied with the thickness of the wraps, cut the yarn leaving a long tail to use for tying later.
Know When to Stop Wrapping Yarn
Observing the size of your pom-pom is crucial. The thickness of your wrapped yarn translates directly to the fullness of the pom-pom. When the cardboard rings are neatly filled out and the yarn extends slightly over the edge, that’s when you can stop wrapping.
Be mindful of these cues:
- The yarn layers are creating a substantive thickness on both sides of the cardboard template.
- It’s becoming increasingly difficult to wrap as the hole in the center shrinks.
- The yarn strands are barely contained within the cardboard’s edge, suggesting a healthy quantity of layers.
Once you observe these signs, you can be confident that you’ve achieved the optimal amount of yarn wrapping. From here, grab your scissors and prepare to cut around the template’s edge.
Cutting Around the Edge of the Ring Correctly
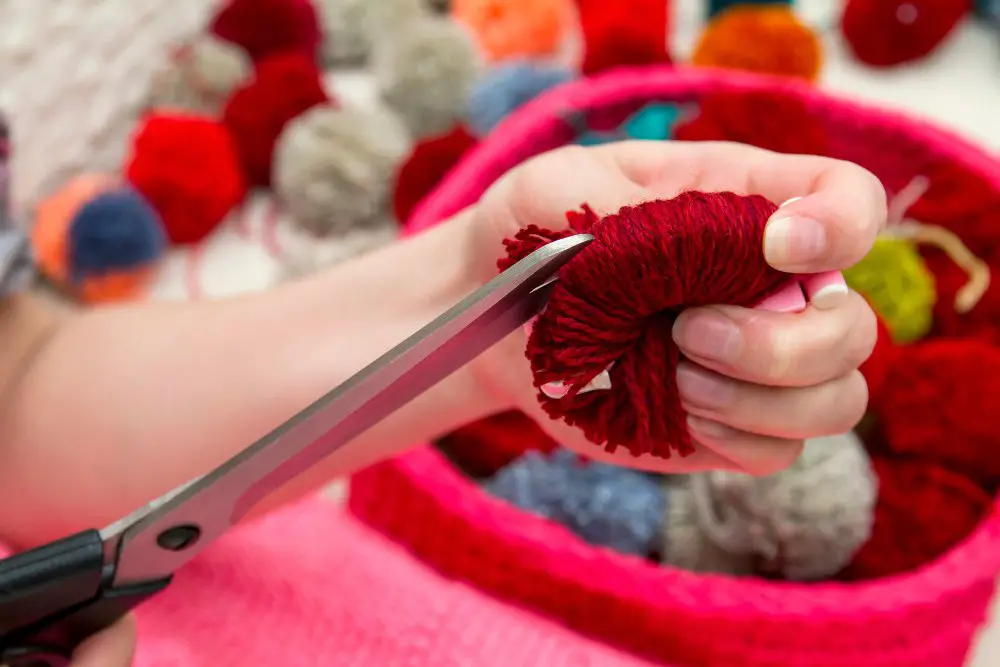
To cut around the edge of the ring correctly, it’s important that your scissors are sharp for precision and ease. Place your scissors between the two pieces of cardboard that make up your pompom template, cutting through the wrapped yarn. Keep the blades of your scissors as close to the edge of the cardboard as possible to ensure an even cut all around. A steady hand is key during this step, so take your time.
One handy tip is to slightly turn the template as you’re snipping, instead of moving the scissors around the ring. Remember, the yarn should remain sandwiched between the cardboard circles until you’ve cut all the way around. This will ensure that no yarn slips out and that your pompom maintains its shape during this process.
Once you’re done cutting, you’ll notice the shape of your pompom start to emerge. Be careful not to disturb the individual strands just yet; there are still more steps to perform before your pompom is complete.
In the next section, we’ll cover how to tie these cut pieces together to secure your pompom. The technique is crucial for the final outcome. Stay patient and meticulous as every small step contributes to the perfect pom-pom.
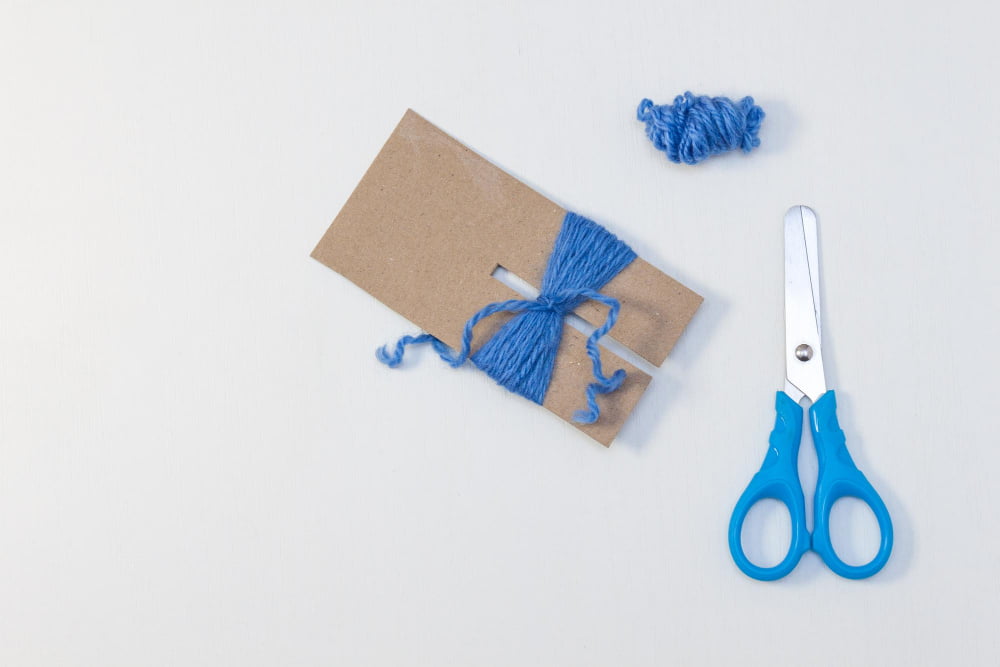
Tying the Cut Yarn Pieces Together Consistently
After cutting around the edge, you will notice loose yarn strands in the middle, which need to be secured to form the structure of your pom-pom.
Choose a durable piece of yarn, preferably double the thickness for added strength. Push this piece between the two halves of the template, around all the yarn strands, pulling it as tight as possible. This is critical to ensure your pom-pom is compact and secure.
Tie a knot and make sure it is tight enough. Double knotting or even triple knotting is recommended to ensure it holds tightly. Be careful while tying, as too much pressure can result in breaking the yarn.
For added security, you can take this tied yarn strand once more around all the yarn strands and tie another firm knot. This will establish a firm hold of all strands together inside your pompom.
This roundabout process effectively secures all yarn pieces together avoiding potential unraveling.
Try your best to have the knot on one side of the template. This will be the side of the pompom where the tie string runs out and will help with the final shaping of your pompom later.
Remember, the quality of a pom-pom is in this secure knotting, this often differentiates a well-made pom-pom from one that unravels quickly.
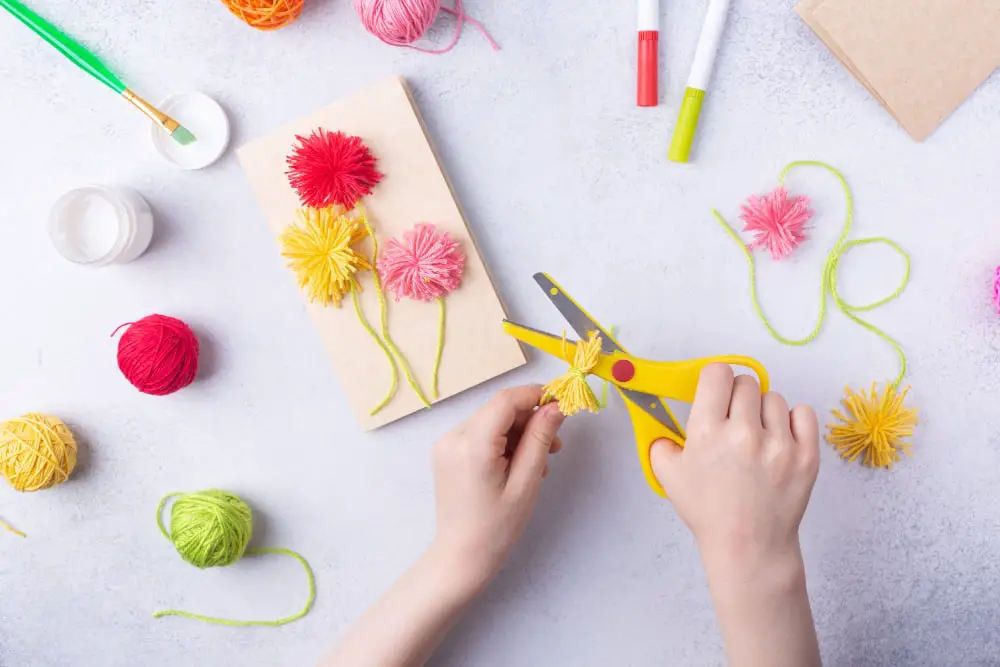
How to Shape Your Pom-Pom Creatively
Once your pom-pom is tied off, it’s time to start shaping. By creating various shapes, you can transform a simple yarn ball into something aesthetically pleasing and unique.
First, use sharp scissors to shape the pom-pom. Trimming is a key step to shape the yarn into a perfect sphere. Use small snips and rotate the ball as you cut to maintain symmetry.
Second, consider using your pom-pom as a canvas. Trim your pom-pom into different shapes, such as a heart or a star, for unique and personalized crafts. This requires careful, methodical cutting.
Third, experiment with textured styles. Instead of cutting straight across, try snipping at angles. This can create a more natural, fluffy look.
Finally, if the pom-pom is for a specific project, shape it accordingly. For instance, if creating a bunny tail, aim for a slightly elongated, fluffy shape.
Remember, shaping your pom-pom is an artistic process; patience and creativity are key. The more you practice, the better your results will become.
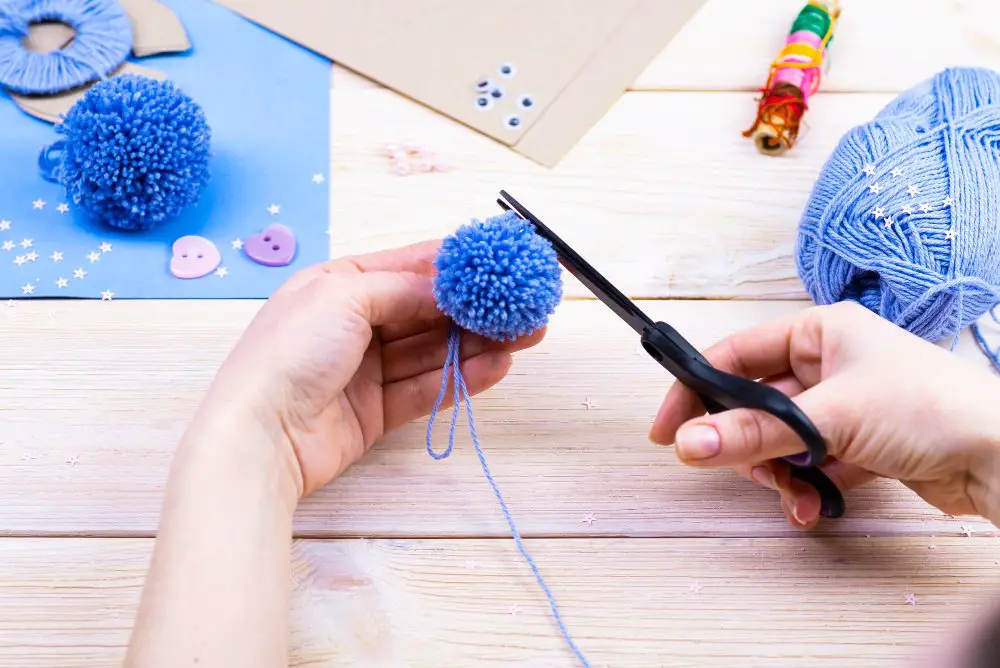
Best Ways to Fluff the Pom-Pom and Finalizing Trimming
After securing and removing your pompom from the ring, you may notice that it appears rather shaggy. This is normal and can easily be rectified.
Give it a vigorous shake – this helps the threads to naturally fluff up and expand. If you want bigger and bouncier pompoms, you can gently roll the pompom between your palms. This can make the fibers plump up and fill out into a perfect sphere.
Some threads may look longer than others, making the pompom appear uneven. Correct this by giving your pompom a trim. Place it on a flat, safe surface and use sharp scissors to trim excess yarn around your pompom. Rotate it in your hand as you do this to ensure you get a well-rounded shape.
Work slowly and steadily, making sure not to cut too much yarn at once. Continually check the pompom from different angles to ensure an even appearance. If it’s still not quite round, repeat the fluffing and trimming steps until you get the desired shape.
Avoid vigorous trimming to prevent your pompom from ending up smaller than intended. In the case of pompom crafting, precision is vital. Remember, you can always cut more off, but you can’t put it back on once it’s cut.
During the final stages, use a fabric brush or a fine-toothed comb to gently tease out the fibers of the pompom, giving them extra fluffiness. Avoid tugging excessively as it can cause the threads to pull out from the center knot. By the end, you’ll have a perfectly fluffy and round pompom ready for your project.
How to Make DIY Pompoms With a Pom Pom Maker
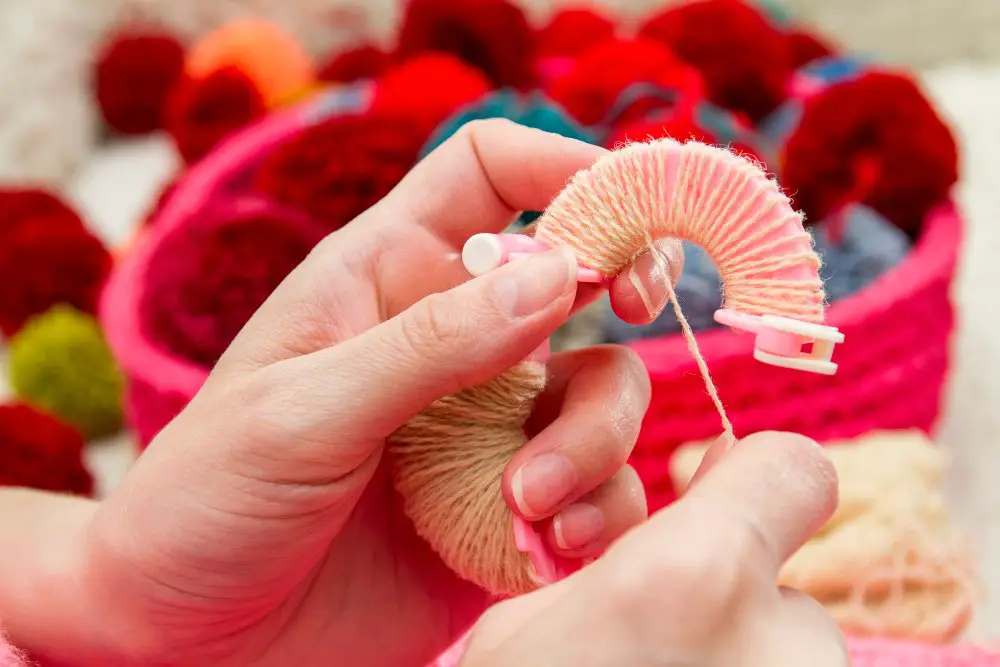
Having a pom-pom maker can make the process faster and more uniform.
Firstly, you need to open the arms of the pom-pom maker. Then, start winding your chosen yarn around one half of the pom-pom maker’s arm. Make sure the yarn is wound thickly, which will result in fuller and fluffier pom-poms.
After you’ve covered the first half, close it and then repeat the process on the second arm. Close that too after it is fully covered with wound yarn.
The cutting process begins after all arms are loaded with yarn. Cut down the center groove of the pom maker but take care not to let the halves separate. This keeps all the cut pieces in place.
Once the cutting is complete, a piece of yarn is required to secure the halves. Slide the yarn into the same groove used for cutting, and tie a knot. Make sure it’s tight to hold the halves together and ensure none of the pieces will fall out.
Once secure, you can then open the arms of the pom-pom maker and pull the halves apart to free your pom-pom.
Last but not least, you may want to make some final trims to your pom-pom to achieve your desired shape and size. Take your scissors and trim it down, keeping in mind that the more you trim, the denser your pom-pom becomes.
Remember, practice makes perfect, so don’t worry if it doesn’t come out as expected on the first try. As you create more pom-poms, you’ll easily get the hang of it.
Managing and Fixing a Pom Pom That’s Falling Apart

Handling a pom pom that’s starting to loosen up can be a challenge without the right tips. By locating the center string, manipulating the tension, and doing some additional trimming, the issues can be fixed.
Identify the string at the center, which binds all yarn strands together. Try to gently tug on it from both sides. This can help tighten the overall structure if the pom pom is slightly loose.
If the knot at the center becomes untied, try to re-tie it more securely. Be careful to not pull it extremely tight to avoid tearing the yarn.
If some strands are falling out, they might have been cut off the knot or not included in the knot. You can try to reattach them by threading them through the center, tying them to the central string, and trimming them to match the length of others.
For uneven pom poms where some strands are protruding, further trimming can be done. Be careful to trim conservatively to avoid removing too much yarn, which could make the issue worse.
When the pom pom is not fluffy enough, try using a fine-tooth comb. Gently comb the yarn strands. This could help fluff up the yarn fibers resulting in a fuller appearance.
Remember, patience is key when handling pom poms. It’s generally a trial-and-error process, with each pom pom potentially requiring slightly different adjustments.
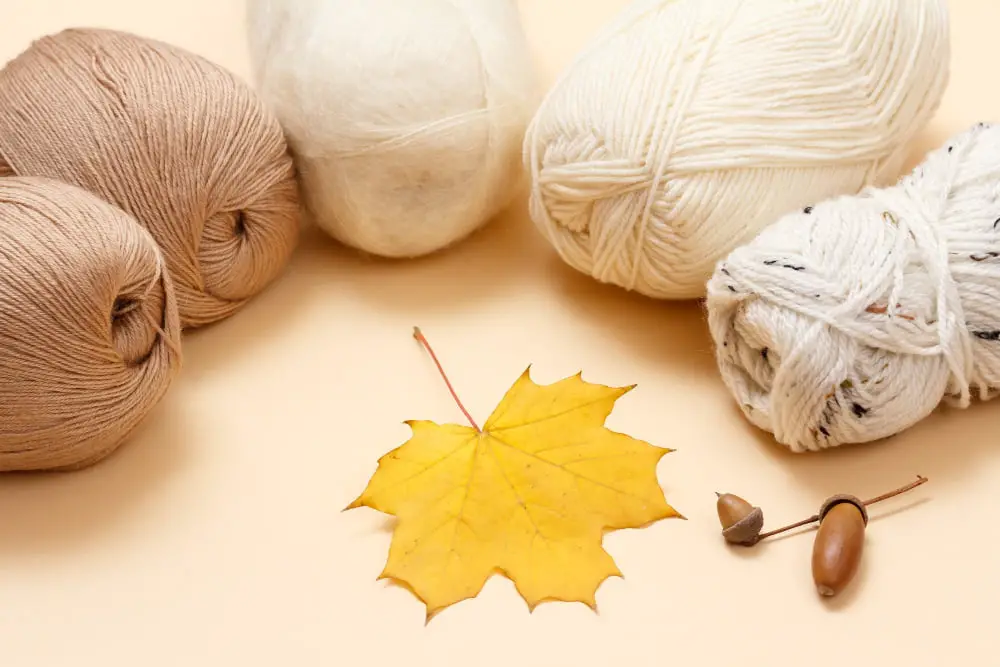
Choosing the Best Yarn for Pompoms
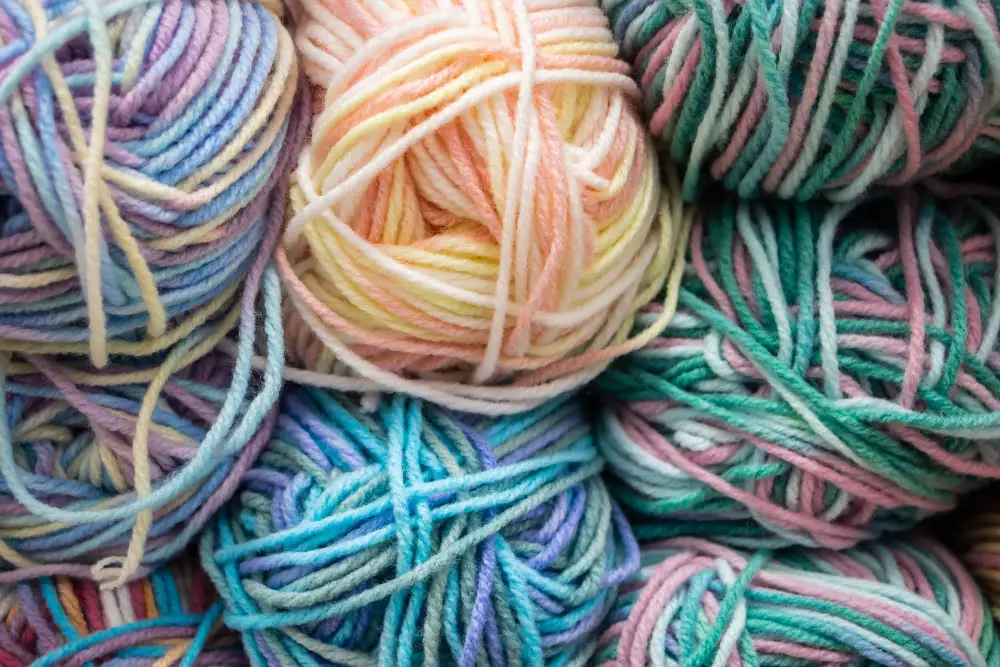
Different types of yarn yield varied results and your choice largely depends on the desired outcome.
– Acrylic yarn is often hailed for its durability and ease to work with. It’s great for crafting pompoms that hold shape and are less prone to fraying. Acrylic yarn also comes in a variety of colors, lending more creativity to your projects.
– Wool yarn, on the other hand, offers a fluffy texture perfect for creating soft and cozy pompoms. Be sure to choose high-quality wool as lower quality may shed over time.
– Cotton yarn is ideal if you fancy denser pompoms.
– Chunky yarn is best for larger and fuller pompoms due to its thicker strands, while finer yarns will yield smaller, denser pompoms.
Try to experiment with different yarn weights and textures. It’s also beneficial to consider the project the pompom will be attached to. For example, if you’re embellishing a baby blanket, wool yarn would provide a soft texture suitable for kids, while cotton is ideal for home décor items owing to its sturdiness.
Remember that blended yarns can combine the beneficial properties of different fibers, making them a versatile choice. Whichever yarn type you choose, ensure to buy enough to complete your pompom project, taking into account that larger or fuller pompoms require more yarn.
Techniques to Make Pom Poms Without a Pom Pom Maker

Designing pom poms doesn’t require a dedicated tool. Here are easy ways to make them using everyday items:
- Hand Method: Wrap yarn around four fingers, holding the end with your thumb to keep it in place. Continue wrapping until you get the desired thickness. Carefully slip it off your hand, then tightly tie a piece of yarn around the middle. Cut through the loops at both ends, and fluff until symmetrical.
- Fork Method: Similar to the hand method, you’ll use a fork in lieu of your fingers. Wrap the yarn around the prongs of the fork until you achieve a suitable size. Thread a piece of yarn between the middle prongs and tie it tightly around the yarn bundle. Remove it from the fork, cut the ends, and fluff as desired.
- Cardboard Method: Using two round pieces of cardboard with identical holes in the middle, hold them together and wrap yarn around. Once satisfied with the size, carefully cut through the yarn along the edges. Create a tight knot around the cut yarn with a separate piece of yarn threaded through the hole. Remove cardboard and trim for an even pom pom.
All methods require careful handling. The firmness of the central knot determines the pom pom’s durability. Use scissors for both tying and cutting for optimal results. For fluffy pom poms, a comb or brush can be gently used post-cutting.
Making Pompoms With Fingers: A Step-by-Step Guide
Before you start, gather your materials: yarn, a pair of scissors, and your own two hands.
First, decide on the size of the pompom you wish to create as this will determine the number of fingers you wrap the yarn around. For smaller pompoms, you might only need two fingers, while larger ones might require all four.
To begin, hold the end of the yarn between thumb and index finger, leaving a tail. Start wrapping the yarn around your chosen fingers, making sure to keep it firm but not too tight in order to allow for easy removal later.
Increase the thickness of your wraps according to the desired fullness of your pompom. The best guideline is to keep adding yarn until your loops start to come away from your fingers slightly, looking somewhat like a roll of coins.
With the loops complete, cut the yarn ensuring to leave a prolonged tail. This will be used to tie-off the center of the loops. Carefully slide the loops of yarn off your fingers while keeping the shape intact.
Using the yarn tail, wrap and tightly knot in the middle of the loops making sure to create a secure hold. This should form two looped halves.
Using your scissors, cut open the loops on either side, slowly turning your bundle of yarn into a bumpy, not-yet-perfect pompom.
Lastly, to finish the pompom, trim it evenly, making it round and fluffy. This trimming stage is crucial in defining the final shape of your pompom. Remember, less is more when trimming; you can always cut more off, but you can’t add back.
Remember, practice makes perfect. The more pompoms you make, the easier the process will get and the better your results will be.
Making Pompoms With a Fork: Steps and Tips
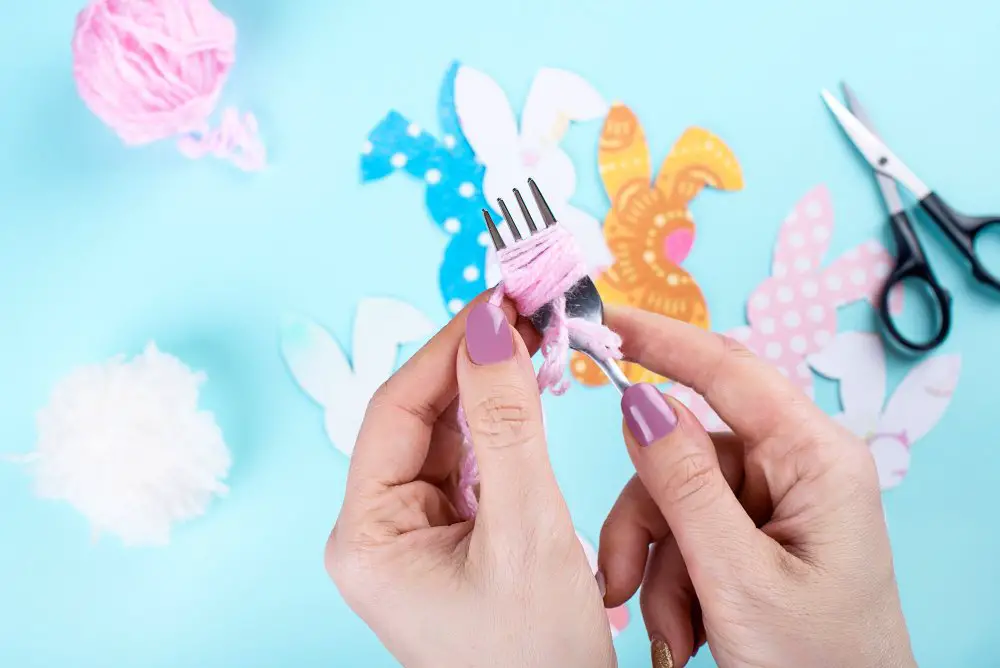
Identify a four-pronged fork for this technique. The size of the fork will determine the size of the pompom. Larger pompoms require a larger fork, while a smaller fork will create a smaller, denser pompom.
Select the yarn. Both the color and type of yarn can affect the final output. Choose a soft, thick yarn for a fluffy and full pompom, and a finer yarn for a more delicate pompom.
Start wrapping the yarn around the outer prongs of the fork. Ensure it’s tight but not too tight, as the tension can affect the shape. Maintain consistency in wrapping to guarantee a uniformly dense pompom.
Wrap as much yarn as you can around the fork. A general rule of thumb is the more you wrap, the fuller the pompom will be.
Once satisfied with the thickness, cut the yarn, ensuring to leave an excess strand for tying.
Take the excess strand of yarn cut, thread it through the middle prong of the fork and tie it around the wrapped yarn, pulling as tightly as you can without breaking the yarn.
Remove the yarn from the fork delicately so as not to ruin the structure before slicing through the loops on each side to create the pompom.
Trimming can be executed to shape the pompom as desired, but caution is vital to prevent cutting into the tie strand.
Finally, shaking or brushing the pompom can increase its fluffiness.
Remember, practice is instrumental in mastering the fork method for making pompoms. Different sized forks and types and thickness of yarn create diverse pompoms, offering an array of options. Be patient and experiment to find what suits your preference best.
Tips and Warnings for Making Perfect Pom-Poms
Ensure your yarn is not too thin; it can result in a sparse pompom lacking in fullness. Heavier weight yarns, such as worsted, aran, or bulky, are often ideal.
Avoid pulling the tying yarn too loosely during the tying process. A loose tie can result in your pompom unraveling or losing its shape easily.
Remember not to cut the tying yarn. It’s crucial for securing the pompom and can be useful for attaching it to your projects.
Pay attention to the yarn ends when you’re cutting the wrapped yarn. Misaligned cuts can result in an uneven pompom, but don’t worry, you can always trim it later for symmetry.
Consider using sharp, high-quality scissors. Blunt scissors can make it difficult to cut through the tightly wrapped yarn and may lead to an untidy cut.
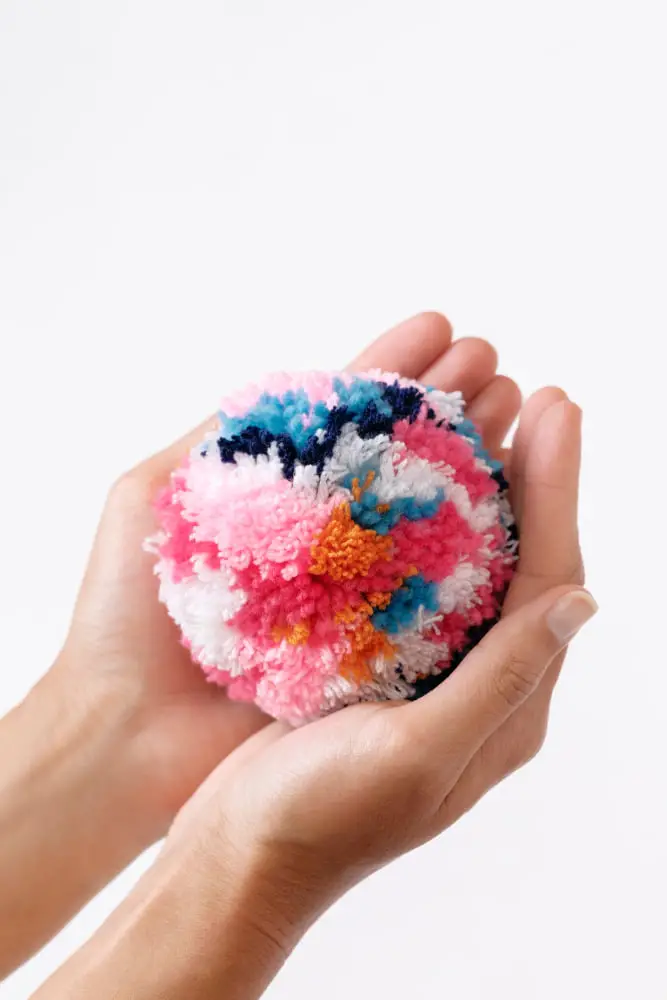
Feel free to be creative with colors. You can make multicolored pompoms by using different yarn colors when wrapping your template or tool.
Don’t rush when fluffing and trimming. This is the step that brings your pompom to life; rushed trimming can negatively affect the pompom’s shape and overall look.
Practice safety measures, especially when crafting with children. Ensure they are supervised when using scissors or working on their pompoms.
With frequent use, homemade cardboard pompom makers can become worn and less effective. For frequent crafters, consider investing in a reusable plastic pompom maker for better durability and consistency.
Remember, practice makes perfect. Don’t worry if your first few pompoms aren’t flawless. As with all crafts, your technique will improve the more you try.
FAQ
How do you make yarn pom poms fast?
To quickly create yarn pom poms, simply wrap yarn around your hand multiple times, remove it cautiously, tie it at the center, then cut the ends.
What are the necessary tools for creating a yarn pom pom?
The necessary tools for creating a yarn pom pom are yarn, scissors, and a pom pom maker or cardboard.
How can you vary the size of yarn pom poms?
To vary the size of yarn pom poms, adjust the width of the cardboard or pom pom maker you’re wrapping the yarn around.
Can different types of yarn be combined to make a multi-colored pom pom?
Yes, different types of yarn can be combined to create a multi-colored pom pom.


