Discover the various types of crochet edging as we delve into a vibrant world of patterns and techniques, perfect for adding that finishing touch to your projects.
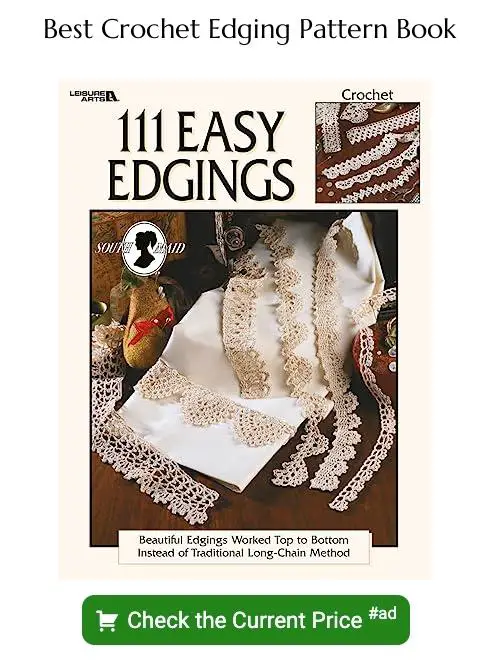
Crochet edging is a fantastic way to add a finishing touch to your crochet projects. Whether you’re working on a blanket, scarf, or even a garment, the right edging can make all the difference.
But with so many different types of crochet edging out there, it can be tough to know where to start. That’s why we’ve put together this guide to help you explore some of the most popular and versatile types of crochet edging.
From simple scallops and picots to more intricate lace patterns, we’ll cover everything you need to know about choosing and working with different types of crochet edging. So grab your hook and let’s dive in!
Basic Crochet Edging
If you’re new to crochet edging, then starting with a basic pattern is the perfect way to get started. A simple single crochet border can add a neat and tidy finish to any project, while also providing some structure and stability.
To work this type of edging, all you need is your hook and yarn.
To begin, start in any corner of your project by making a slip knot on your hook. Then insert the hook into the first stitch along one edge of your work and pull up a loop (two loops on the hook).
Yarn over (wrap yarn around the hook) once more before pulling through both loops on the hook – that’s one single crochet made! Continue working single crochets evenly spaced along each side until you reach another corner.
When working corners or turning points in this type of edging pattern, it’s important to make three single crochets into each corner stitch so that it doesn’t bunch up or pucker as you go around curves. Once complete all sides with even number stitches for an even look.
Single Crochet Edge Trim
It’s perfect for adding a neat, clean finish to your projects without overwhelming the design. To work this type of edging, you’ll need to start by creating a foundation row along the edge you want to trim using single crochet stitches.
Once you’ve completed your foundation row, simply turn your work and continue working single crochets into each stitch across until you reach the end.
One great thing about Single Crochet Edge Trim is that it can be worked in any color or yarn weight, making it easy to match with any project. You can also experiment with different hook sizes and stitch counts for varying effects.
This type of edging works well on blankets, scarves or even clothing items like cardigans or shawls where a simple yet elegant finish is desired.
Picot Edging
This simple yet elegant edging consists of small loops or points along the edge of your work, creating a beautiful scalloped effect. To create picot edging, you’ll need to know how to chain and slip stitch.
To start, work single crochet stitches along the edge of your project until you reach the point where you want to add picots. Then chain three (or more for larger picots), skip one or two stitches (depending on how large you want your picots), and slip stitch into the next stitch.
Repeat this process all around your project’s edges until complete. Picot edging works well on blankets, scarves and shawls as it gives them an extra feminine touch while also adding texture.
Experiment with different yarns and hook sizes for varying effects; thinner yarns will produce smaller loops while thicker ones will give bigger ones.
Shell Edging
It’s perfect for blankets, shawls, and even clothing items like cardigans or skirts. The shell stitch consists of multiple double crochets worked into the same stitch or space, creating a fan-like shape that resembles the curve of a seashell.
To work this edging, you’ll need to have some experience with basic crochet stitches like chain and double crochet. Once you’ve completed your main piece (whether it’s rectangular or circular), start by working one round of single crochet evenly around the edges.
Next, begin working your shells in each corner and along each side by chaining three (or more) stitches as needed for height before starting your first set of double crochets. Depending on how many chains you use between sets will determine how large your shells are going to be.
Continue alternating between single crocheting across straight edges while making sure not to skip any spaces until reaching another corner where another shell should be made again.
Crab Stitch Edging
This edging works well on blankets, scarves or any project where you want to add texture and definition. The crab stitch is worked in the opposite direction of traditional crochet stitches which gives it its distinctive appearance.
To work this edging, start by chaining one at the end of your row or round. Insert your hook into the next stitch to the right (if you’re right-handed) or left (if you’re left-handed).
Yarn over and pull through both loops on your hook. Repeat this process for each subsequent stitch until you reach the end of your row.
One great thing about using crab stitches for an edge trim is that they are reversible! So if one side looks better than another when working with variegated yarns or color changes in general – no problem! Just flip it over!.
Adding a crab-stitch border can give any project an extra touch of elegance while still being easy enough for beginners to master quickly.
Scallop Edging
This type of edging creates a beautiful wave-like pattern that adds texture and interest to your project. The scallop stitch can be worked in any number of stitches, making it versatile enough to use on everything from blankets to clothing.
To work the scalloped edge, start by working single crochets along the edge of your project until you reach the corner or end point where you want to begin your first shell. Then chain three stitches (or more if desired) and double crochet into the same stitch as your last single crochet.
Next, skip two stitches and work five double crochets into the next stitch. Skip two more stitches and slip stitch into the next one; this will create a dip between each shell which gives it its signature look.
Repeat this pattern all around until you reach back at starting point again.
Chevron Edging
This zigzag pattern creates a bold and eye-catching border that’s sure to turn heads. Chevron edging works particularly well on blankets, scarves, and shawls but can be used on any project where you want to add some visual interest.
To create this type of edging, start by working single crochet stitches along the edge of your project in one color. Then switch colors every few rows as you work back-and-forth in a chevron pattern until you reach the end of your piece.
The beauty of chevron edging is that it’s incredibly versatile – there are countless variations out there depending on how many colors or stitches per row are used. You can also experiment with different yarn weights or hook sizes for varying effects.
V-Stitch Edging
This edging pattern creates an intricate design that resembles the letter “V” and is perfect for blankets, shawls, scarves, or even clothing items. To create this stitch pattern, you will need to know how to work double crochet stitches and chain stitches.
To start the V-stitch edging, begin by working one row of single crochet around your project’s edge. Then make two chains before starting each V-stitch in the next row.
The basic idea behind this stitch is simple: you’ll be making two double crochets separated by a chain space in between them.
Once you’ve completed your first set of double crochets with their corresponding chain space in between them (the “V”), skip one stitch on your previous round before repeating it again all around until reaching back at the beginning point where we started our first single-crochet round.
Bobble Edging
This type of edging features small, raised bumps that create a unique look and feel. To work this edging, you’ll need to know how to make bobbles or popcorn stitches.
To start the bobble edging, first decide on the number of stitches you want for each bobble. Then work single crochets up until the point where you want your first bobble stitch.
Next, begin working your bobbles by making several double crochets into one stitch (usually 5-7). After completing all double crochets in one go without finishing them off with slip stitches as usual; pull through all loops at once with yarn over hook technique which will close up those loops together forming a bump or “bobble”.
Repeat this process across each row until complete! Bobbles can be worked in any color combination desired for added interest.
Loop Stitch Edging
This technique creates loops of yarn that stand out from the fabric, adding a playful touch to your project. To work this edging, start by creating a row of single crochet stitches along the edge of your piece.
Then, using a hook one or two sizes larger than what you used for the body of your project, insert it into each stitch and pull up a loop about 1 inch long. Next comes the fun part: use another hook (or even just your fingers) to pull each loop through itself until it forms its own little knot on top of your work.
Repeat this process across all stitches in that row until you have created an entire border made up entirely out these cute little knots! The result is not only visually appealing but also adds some extra warmth and coziness to any blanket or scarf. So if you want something different from traditional scallops or picots edges try experimenting with Loop Stitch Edgings!
Block Edging
This edging style involves working single crochets into the spaces between stitches, creating a solid and sturdy border that frames your work beautifully. Block edging works particularly well on blankets and afghans, as it helps to give them structure and definition.
To create block edging, start by working one round of single crochet around the entire edge of your project. Then, for each subsequent row of block edging, you’ll work one single crochet stitch into each space between stitches from the previous row.
One great thing about block edging is that it’s easy to customize with different colors or yarn types. You can also experiment with different stitch patterns within each individual “block” for added texture or interest.
Filet Crochet Edging
This technique involves creating a mesh-like fabric with open spaces that form patterns when worked in combination with solid stitches. Filet crochet edgings can be used to add beautiful detail to tablecloths, curtains, or even clothing items like blouses or skirts.
To create a filet crochet border, start by working the foundation row of your project in double crochets (or another stitch of your choice). Then work rows of chain stitches and double crochets following the pattern chart until you reach the desired length.
One advantage of using filet crochet for borders is that it allows you to customize your design easily. You can choose from many different patterns such as flowers, leaves or geometric shapes depending on what suits best for your project.
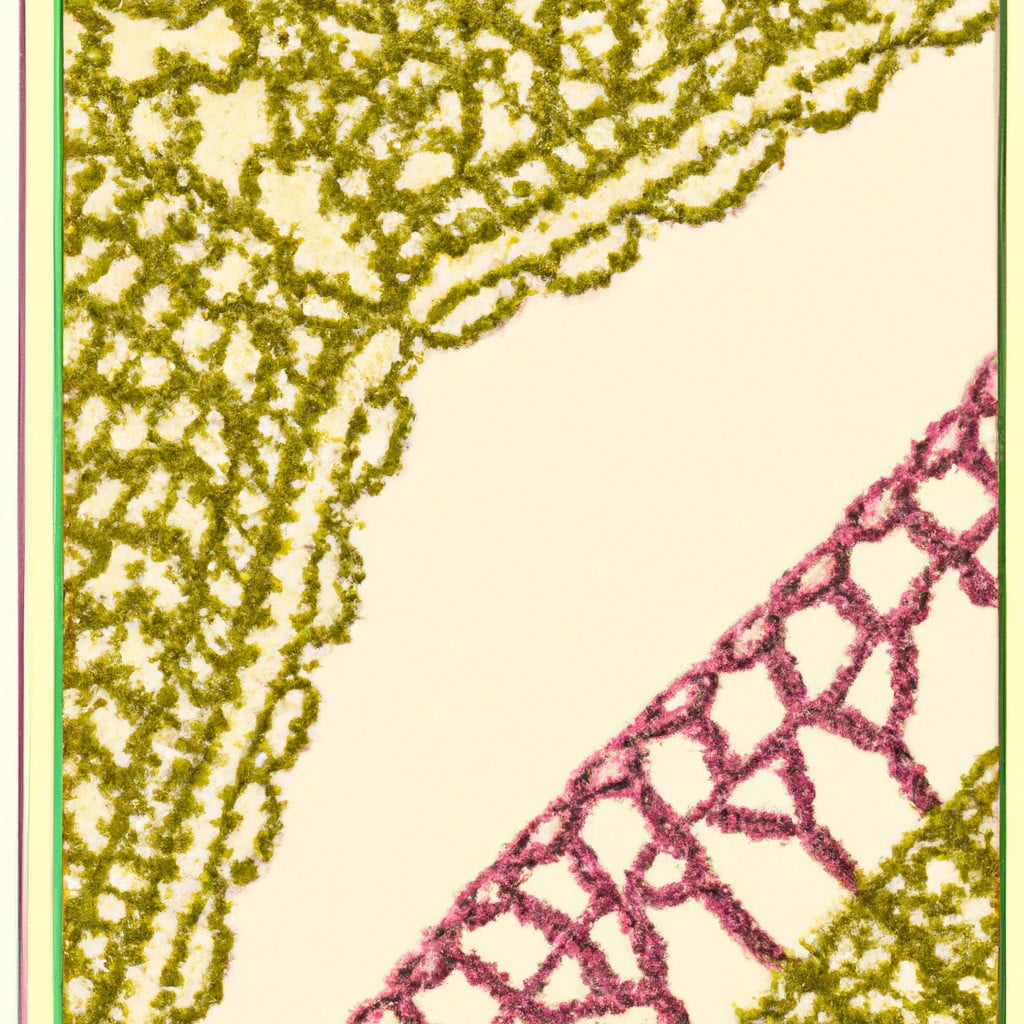
Lacy Edging
Lacy edgings are typically made up of openwork stitches that create a beautiful and intricate pattern. They can be used on anything from blankets to clothing items, adding an elegant finishing touch.
To work a lacy edging, you’ll need to have some experience with basic crochet stitches like chains, single crochets (sc), double crochets (dc), treble crochets (tr) and picots. The most common types of lace patterns include shells or fans worked in groups of three or five stitches separated by chain spaces.
One popular technique for creating lacy edges is the pineapple stitch pattern which creates elongated loops resembling pineapples stacked on top of each other along the edge. Another option is working clusters into chain spaces which create small flowers along the border.
When choosing yarns for your lace borders consider using lightweight cotton threads or silk blends as they will give more drape than heavier fibers such as wool.
Ruffle Edging
This type of edging creates a beautiful frilly effect that can be used on blankets, scarves, shawls or even clothing items like skirts and dresses. Ruffles are created by working multiple stitches into one stitch or space in the previous row which gives it its signature wavy look.
To create this stunning border design, start with any basic crochet stitch pattern such as single crochets or double crochets. Then work several rows until you reach the end of your project before starting on the ruffle edge.
To begin creating your ruffles: chain 3 (or more depending on how big you want each loop), skip two stitches from previous row and make 1 double crochet in next stitch; *chain 3 (or more) again; skip two stitches from previous row and make another double crochet*. Repeat between ** across entire length until last few stitches remain.
Ribbon Edging
This type of edging involves weaving ribbon through the stitches, creating a unique and elegant look. It’s perfect for adding a touch of femininity to baby blankets or shawls.
To create this type of edging, you’ll need some ribbon that matches your project’s color scheme. Cut the ribbon into strips that are slightly longer than the edge you want to cover.
Then weave it in and out of every other stitch along the edge until you reach the end.
One thing to keep in mind when using ribbon as an edging is that it can be quite slippery, so make sure it’s secured tightly before cutting off any excess length.
Cord Edging
This type of edging involves creating a small cord or rope-like structure using single crochet stitches and then attaching it to the edge of your project. Cord edging is perfect for adding a subtle touch of texture and dimension without overwhelming the overall design.
To create cord edging, start by chaining several stitches (the number will depend on how thick you want your cord to be). Then work single crochets into each chain stitch until the entire length is covered in sc stitches.
Once complete, attach one end of the cord to your project with slip stitches along its edge.
You can experiment with different colors and thicknesses when making cords that complement or contrast with yarn used in main projects.
Tulip Stitch Edging
This stitch creates small tulips that line the edge of your work, adding a touch of elegance and charm. The Tulip Stitch Edging works well on blankets, scarves, shawls or any other project where you want to add some extra flair.
To create this edging, start by working a row of single crochet stitches along the edge of your project. Then begin the tulip stitch pattern by chaining three stitches and skipping two stitches from the previous row.
Next, make five double crochets in one stitch followed by another chain three before skipping two more stitches from the previous row.
Repeat this pattern until you reach the end of your work then slip-stitch into each chain-three space to complete each tulip petal.
Fringe Edging
This type of edging involves attaching strands of yarn to the edge of your work, creating a fringed effect that can add texture and movement to any piece. Fringe edging is particularly popular for scarves, shawls, and blankets but can also be used on other items like bags or clothing.
To create fringe edging, start by cutting several pieces of yarn in the desired length (usually around 6-8 inches). Then fold each piece in half so that it forms a loop at one end.
Insert your hook into the first stitch along the edge where you want to attach the fringe. Take two strands from one folded piece of yarn and pull them through this stitch with your hook until they form a small loop at their midpoint; then pass both ends through this loop before pulling tight.
Repeat this process across all stitches along the edge until you have attached as many fringes as desired evenly spaced apart. Once complete trim any uneven edges if necessary using scissors or shears.
Wave Edging
This type of edging creates gentle curves along the edge of your work, giving it an undulating effect that’s both playful and elegant. The wave stitch pattern is easy to learn and can be worked in any number of colors or yarn weights.
To create this beautiful border, start by working single crochets evenly spaced along the edge of your project. Then begin working rows in alternating sets: one row with double crochets followed by another row with half-double crochets.
Repeat these two rows until you’ve achieved the desired length.
Zigzag Edging
This type of edging is perfect for adding a touch of whimsy to blankets, scarves, and even clothing items. The zigzag pattern can be created using single crochets or double crochets worked in alternating directions.
You can also experiment with different colors to create a bold and eye-catching effect.
To work the zigzag stitch, start by working one row of single crochet along the edge of your project. Then turn your work 90 degrees so that you are working perpendicular to the first row.
Work another row of single crochet stitches in the opposite direction as before but this time insert hook into back loop only (BLO). Continue alternating rows until desired length is achieved.
The beauty of this type of edging is that it’s easy enough for beginners yet versatile enough for more experienced crocheters who want to add some flair to their projects.
Puff Stitch Edging
This type of edging involves creating small, puffy clusters of stitches along the edge of your work. The result is a soft, fluffy border that looks great on blankets, scarves, shawls or even clothing.
To create this stunning effect you will need to know how to make the puff stitch itself which involves working multiple incomplete double crochets into one stitch before completing them all at once in the final step. Once you have mastered this technique it’s easy to incorporate it into your projects as an eye-catching finishing touch.
One way to use the puff stitch edging is by adding it around a simple blanket or scarf made up entirely of single crochet stitches for example; this creates an interesting contrast between textures while also giving some extra warmth and coziness. Another option would be using different colors for each cluster making sure they complement each other well so that when combined together they form something truly unique!
Beaded Edging
This type of edging involves adding beads to your crochet stitches as you work, creating a beautiful and eye-catching effect. Beaded edgings can be worked in any number of patterns or designs, from simple single crochets with beads added intermittently along the edge, to more intricate lace patterns that incorporate multiple rows of beads.
To get started with beaded edging, all you need are some basic supplies: yarn in the color of your choice (preferably one that complements or contrasts nicely with your chosen bead colors), a small hook suitable for working with fine thread or yarn (such as size 1-2mm), and an assortment of seed beads in various sizes and colors.
Once you have everything ready, it’s simply a matter of choosing which stitch pattern you want to use for your border design. Some popular options include picots interspersed between groups of three or four single crochets; shells made up entirely out-of-beads; clusters alternating between plain stitches; etc.
Braided Edging
This type of edging involves creating three strands of yarn and braiding them together to create a rope-like effect. You can use this technique to add an interesting border to blankets, scarves or even clothing items.
To create the braid, start by cutting three lengths of yarn that are each twice as long as the edge you want to cover. Fold each length in half so that it forms a loop at one end and two tails at the other end.
Knot all six ends together tightly.
Next, separate your strands into three groups with two strands in each group. Braid these groups together until they reach your desired length for the border.
Once complete, sew or slip stitch your braid onto your project’s edge using matching thread or yarn color.
Tassel Edging
Tassels are easy to make and can be customized in any color or size you like. To create a tassel edge, simply work single crochets around the edge of your project as usual, then attach individual tassels at regular intervals using slip stitches.
To make a basic tassel, cut several lengths of yarn (around 6 inches long) and fold them in half. Take another length of yarn (about 12 inches long) and tie it tightly around the folded strands near one end.
Trim any excess ends so that they are even.
Attach each tassel by inserting your hook into the stitch where you want it placed on your project, then pulling up a loop with both ends of the tied-off string from one side through that stitch space; pull these two loops through themselves forming an anchor knot which will hold this new strand securely onto its place along with other stitches already made before attaching this new strand.
Fan Stitch Edging
This edging features clusters of stitches worked in the shape of fans, creating a delicate and lacy effect. It’s perfect for adding an intricate finish to blankets, shawls, scarves or even clothing items like cardigans or blouses.
To work this stitch pattern as an edging, you’ll need to start by working along the edge of your project with single crochet stitches. Then you’ll create groups of double crochets separated by chains that form the fan shapes.
One great thing about Fan Stitch Edging is its versatility – it can be worked in different colors or yarn weights depending on your preference and style. You could also experiment with varying the number of double crochets between each chain space for different effects.
Granny Square Edging
This type of crochet edging involves working around the edges of your project with small squares that mimic the look and feel of traditional granny squares. You can use one color or multiple colors for this type of edging, depending on your preferences and what will complement your project best.
To create a basic Granny Square Edging, start by chaining three stitches in any corner space. Then work two double crochets into that same space before chaining two more stitches and working another three double crochets into the same corner space.
Continue this pattern all around each side until you reach back at where you started.
Granny Blanket Edging
The granny blanket edging is perfect for adding a touch of vintage charm to your crochet projects. To create this border, start by working single crochets around the edge of your project in each stitch and space.
Then, work three double crochets into each corner stitch to create a neat turn at the corners.
Once you’ve worked all the way around your project with single crochets and double crochet corners, it’s time to add some color! Choose two or three colors that complement your main yarn color and work rounds of granny clusters (three double crochets worked together) in alternating colors along the edge.
The result is an eye-catching border that adds just enough detail without overwhelming your main design.
Crochet Pom Pom Border
This border adds a whimsical touch that’s sure to make any blanket or scarf stand out. The best part? It’s incredibly easy to make! All you need is some yarn in your desired color and size of pom-pom maker.
To start, simply create several pom poms using the maker. Once they are all made, attach them one by one along the edge of your project using a tapestry needle and matching yarn.
You can choose how many pom poms per inch or centimeter depending on how dense or sparse you want it to look like. You can also mix up colors if desired!
The Crochet Pom-Pom Border works well with blankets meant for children as it adds an element of playfulness that kids will love! But don’t let that stop adults from adding this fun border too – after all, who doesn’t love a good pop of color?.
Blanket Stitch Edging
This versatile stitch works well on blankets, scarves, and other projects where you want to add a neat border without detracting from the main design. The blanket stitch creates a clean edge that’s perfect for framing your work or adding extra warmth to your project.
To create this edging, start by working single crochet stitches evenly along the edge of your project. Then work one row of chain stitches before starting the blanket stitch pattern itself.
To make each “V” shape in the pattern, insert your hook into both loops of the next single crochet stitch and pull up a loop. Then insert your hook into both loops of one chain space from earlier in the row (the same space used to begin this round), yarn over again and pull through all three loops on your hook.
Repeat this process across each side until you reach back at where you started.
Berry Stitch Crochet Edging
This stitch creates small, raised “berries” that are perfect for adding a pop of color or contrast to your work. To create this edging, you’ll need to know how to work the berry stitch itself, which involves making several stitches into one space.
To start the berry stitch crochet edging, begin by working a row of single crochet stitches along the edge of your project. Then, chain one and turn your work.
Next comes the fun part: creating those lovely little berries! To do this, insert your hook into the next stitch on your row (the second single crochet from before), yarn over and pull up a loop so you have two loops on your hook.
Then yarn over again and insert it back into that same space in order to make another loop – now you should have three loops on our hook!.
Yarn over once more time then pull through all three loops at once – voila! You’ve made yourself an adorable little berry!.
Repeat these steps across each remaining single crochet until you reach end-of-row marker or corner if applicable. This technique works well with variegated yarns as it highlights different colors within them but also looks great in solid colors too.
Simple Crochet Border
This type of edging is perfect for beginners or those who want a minimalist look. The simple crochet border can be worked in any stitch pattern, making it versatile and adaptable to any project.
To create this type of edging, start by working single crochets evenly around the edge of your piece. You can work them directly into the stitches or spaces along the edge – whichever works best for you.
Once you’ve completed one round of single crochets, continue with another round if desired or fasten off and weave in ends.
The beauty of this type of edging lies in its simplicity; it’s straightforward yet effective at giving your project that finished look without being too overwhelming. Plus, since it’s so easy to work up quickly, you’ll have more time to focus on other aspects like color choices or stitch patterns!
Cosy Blanket Edging
This type of edging works well with blankets or throws made from soft yarns like chenille or wool. The Cosy Blanket Edging features a row of single crochets followed by a row of double crochets worked into the back loop only, which creates an interesting texture that complements any blanket design.
To work this edging, start by attaching your yarn to one corner of your blanket and working one round of single crochet stitches evenly spaced around the edge. Then work another round using double crochet stitches in the back loop only to create raised ridges along each stitch.
This simple yet effective border adds just enough detail without overwhelming your project’s overall look and feel. Plus, it provides extra warmth on chilly nights when snuggled up under your favorite handmade blanket.
Rib Crochet Border
This type of edging creates a neat and tidy finish that works well on blankets, scarves, and even garments. The ribbed texture adds depth and interest to your work while also providing some stretchiness.
To create this border, you’ll need to work in rows along the edge of your project using single crochets (sc) or half double crochets (hdc). Start by working one row of sc or hdc evenly spaced along the edge.
Then turn your work and begin working in the back loop only (blo) for each stitch across.
Repeat this process until you’ve achieved the desired width for your border. You can use any color yarn that complements or contrasts with your main piece; it’s entirely up to you!
The rib crochet border is perfect if you want something understated but still visually appealing. It’s easy enough for beginners but also versatile enough that experienced crafters can experiment with different variations like changing colors every few rows or adding more stitches per row.
Alpine Stitch Crochet Blanket Border
This stitch creates a textured, woven look that adds depth and interest to any blanket or afghan. The alpine stitch involves working alternating rows of single crochets and double crochets, creating a pattern that resembles the peaks of mountains.
To create an alpine stitch border for your crochet blanket, start by choosing the yarn color you want to use. Then work around the edge of your project in single crochet stitches until you reach one corner.
Next, begin working in rows of alpine stitches along each side of the blanket. To do this, start with a row of single crochets across the top edge (or bottom if you prefer), then work two rows using double crochets before finishing with another row using single crochets.
Repeat this process on each side until you have completed all four edges. You can choose to make your border as wide or narrow as desired by adjusting how many times you repeat these steps along each side.
Reverse Shells Crochet Border
This type of edging is created by working a series of shell stitches in reverse order, which creates an interesting texture that’s perfect for adding some visual interest to your projects.
To work this border, start by creating a foundation row of single crochet stitches along the edge of your project. Then, work one or more rows of shells using double crochets and chain spaces as usual.
The key difference with this border is that instead of ending each shell with three double crochets like you would normally do when making regular shells, you’ll end each shell with three single crochets.
Once all your shells are complete, finish off the edge with another row or two (depending on how wide you want it to be) using single crochet stitches worked into both loops at once. This will help give your finished project a neat and polished look while also helping to secure any loose ends from previous rows.
The reverse shells crochet border is an excellent choice if you’re looking for something different than traditional scallops or picots but still want something elegant and visually appealing.
Herringbone Crochet Border
This stitch creates a beautiful woven texture that looks great on blankets, scarves, and even clothing items. To work this border pattern, start by creating a foundation row of single crochet stitches along the edge of your project.
Then begin working in rows of herringbone half-double crochets to create the distinctive zigzag pattern.
One thing to keep in mind when working with this stitch is tension – it can be easy to accidentally pull too tightly or too loosely as you work each row. Take your time and practice until you find just the right balance between tightness and looseness for your desired effect.
Adding a herringbone crochet border can give any project an extra touch of sophistication while also providing some structural support at its edges.
Crochet Simple Shell Border
This border features a series of shells made up of three double crochets separated by chains. The result is a delicate and lacy edge that adds just the right amount of detail without overwhelming your work.
To create this border, start by working single crochet stitches evenly around the edge of your project. Then, work one shell in each stitch or space along the edge using three double crochets separated by two chain stitches between each shell.
This edging works well on blankets and shawls but can also be used on scarves or other accessories where you want to add some texture and interest without going overboard with embellishments.
Crochet Simple Shell Border is an easy-to-follow pattern that produces beautiful results every time.
Crochet Puff Stitch Border
This border is created by working rows of puff stitches along the edge of your crochet piece, creating a soft, fluffy effect that’s perfect for blankets, scarves, shawls or even clothing.
To create this border stitch pattern you will need to know how to work basic crochet stitches such as chain stitch (ch), single crochet (sc) and double crochet (dc). The puff stitch itself involves pulling up several loops on your hook before completing the stitch in one go.
It may take some practice but once you get the hang of it you’ll be able to create stunning borders with ease.
One great thing about this type of edging is its versatility – it works well with both solid colors and variegated yarns alike. You can also experiment with different color combinations or use multiple strands at once for an even more unique look.
Easy Crochet Ruffle Edge
This edging style creates a beautiful and delicate frill that can be used on blankets, scarves, shawls or even clothing items like skirts and dresses.
To create this edging style, start by working single crochets around the edge of your project. Then work double crochets into each stitch until you reach the end of the row.
Work three double crochets into each stitch in order to create a ruffled effect.
The great thing about this technique is that it’s very versatile – simply adjust how many stitches are worked between each set of three doubles depending on how deep or shallow you want your ruffles to be.
Checker Edging
This simple yet striking pattern involves working single crochets and chain stitches in alternating colors, creating the appearance of tiny squares or checks along the edge of your work. Checker Edging works particularly well on blankets, scarves, and other items with straight edges.
To create this edging, you’ll need two contrasting colors of yarn and a hook appropriate for your chosen yarn weight. Start by attaching one color to the corner or edge stitch using a slip stitch.
Then work single crochets across until you reach the next corner or desired stopping point.
Next comes the fun part: switching colors! To do this, simply drop your current color (leaving it hanging at least 3 inches) and pick up your second color by pulling it through with your hook before making another single crochet.
Continue alternating between these two steps – working sc’s in one color then switching to make sc’s in another – until you’ve completed as many rows as desired for an even checkerboard effect along all sides.
Crochet Dot Border Stitch
This stitch involves working single crochets into the spaces between stitches, creating a row of dots that can be used as an edging or incorporated into the body of your project.
To work this stitch, start by chaining an even number of stitches plus one. Then, skip the first chain and work single crochets in each remaining chain across.
When you reach the end of your foundation row, turn your work and chain one.
Next comes the fun part! Instead of working directly into each stitch like you would with traditional crochet rows, you’ll be inserting your hook under both loops between two stitches (also known as “the space”) and pulling up a loop to create a single crochet “dot”. Repeat this process across every other stitch from previous rows until you reach the end.
This technique creates small bumps or dots along one edge while leaving another edge flat for easy seaming or joining with other pieces. The result is an attractive border that adds just enough detail without overwhelming more intricate designs.
Bobble Shell Stitch Crochet Border
This stitch combines the classic shell stitch with bobbles, creating a unique look that’s perfect for blankets, scarves, or even clothing. To work this border, you’ll need to know how to crochet basic stitches like single crochet (sc), double crochet (dc), and treble crochet (tr).
Once you’ve mastered those stitches, the bobble shell stitch is easy to learn.
To create this border pattern:.
- Start by working a row of sc around your project.
- Next, work 3 dc in each sc from the previous row.
- In between each group of 3 dc shells from step two above make one bobble stich as follows: yarn over hook insert into next space pull up loop so there are three loops on hook; yarn over again insert into same space pull up another loop so there are five loops on hook; repeat until there are nine loops on your hook then yarn over once more and draw through all nine loops at once
- Finally finish off with another row of sc.
Slip Stitch Edging
This type of edging creates a neat and tidy border that won’t detract from the main body of your work. Slip stitch edging can be worked in any color or yarn weight, making it incredibly versatile.
To create slip stitch edging, start by working one round of single crochet around the edge of your project. Then switch to slip stitches for subsequent rounds.
To work each round, insert your hook into the first single crochet from the previous round and pull up a loop through both loops on your hook (this is called a slip stitch). Continue working one slip stitch into each single crochet around until you reach where you started.
Slip stitches are very easy to work with once you get used to them – they’re essentially just pulling loops through other loops! And because they don’t add much bulk or texture to your finished piece, they’re perfect if you want something subtle but effective.
Crochet Chain Border
This type of edging can be used to add a clean, simple finish to any project, from blankets and scarves to clothing items like cardigans or shawls. To create a crochet chain border, simply work single crochets into each stitch along the edge of your project until you reach a corner.
Then make one or more chains before continuing with single crochets along the next side.
While this may seem like an easy technique, there are many variations that can be applied for different effects such as using multiple colors in your chains or working half-double crochets instead of singles for added texture.
The beauty of this type of edging is its simplicity; it’s perfect for beginners who want to add some flair without getting too complicated with their stitches.
Wide Crochet Borders
These types of edgings can be worked in a variety of stitches, from simple single crochets to more intricate lace patterns. One popular option is the wide shell stitch border, which features large shells that create an elegant scalloped edge.
Another great choice is the wide V-stitch border, which uses double crochets and chain stitches to create a lacy effect. This type of edging works particularly well on blankets or shawls where you want to add some extra drape.
If you’re looking for something with even more texture, consider trying out the popcorn stitch or bobble stitch in your wide crochet border. These raised stitches will give your project an added dimensionality that’s sure to impress.
Elegant Crochet Lace Edgings
These intricate patterns can add a touch of vintage charm or modern elegance to any design. Lace edging is often worked in fine thread or yarn, making it ideal for lightweight garments like shawls and scarves.
One popular type of lace edging is the pineapple stitch pattern. This classic design features clusters of stitches that resemble pineapples, giving it an exotic feel that’s perfect for summer projects.
Another beautiful option is the shell stitch pattern which creates scalloped edges with its repeating shells made up of double crochets and chains.
For those who prefer more complex designs, there are many other types of elegant crochet lace edgings available such as filet crochet borders with their openwork mesh-like appearance or Irish Crochet Edges featuring intricate motifs inspired by traditional Irish needlework techniques.
Whipsidery Border
This border features a series of loops worked in the front loop only, which creates an interesting braided effect. The pattern is easy to follow once you get the hang of it, but it does require some concentration and patience.
To work this border, start by working single crochets evenly around your project’s edge. Then begin working the whipsidery stitch pattern by chaining one, skipping one stitch from your previous row or round (depending on where you are attaching this edging), then inserting your hook into the next stitch’s front loop only before pulling up a loop.
Next, yarn over again before pulling through both loops on your hook; repeat these steps until you reach the end of each section or corner as needed for continuity purposes.
Field of Flowers Crochet Border
This border features delicate flowers with petals made from clusters of double crochet stitches, surrounded by leaves and stems worked in single crochet. The result is a stunning border that looks like it was plucked straight from the garden.
To create this border, you’ll need to have some experience working with cluster stitches and following complex patterns. But don’t let that intimidate you! With patience and practice, anyone can master this gorgeous edging.
One tip for working the Field of Flowers Crochet Border is to use contrasting colors for the flowers, leaves, stems, and background rows. This will help each element stand out more clearly while also adding visual interest to your finished project.
Cluster Lace Edging
This type of edging features clusters of stitches that create a lacy effect, making it ideal for adding an elegant touch to blankets or shawls. The cluster lace pattern can be worked in any number of stitches depending on how dense or open you want your finished edge to be.
To work this stitch pattern, start by chaining the desired length and then working single crochets along the edge until you reach a corner. Once at the corner, work three single crochets into one stitch to turn around smoothly before continuing with more single crochets along another side.
Next comes creating clusters: yarn over hook (yo), insert hook into next st; yo again and pull up loop through st; yo once more and draw through two loops on hook (two loops remain); repeat from * twice more in same st – 4 loops now remain on hook – yo once again & draw through all four remaining loops.
Vintage Fan Crochet Edging
This edging features delicate fan-shaped motifs that are worked in rounds, creating an eye-catching border that’s perfect for blankets, shawls, and even clothing. The vintage fan crochet edging pattern is relatively easy to follow but requires some experience with basic stitches such as single crochets (sc), double crochets (dc), chain stitches (ch) and slip stitch(es).
Once you get the hang of it though, you’ll be able to create stunning borders that will make your projects stand out from the crowd.
To work this edging pattern effectively, start by making sure you have enough yarn or thread available before beginning. You can use any type of yarn or thread for this project; however finer threads tend to produce more delicate results while thicker ones give bolder finishes.
The Vintage Fan Crochet Edging consists mainly of chains and shells which form the fans’ shape. To begin working on it:
- ) Start by chaining multiples of 10 plus 3.
- ) Work one row in single crochet across.
- ) Begin working on shell patterns until desired length is achieved
- ) Finish off with another row in single crochet
Peaked Group Crochet Border
This type of edging features groups of three double crochets worked together, creating peaks along the edge. The pattern can be repeated as many times as desired to create a wider or narrower border.
To work this stitch, start by chaining an even number of stitches plus two for turning. Then, work one row in single crochet across the edge you want to add the border to.
Next, begin working your peaked group stitch pattern by chaining three (counts as first double crochet), then skip two stitches from previous row and make 3 dc in next st; *skip 2 sts from previous row and sc into next st; skip 2 sts from previous row again then make another set of 3dc in next st*. Repeat between ** until end.
Finish off with a slip stitch into top chain-3 at beginning of round. This stunning edging works well on blankets or shawls where you want something more than just simple scallops or picots but not too complicated like lacy borders.
Crochet Big Shell Edging
This edging features large, open shells that create a lacy effect, making it perfect for blankets or shawls. The big shell stitch is worked by creating multiple double crochets into the same stitch or space, then skipping stitches in between each shell.
This creates an undulating wave-like pattern that looks stunning when used as an edging.
To work this edging on your project, start by working a row of single crochet around the edge you want to finish. Then begin working the big shell stitch pattern along one side of your project until you reach the corner.
When you get to the corner, work three big shells into each corner space so that they lay flat against both sides of your project’s corners without puckering up.
Textured Crochet Borders
These borders use a variety of stitches and techniques to create interesting patterns that stand out from the rest of your work. Some popular options include popcorn stitch, bobble stitch, or even simple front post double crochets.
One great thing about textured crochet borders is their versatility. They can be used on just about any type of project – blankets, scarves, shawls – you name it! Plus they add an extra layer of warmth and coziness when used on blankets or afghans.
When choosing a textured border for your project consider the overall look you want to achieve. If you’re going for something more playful or whimsical try using bobbles in bright colors; if elegance is what you seek opt-in for lacey textures like shells with picots; while if simplicity is key stick with basic stitches like single crochets worked in back loops only.
Berry Stitch Edging
This stitch creates small, raised “berries” along the edge of your work, giving it a unique look that’s perfect for blankets, scarves, shawls or even garments.
To create this edging you’ll need to know how to work the berry stitch which involves making clusters of double crochets (DC) with chain spaces in between. Once you have mastered this technique it’s easy to incorporate into your projects.
One great thing about the Berry Stitch Edging is its versatility; it works well on both solid and multi-colored fabrics. You can also customize its size by adjusting the number of stitches in each cluster or adding more chains between them.
Bobble Border
This type of edging features small, raised bumps that create a unique look and feel. The bobbles can be worked in any color or size, making them incredibly versatile.
To work the bobble border, start by crocheting a row of single crochet stitches around the edge of your project. Then, begin working the bobbles by chaining two or three stitches (depending on how large you want your bobbles to be) and then working several double crochet stitches into that same stitch.
Once you’ve completed all of your bobbles along one side of your project’s edge, simply slip stitch into the next single crochet stitch along that same edge before repeating this process across each remaining side.
Adventure Stitch Border
This border features a combination of stitches that create an intricate and textured pattern. The stitch sequence includes single crochets, double crochets, chains, and slip stitches worked in different combinations to achieve the desired effect.
The Adventure Stitch Border is perfect for adding some personality to your projects or giving them a more rustic feel. It works well on blankets or scarves made with natural fibers like wool or cotton.
To work this border, start by working one round of single crochet around the edge of your project. Then begin working the stitch sequence as follows: *1 sc in next st; 2 dc in next st; ch 1; sl st into same st as last dc* Repeat from * to * around until you reach the end of your project.
Once you’ve completed this round, continue with another round of single crochet before fastening off and weaving in any loose ends.
Betty’s Beautiful Border
This border features a series of shells and picots, creating a delicate scalloped edge that looks stunning on blankets, shawls, and more.
Named after its creator Betty McKnitster (a pseudonym), this border has been passed down through generations of crocheters. It’s easy to see why it has stood the test of time – the combination of simple stitches creates an intricate-looking design that elevates any project.
To work Betty’s Beautiful Border, you’ll need to be comfortable with basic crochet stitches like single crochet and double crochet. The pattern involves working multiple rounds in alternating colors for added visual interest.
Puff Edge Border
This type of edging features small puffs or bobbles worked into the stitches, creating a fun and playful look. The puff stitch itself is easy to learn and can be used in many different ways throughout your crochet projects.
To create a puff edge border, you’ll need to work single crochets along the edge of your project first. Then comes the fun part – working up rows of puffs! You can vary their size by adjusting how many loops you pull through each stitch before completing them all together.
The result is an adorable little row of fluffy clouds that will add charm and whimsy to any blanket or garment. Try using different colors for each row or alternating between solid colors and variegated yarns for even more visual interest.
Whether you’re making something cozy for yourself or crafting gifts for loved ones, adding a puff edge border will give it that extra touch of personality that makes handmade items so special. So why not give this technique a try on your next project?
FAQ
What is the best stitch for edging in crochet?
The best stitch for edging in crochet is either the single or half double crochet, as they create clean and perfect borders on almost any blanket pattern.
What is the best border for uneven edges crochet?
The best border for uneven edges crochet is a lacy border, as it provides fluidity and great drape, making the uneven edges almost unnoticeable.
What are some simple crochet edging stitches suitable for beginners?
Some simple crochet edging stitches suitable for beginners include slip stitch, single crochet, double crochet, picot stitch, and shell stitch.
How can decorative crochet edging enhance a finished project?
Decorative crochet edging enhances a finished project by adding a visually appealing and personalized touch.
What techniques can be used to create a smooth crochet border on a curved or irregular edge?
Techniques such as using shorter stitches, increasing or decreasing stitches, and evenly distributing stitches can be used to create a smooth crochet border on a curved or irregular edge.
Related Posts
 Easy Crochet Gnome Pattern Free: Transform Yarn into Whimsical Friends
 Crochet Star Blanket: A Stellar DIY Guide
 How to Crochet Slippers for Beginners Step by Step with Pictures: Cozy Feet Awaits
 Adjustable Ring Crochet: Master the Magic Circle
 How to Crochet Without a Hook: Hands-On Creativity