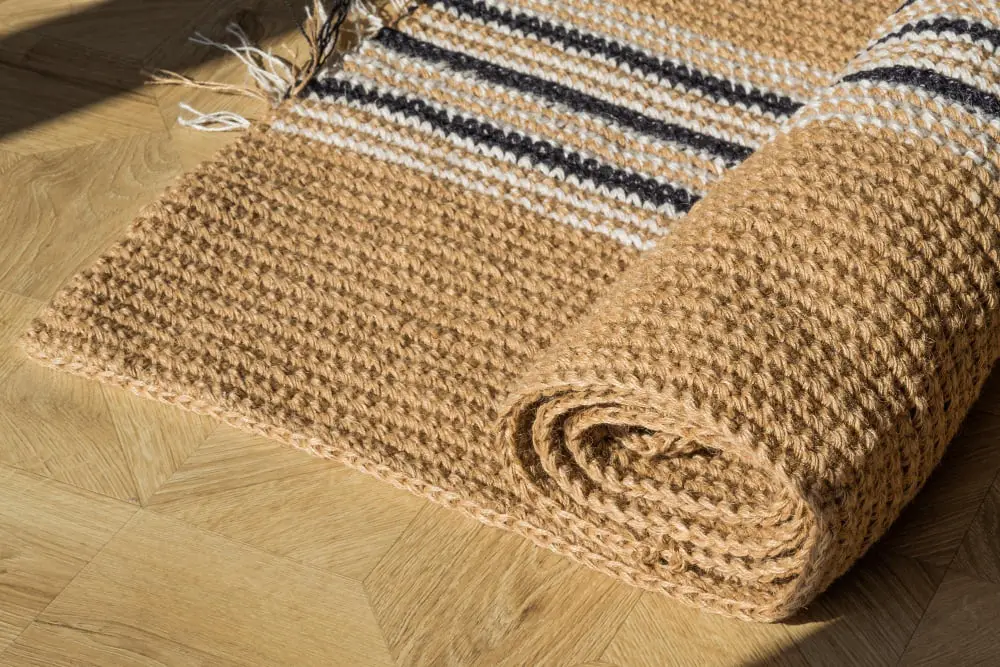
Explore the process of creating a beautiful, handmade rug using yarn to enhance your home’s aesthetic appeal.
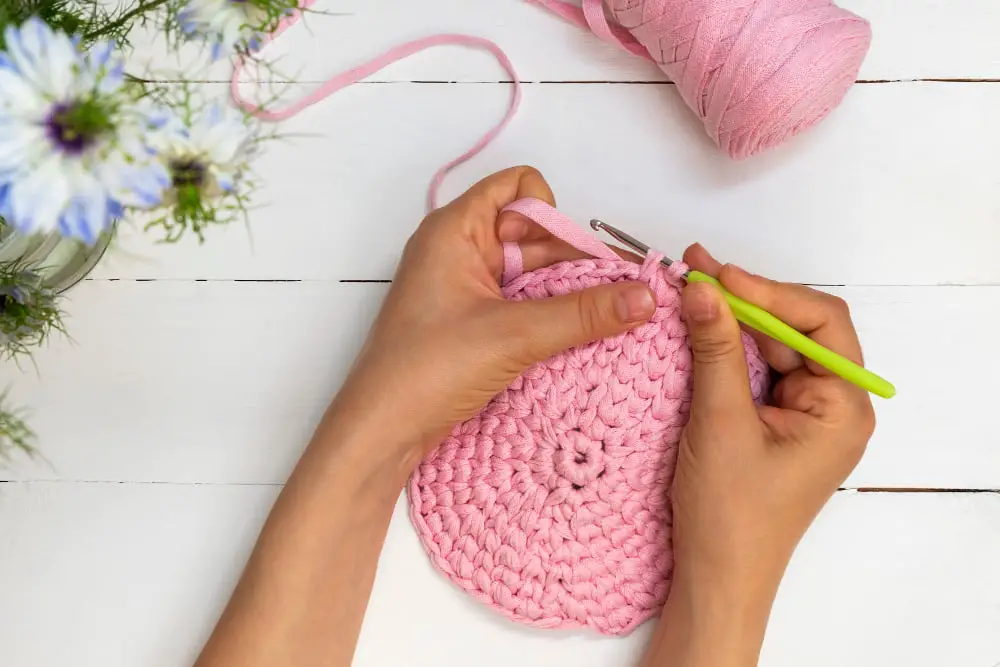
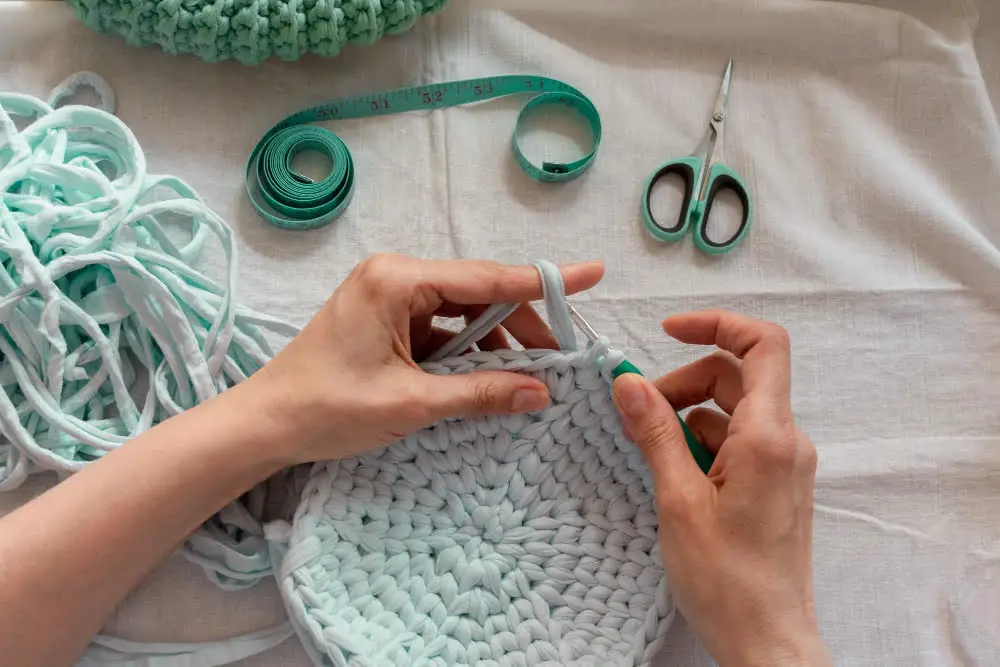
Creating a rug with yarn can be a fun and rewarding project, whether you’re a seasoned crafter or a novice. The process involves selecting your yarn, choosing a pattern, and mastering a few basic crochet or knitting techniques.
This article will guide you through these steps in detail, ensuring you have all the information you need to make a beautiful and functional rug. From picking the right yarn and pattern to understanding the techniques involved, you’ll find everything you need to create your own cozy masterpiece.
Key takeaways:
- Loop yarn simplifies knitting and crocheting projects, suitable for beginners.
- Popular loop yarn brands include Bernat Alize Blanket EZ Yarn, Red Heart Loop-It Yarn, and Lion Brand Off The Hook Yarn.
- Measure the amount of loop yarn needed based on the size and design of the rug.
- Choose the right rug canvas based on the desired technique and use of the rug.
- Use a small crochet hook to hook the yarn through the rug canvas.
Supplies You Need for Making Rugs
Before embarking on this crafting adventure, ensure your workspace is equipped with special tools and materials.
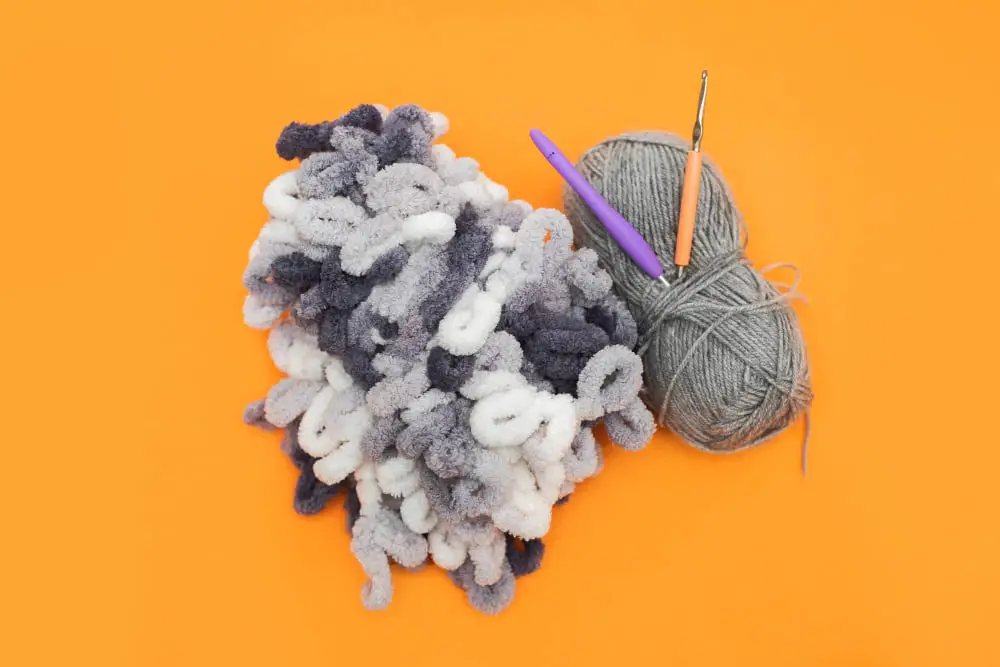
First is loop yarn, a fun, fresh and innovative kind of yarn, perfect for hand-knit rug making. No needles or hooks are necessary, your fingers do all the magic.
Next, grab a rug canvas. It serves as a foundation for your rug, providing a grid for the design. It’s sturdy and will give your rug a strong base.
Add a small crochet hook to your toolkit. You’ll use it to form a lock stitch on the yarn, making your rug sturdy and durable.
A steel yarn needle is indispensable. It’s perfect for weaving in yarn ends and sewing in the rug backing.
For a polished, finished look to your rug, ensure to have some finishing yarn. It securely binds off the edges of the rug.
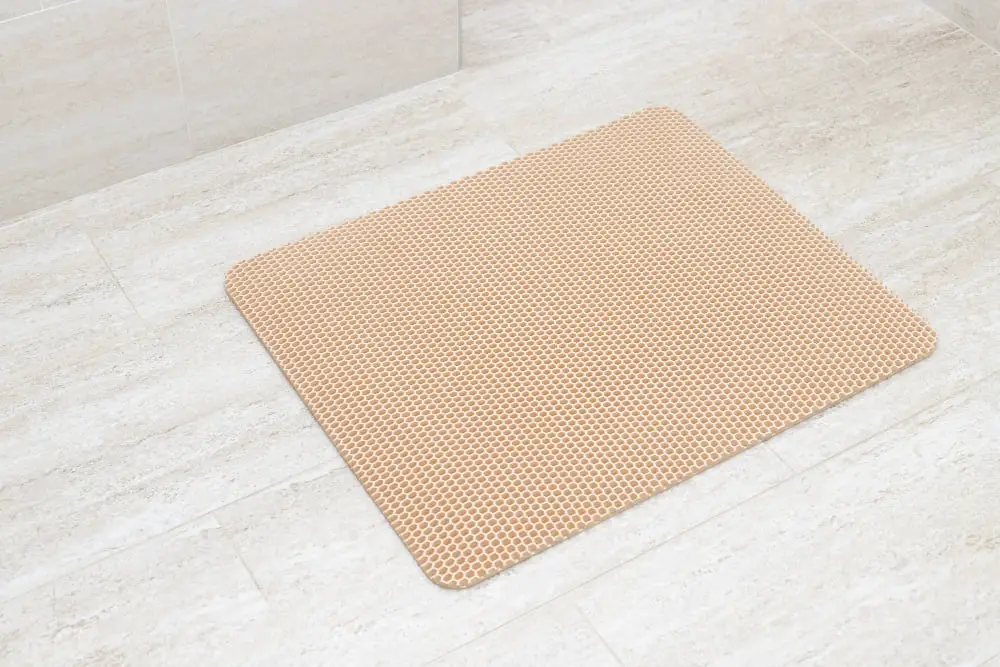
Don’t forget about safety! A non-slip rug pad or a bottle of latex rug backing will ensure your rug stays firmly in place, preventing accidental slipping.
Lastly, invest in a sturdy pair of scissors for cutting yarn. It’d make trimming excess yarn and canvas an easy task.
Having these supplies ensures you can start and finish your rug-making project without unnecessary interruptions.
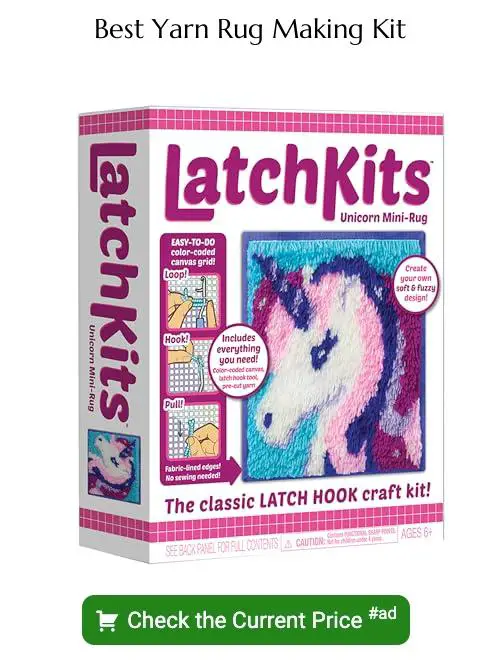
What Is Loop Yarn?
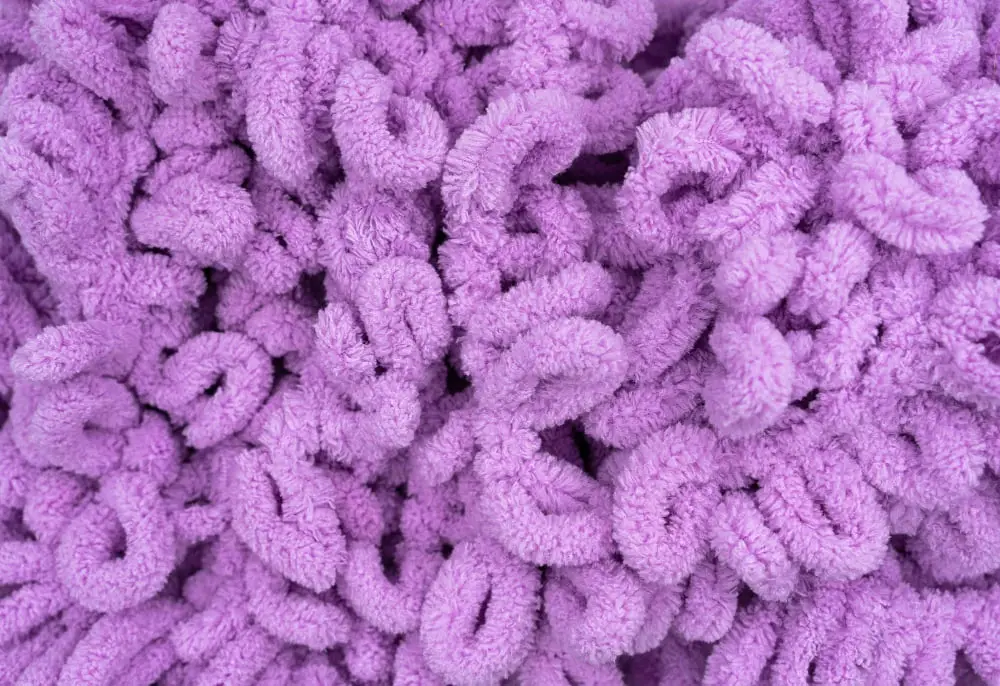
Loop yarn is a specially designed type of yarn that simplifies knitting and crocheting projects to a great extent. The yarn comes preformed with loops, eliminating the need for knitting needles or a crochet hook.
- Made of super-soft materials, typically polyester or similar blends, ensuring comfortable usage.
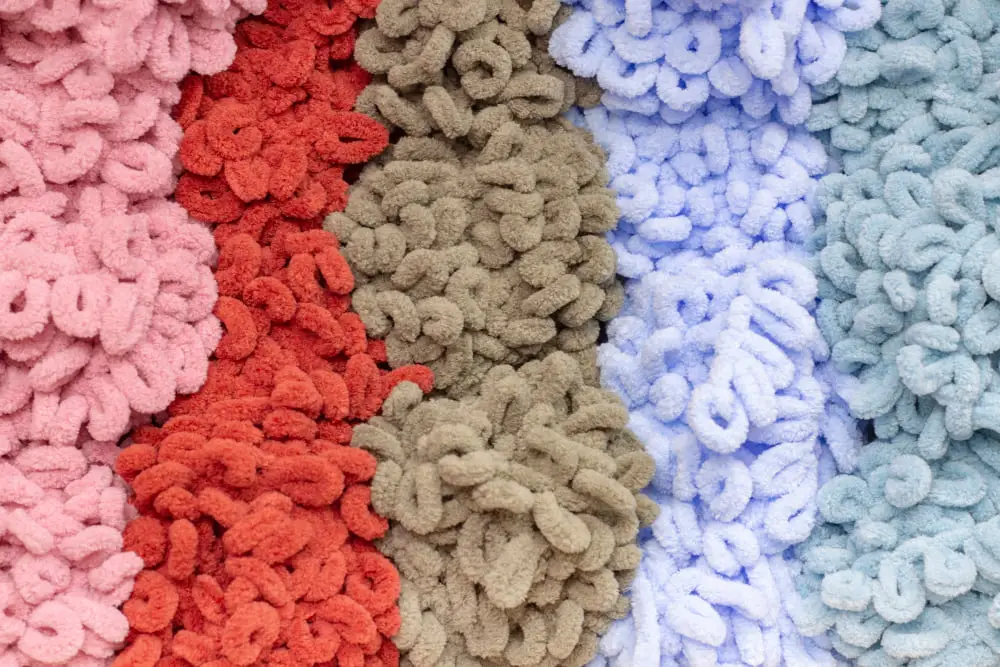
- Available in a multitude of colors and textures, providing countless aesthetic possibilities.
- The preformed loops in the yarn facilitate easy and fast creation of stitches.
- Simply put, you pull the loops through one another to create stitches, making crafting accessible even for beginners.
- Allows diverse project options, not limited to rugs but also extends to blankets, scarves, and hats.
- Recommended for beginners who want fast results and an easy learning curve, as well as experienced practitioners looking for a change of pace.
- It’s easy to handle, immensely reducing the possibility of dropped stitches – a common annoyance in crafting.
In essence, loop yarn simplifies and streamlines the process of crafting various items, including rugs, by preforming the loops and thus, eliminating some of the most complex steps in these endeavors.
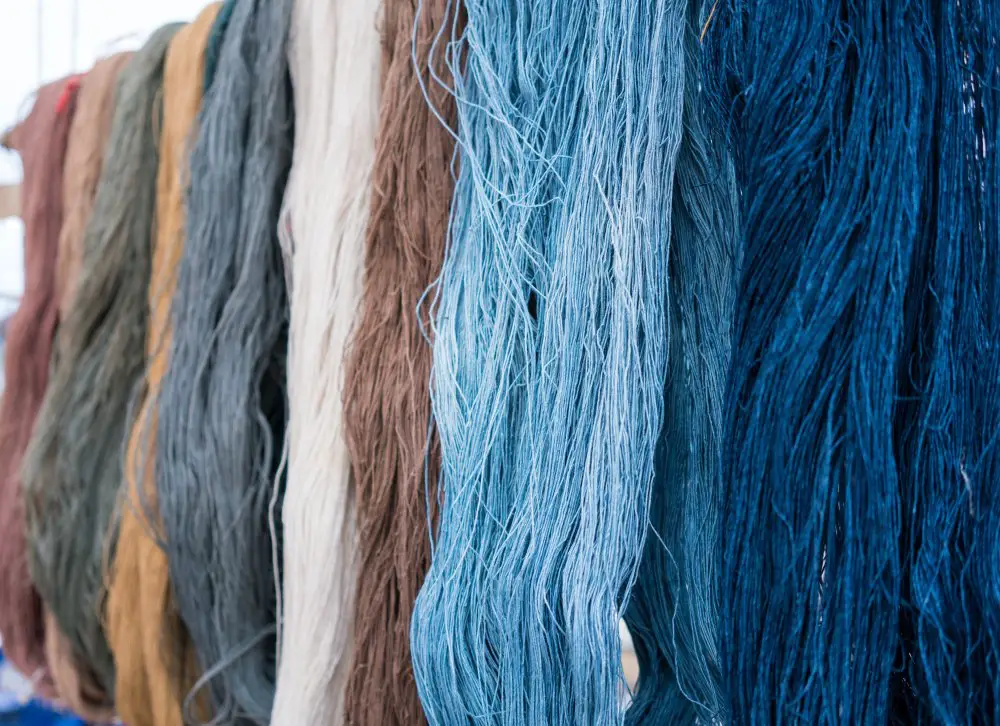
Which Brand of Loop Yarn Is Best?
Deciding on the best brand of loop yarn can vary according to personal preference, project requirements, and budget. Among the few leading brands are Bernat Alize Blanket EZ Yarn, Red Heart Loop-It Yarn, and Lion Brand Off The Hook Yarn.
The Bernat Alize Blanket EZ Yarn offers the advantage of being both soft and robust, great for comfortable yet durable rugs. They come in an array of vibrant and pastel shades.
Meanwhile, Red Heart Loop-It Yarn is known for its wide gradient color options, ideal for creating visually interesting projects. It’s also machine washable and dryable, making it a hassle-free addition to any rug crafting endeavor.
Lastly, Lion Brand Off The Hook Yarn is well-reputed for its smooth texture and rich color assortment. It has no dye lots, which ensures color consistency throughout the project. It’s perfect for those wanting aesthetics along with practicality.
Remember, while choosing, consider factors such as texture, color range, and care instructions. The best brand will be one that best fits your overall project requirements.
Measuring the Required Loop Yarn
Understanding how much material is needed starts with the size of the rug. A small rug of about two square feet could use up five skeins of loop yarn. However, a larger rug may require up to twenty or more skeins. Take note that the loop yarn is measured in yards, typically sold in skeins of about 18 yards each.
Consider the design. A more detailed or patterned design may need extra yarn compared to a basic, single-color rug.
Finally, to ensure enough material is on hand:
- Purchase extra skeins to account for errors or adjustments.
- Keep the store receipt in order to return unopened and unused skeins if not needed.
- Consider purchasing all the necessary skeins upfront, as dye lots can vary between batches, potentially leading to slight color variation.
This careful approach ensures a smooth rug-making process, with no pauses due to a shortage of yarn.
Choosing the Right Rug Canvas
A rug canvas plays a crucial role in DIY rug making. It essentially acts as the foundation of your project, keeping your stitches secure while you work.
Selecting a rug canvas might seem trivial but it’s a crucial step. The type of canvas you select can impact the overall look and functionality of your finished rug.
There are a few varieties options you’ll come across.
Standard rug canvas is typically made from a sturdy mesh fabric with a grid of large holes to accommodate the yarn. It’s relatively thick and sturdy, ideal for larger, heavy-duty rugs.
Latch hook canvas, on the other hand, is specifically designed for rugs made using a latch hooking technique. It’s denser and offers smaller holes than the standard version, enabling detailed designs.
Third is the plastic canvas which is relatively lighter and flexible, ideal for smaller, lightweight projects.
Your choice between these options should be influenced by two main factors: the technique you plan to use and the intended use of the completed rug. If designing a decorative wall hanging, a standard or plastic canvas might suffice. But if you intend to craft a functional floor rug capable of withstanding substantial foot traffic, a sturdy latch hook canvas could be the more appropriate choice.
Remember, the canvas should be larger than your intended rug size to allow room for finishing edges and accommodating design adjustments.
Selecting the Small Crochet Hook
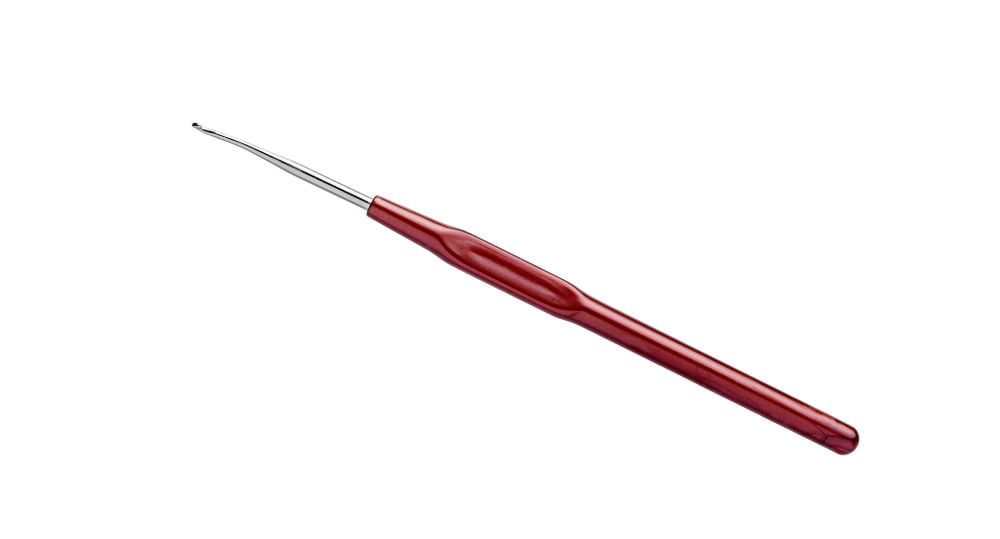
Small crochet hooks are crucial for hooking the yarn through your rug canvas. When selecting your tool, consider the hook size. You’ll want a size that complements your loop yarn’s thickness neatly.
- Opt for a smaller hook (size E-4 to 7 or 3.5 to 4.5 mm) if you’re working with thinner yarn.
- If your yarn is thicker, it’s okay to lean towards a larger crochet hook (size I-9 to K-10.5 or 5.5 to 6.5 mm).
Look at the material of your crochet hook. Most beginners find aluminum or plastic hooks easier to maneuver. On the other hand, bamboo or wooden hooks can offer a warm, informal feel, perfect for rustic-style rugs.
Lastly, the handle of your crochet hook should feel comfortable in your hand. Ergonomic handles can provide additional comfort during long crafting sessions. Long handle hooks are preferable as they provide more control.
The Necessity of a Steel Yarn Needle
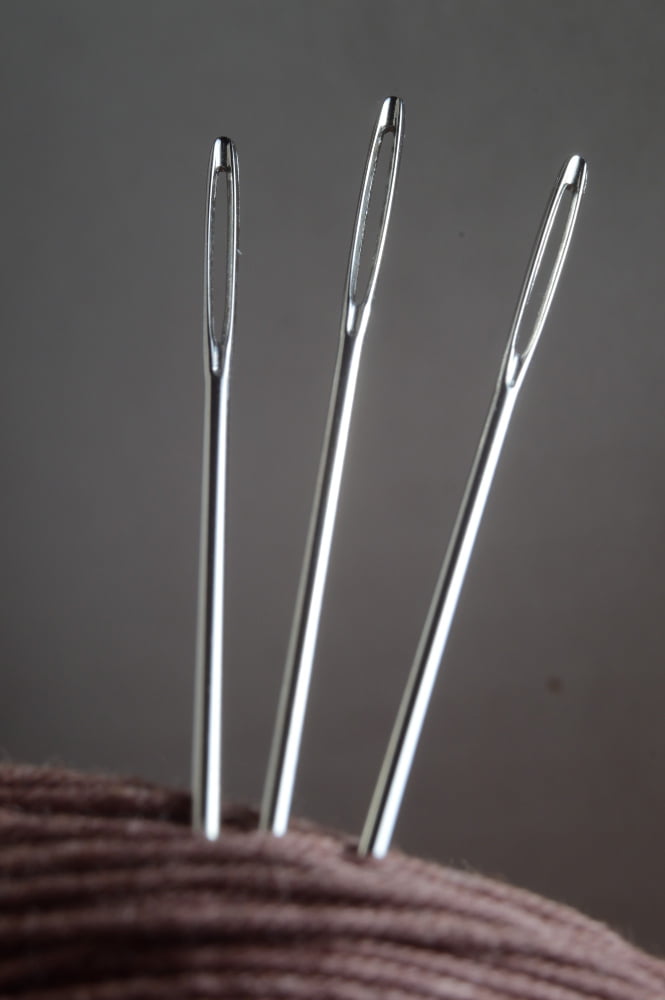
A steel yarn needle is indispensable in the process of yarn rug making. Sturdy and durable, it seamlessly helps in weaving the ends of the yarn into your rug, providing a neat and professional finish. The large eye of the needle allows for easy threading, accommodating the thickness of the yarn comfortably.
When choosing a steel yarn needle, opt for one with a blunt tip. This ensures that the needle threads the yarn without splitting it, maintaining the integrity of your rug.
To use the steel yarn needle:
- Thread the yarn through the needle’s eye. Keep a substantial length of yarn to weave into the rug.
- Start at one end of your rug. Push your needle and yarn through some stitches on the rug. Pull through until the end of your yarn is close to the rug’s surface.
- Repeat the previous step in different directions to secure the yarn.
These simple steps, done with your steel yarn needle, ensure that no loose ends poke out, achieving a polished look for your rug.
Understanding the Use of Finishing Yarn
Finishing yarn is crucial as it helps to enhance the overall appearance and durability of the final product. One important step in finishing yarn is washing it to remove any dirt, oils, or other impurities that may be present. This can be done by soaking the yarn in a gentle detergent and warm water, then rinsing it thoroughly.
After washing, the yarn should be dried properly to prevent any damage or mold growth. It is recommended to lay the yarn flat on a clean towel or drying rack and allow it to air dry. Avoid hanging the yarn, as this can cause it to stretch or lose its shape.
Once the yarn is dry, it can be wound into a ball or skein for storage or immediate use. This can be done by hand or using a yarn winder. Winding the yarn helps to keep it organized and prevents tangling or knotting.
Additionally, labeling the finished yarn is important for easy identification. This can be done by attaching a small tag or label with information such as the fiber content, yardage, and any special care instructions. This will help the user to know how to properly care for the yarn and ensure its longevity.
Step-by-Step Instructions for Making a Rug With Yarn
Start by making a plan of your rug design in advance. For a basic patterned rug, plot out your design on the blank canvas using a fabric marker.
Cut the loop yarn into small pieces, each containing a single loop. Alternatively, for a more textured rug, cut longer pieces of yarn.
Insert the small crochet hook through a hole in the rug canvas from underneath. Keep the hook on top of the yarn and pull through to create a loop on the top side of the canvas.
Now, repeat these steps, ensuring each yarn piece is attached to the canvas in a consistent manner, following your drawn pattern. Remember to push the canvas strands apart to easily see the holes while working.
Once you’ve finished hooking the yarn, check for loose strands and secure them with added knots if necessary. Remember to thread the steel yarn needle with finishing yarn. This is used to outline the corners and edges of your rug to ensure a neat appearance.
For non-slip variants, flip the rug and apply a layer of latex rug backing. Once dry, this prevents the rug from moving on slick surfaces like wood or tile floors.
Trim excess canvas, leaving a margin around the edges of your rug. This will give a neat, finished look to your handmade rug.
If creating a pom pom rug, flip and fluff the yarn pom poms outward, arranging them to your desired density. Your handmade yarn rug is now ready to be used or gifted.
Marking the Rug Design

To start, one should carefully decide and mark the pattern and size of the desired rug on the rug canvas with a wax or chalk pencil. This guideline becomes pivotal in achieving the desired rug design.
There are two key steps in this process:
- In case one is using a pattern, begin by creating a grid with the help of a ruler and pencil on a piece of paper. Once this grid is formed, replicate your pattern into the squares. Transfer this pattern onto your rug canvas with a waxed or chalk pencil.
- If an abstract design is preferred or opting for a freehand design, directly sketch onto your pre-sized rug canvas. Remember, the final outcome heavily relies on this initial sketch. Fine tuning the design at this stage can smoothen the rest of the rug-making process.
Ensure the markings are clear yet temporary as they will guide the yarn placement. They should be easy to remove once the rug is complete. One might also consider marking off areas designated to specific colors to streamline the yarn hooking stage.
How to Hook the Yarn
Start by pushing the hook through a hole on the canvas from the front to the back. Grasp the loop of the yarn with the hook, then guide it through the canvas hole to the front. Now the loop should be on the front side of the canvas.
Slide the hook through the loop and grab the yarn’s tail. Draw the tail through the loop gently until it creates a new loop over the hook. Pull the new loop towards you while holding the end of the yarn taut.
Remember to hold the yarn from the back of the canvas to control the loop size on the front. Use the hook to grab the loop and push it through to the back of the canvas.
Continue this process, making one loop at a time. Ensure that loops are uniform and consistent to create a polished look for your rug. It’s important to be patient in this process, as rushing can lead to uneven loops and a less refined finish.
Trimming Excess Yarn and Canvas
Once the hooking process is completed, it’s important to trim any excess yarn and canvas to create a clean, finished look. This entails cutting the strands of yarn to a uniform length and also snipping off any extra canvas around the rug’s edge.
– Begin by turning your rug so the back side is facing upwards. This will allow you to clearly see any uneven yarn lengths.
– Using a pair of sharp scissors, trim the yarn strands. The ideal length is generally about an inch, but this can be adjusted based on your personal design preference. Just ensure all lengths are uniform across the rug.
– After the yarn is trimmed, turn your focus to the canvas. The aim is to leave about an inch of canvas around the hooked area as this will create a natural border.
– Cut carefully along the desired line, making sure not to cut any of your looped yarn in the process.
– If there are any stray strands of yarn left on your canvas, make sure to trim these as well.
Remember, careful trimming is crucial, as this step significantly contributes to the overall aesthetics of your handmade rug.
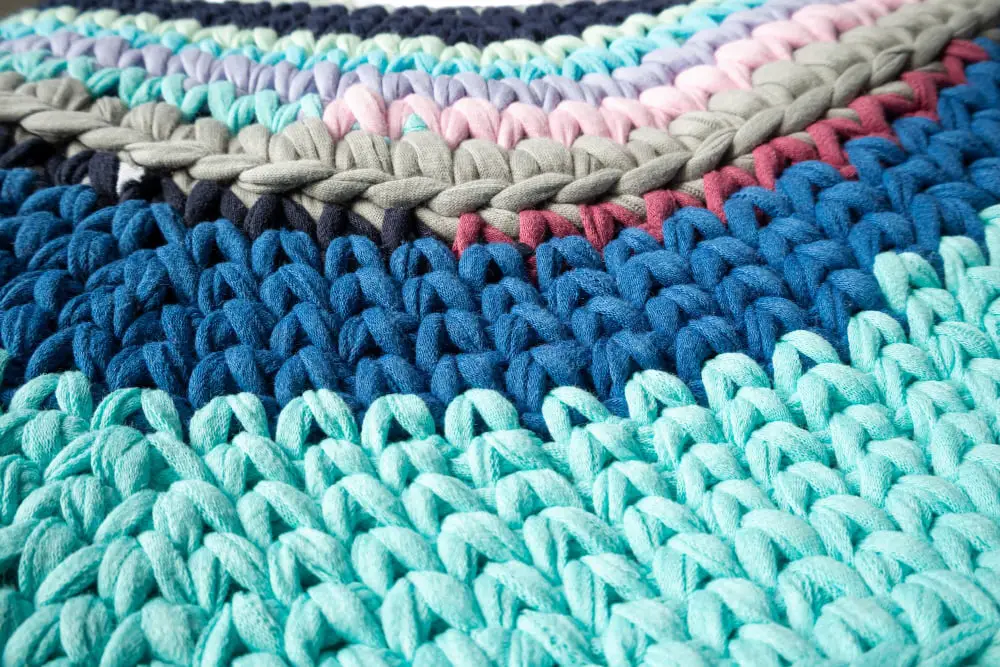
Finishing Techniques for a Yarn Rug
Once the main pattern of your rug is complete, it’s crucial to properly finish it to ensure durability and longevity.
Begin by securing the last loop of yarn. This can be achieved by cutting the loop in half and tying a knot. The knot should be pulled tightly so it’s hidden within the bulk of the rug.
Subsequently, consider adding a fringe or edge to the rug. This can be done using additional yarn, knotted in consistent intervals around the border of the rug.
Additionally, the rug’s edges should be hemmed to maintain its shape and prevent unraveling. For this, fold over the edges of the rug’s base material, pin to hold in place, and sew using a whip stitch in the same color yarn or thread.
Then, trim any additional excess yarn to maintain a clean, uniform appearance.
Lastly, it is essential to secure the rug’s bottom to make it safe to step on. Commercial rug backing solutions, such as non-slip rubber or latex, are often used. Alternatively, a DIY solution is to apply dots of hot silicone in a grid pattern.
Remember, properly finishing the rug not only perfects its appearance but also increases its usability and lifespan.
Making the Rug Non-Slip
Adding a non-slip backing is essential for safety and durability. Start by laying out your finished rug on a clean surface, face down. Opt for a rug pad that is slightly smaller than your rug. This is to ensure it will remain hidden.
Cut the rug pad to size using sharp scissors. If the rug pad is not self-adhesive, a hot glue gun will prove handy. Apply a thin layer of hot glue on the rug pad, carefully adhering it to your rug.
Allow the glue to dry completely before moving the rug. Remember, this layer of rug pad will provide the necessary traction to prevent it from moving or slipping on different kinds of floor surfaces. To keep the pad clean, consider vacuuming it regularly. This aids in removing dust and other debris, prolonging the life of your rug.
Optional graspable rug corner grippers also exist. Stick these onto the corner of your rugs to have them stay exactly where you want them. This is particularly helpful for larger rugs or rugs placed in high traffic areas. They are easily removable and won’t leave any damage or residue.
Lastly, spray-on non-slip rug solutions available in craft stores can also be used. After drying, this spray creates a non-slip, non-visible layer on your rug’s backside. However, be aware, this method might need to be reapplied over time.
Choose a method that best fits your rug’s size, location, and specific use.
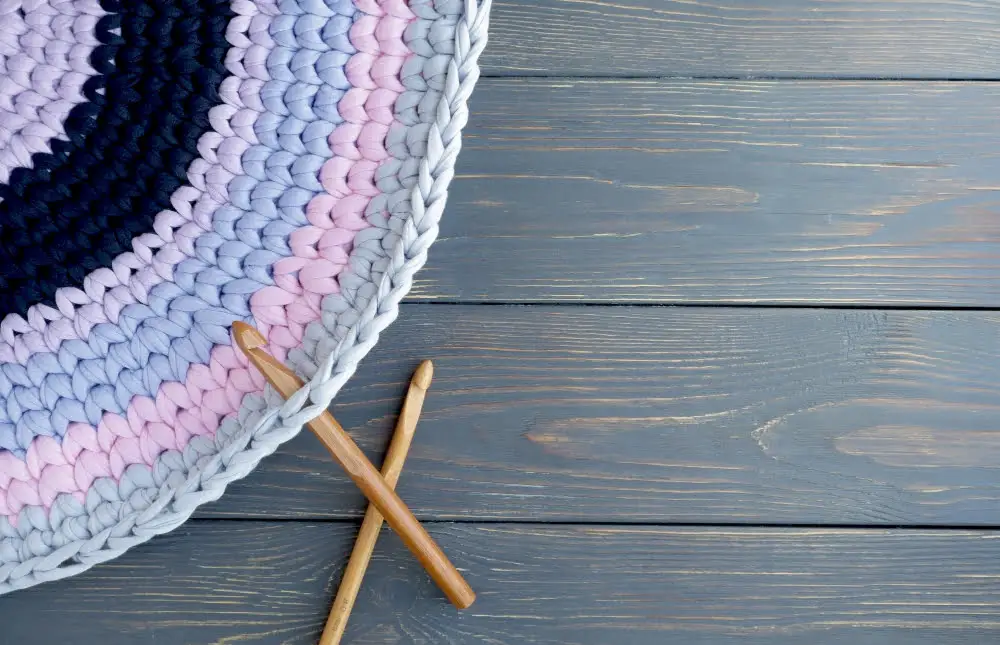
Caring for Your Handmade Rug
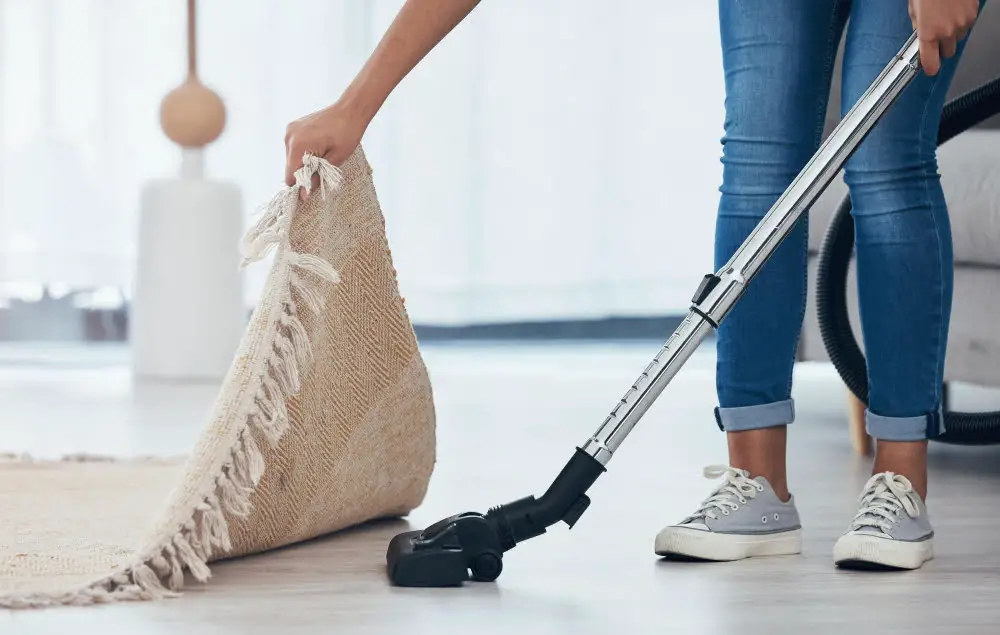
Regular cleaning can significantly extend the life of your handmade yarn rug, while maintaining its vibrant colors. Avoid using harsh chemical cleaners, which could damage the fibers of the rug. Instead, opt for gentle, natural cleaners.
Sweep or shake off any loose dust and dirt from the rug. A soft-bristle brush is effective for getting out stubborn particles.
If the rug gets stained, try to clean it as soon as possible. Use a cloth dampened with warm soapy water and gently blot – don’t scrub the area. Harsh rubbing can damage the rug fibers.
Spot test any cleaning agent on an inconspicuous part of the rug before applying it to a more visible area. This will ensure the cleaning agent won’t cause discoloration or damage to the yarn.
Avoid exposing the rug to long periods of direct sunlight, which can cause it to fade.
When not in use, store your rug in a cool, dry space. Roll the rug with the right side in and cover it with a cloth to protect it from dust and moisture.
Machine washing should only be done if the yarn packaging specifically states it’s machine-washable. Most handmade rugs prefer a more delicate hand wash.
For drying, lay the rug flat in the shade, as direct sun can shrink the rug and fade its colors. Rotate regularly to ensure it dries evenly.
Remember, frequent, gentle care will ensure the beauty and longevity of your handmade rug for years to come.
Creating a Full Loop Yarn Rug: Loop Placement
Upon preparing your canvas and marking the design, loop placement commences. Start at one edge of your design, pushing one end of a loop through a hole in the canvas with a crochet hook. Then, drag the opposite end of the loop through the adjacent hole in the canvas. Pull both ends together to secure the loop.
Follow the design you’ve sketched. If a denser rug pile is desired, fill every hole with a loop. Alternatively, pushing loops through every other hole results in a less dense, yet still full, rug pile. Consistency is crucial, so choose one method and stick throughout.
Remember, loop placement is significant when forming your design. A particular color’s loops must go in the allocated areas. Switch colors as per the design.
Work orderly, from one edge to the other, maintaining uniform row direction. This ensures a neat finish and avoids misplaced loops. Be careful not to pull the loops too tightly, to prevent warping the canvas or making the rug pile inconsistently dense.
Adhere to the rug dimensions. If you’ve finished a set of rows, these should match the planned rug width or length.
Whether you are following a pattern or creating a freestyle rug, always ensure to keep the loops consistently close together for uniformity, as any gaps can make the base visible and affect the overall look.
However, practice and patience are crucial as the rhythm of loop placement may take a while to master, but once proficient, you’ll find it hardly challenging. Only when all loops for the design are placed, you can proceed to the next step.
Final Touches for a Pom Pom Rug
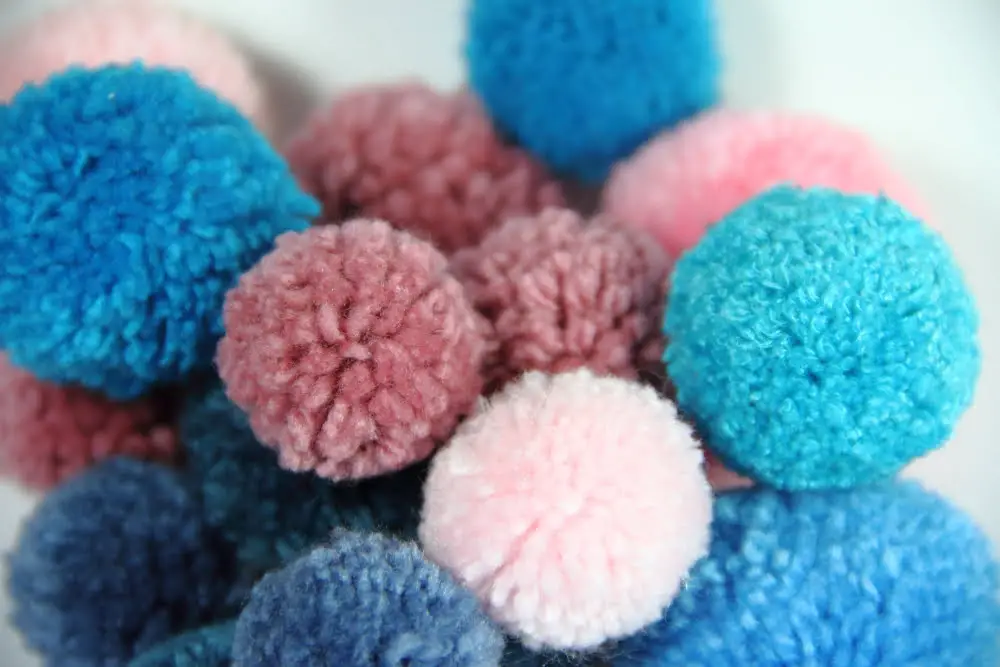
After the meticulous process of tying and trimming each pom pom, final touches play a substantial role in evolving a simple yarn rug into a well-rounded masterpiece.
Attach a backing onto the rug; it provides stability and gives the rug additional durability. Utilize a fabric that’s sturdy, yet comfortable — usually a non-slip grip type of material works well. Secure with fabric glue paying keen attention to the rug’s edges.
Comb out each pom pom to fluff them up and make them round. This can help the yarn puff out, giving the rug a fuller and livelier look.
Trim uneven ends of the pom poms. This gives the rug a uniform appearance and provides some order to the chaos of pom poms.
Hand sew any loose pom poms. Despite the best efforts, some pom poms might have come loose during the attaching process. Ensure no pom poms are loose or at risk of falling off.
Examine the rug from different angles and lighting. Sometimes, what looks perfect from one angle may appear slightly off from another. Inspecting the rug from all sides ensures you don’t miss any irregularities.
Finally, let the fabric glue dry fully before placing the rug onto the floor – this may take up to 24 hours depending on the specific brand’s instructions.
FAQ
Can you make a rug with yarn?
Yes, a rug can be created using yarn by employing basic crochet or knitting skills, along with a crochet hook and the choice of yarn, typically a heavy wool-acrylic mix, heavy cotton yarn or homemade T-Shirt yarn.
How much yarn is needed to make a rug?
To create a rug, approximately 200 grams of yarn are required per square foot, but having extra yarn is always advisable for any contingencies that may arise during the crafting process.
What kind of yarn do you use to crochet a rug?
For crocheting a rug, acrylic yarn, particularly bulky types or multiple strands used simultaneously, is preferred due to its lack of elasticity which helps in maintaining neat stitches.
What are the best patterns to follow when crocheting a rug?
The best patterns to follow when crocheting a rug include the round floral area rug pattern, the simple color-block rug pattern, and the ocean spiral rug pattern.
How do you ensure durability in your yarn rug creation?
To ensure durability in a yarn rug, use high-quality, thick yarns and tightly crochet or knit to create a sturdy weave.
Can recycled materials be incorporated into making a yarn rug?
Yes, recycled materials can be incorporated into making a yarn rug.


