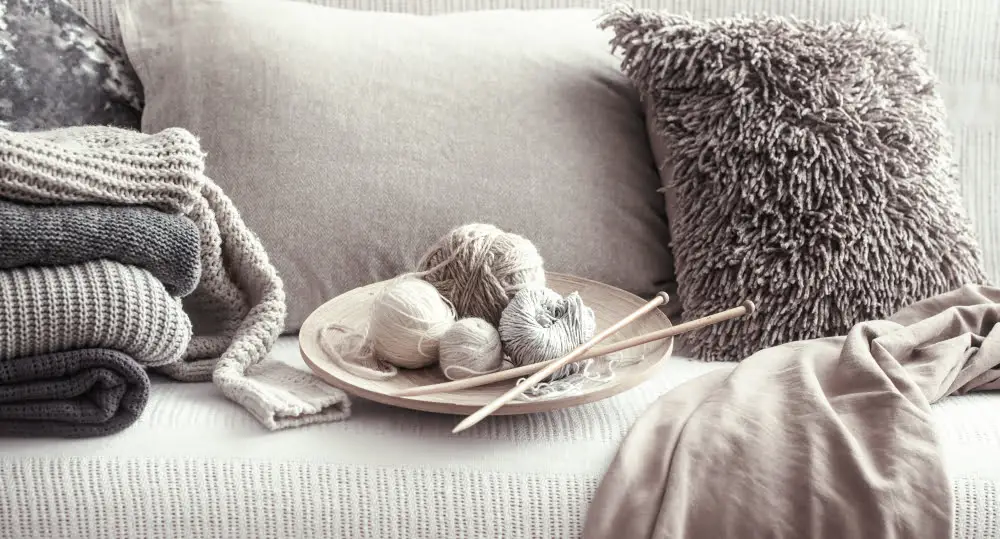
Explore the diverse and creative possibilities that yarn offers, from colorful crochet projects to intricate knitting designs, decorative crafts to functional home accessories.
Overflowing with yarn and not sure what to do with it? There’s a world of creativity waiting to be explored. From crocheting and knitting to more unconventional crafts, yarn can be transformed into a variety of beautiful and practical items.
In this article, we’ll delve into the many ways you can utilize your yarn stash, from simple beginner-friendly projects to more complex designs. Whether you’re a seasoned craftsperson or just starting out, you’ll find a plethora of ideas here to inspire your next yarn project.
So, let’s unravel the possibilities together!
Key takeaways:
- Dream catchers, tassel bookmarks, mobiles and windchimes, wall hangings, pom pom animals
- DIY yarn garland, cut yarn, secure to twine, space evenly
- Macrame yarn garland, tie yarn to cord, use square knots, add beads
- Loop yarn blanket, use loop yarn, create knit stitches, weave rows
- DIY yarn canvas art, sketch design, apply adhesive, press yarn onto canvas
Easy Yarn Crafts
For the creative crafter, there’s more to make from yarn than just sweaters and scarves. The flexibility and versatility of yarn make it a superb material for various kinds of DIY projects. If you wish to expand your horizon beyond traditional uses, here are some craft ideas to consider:
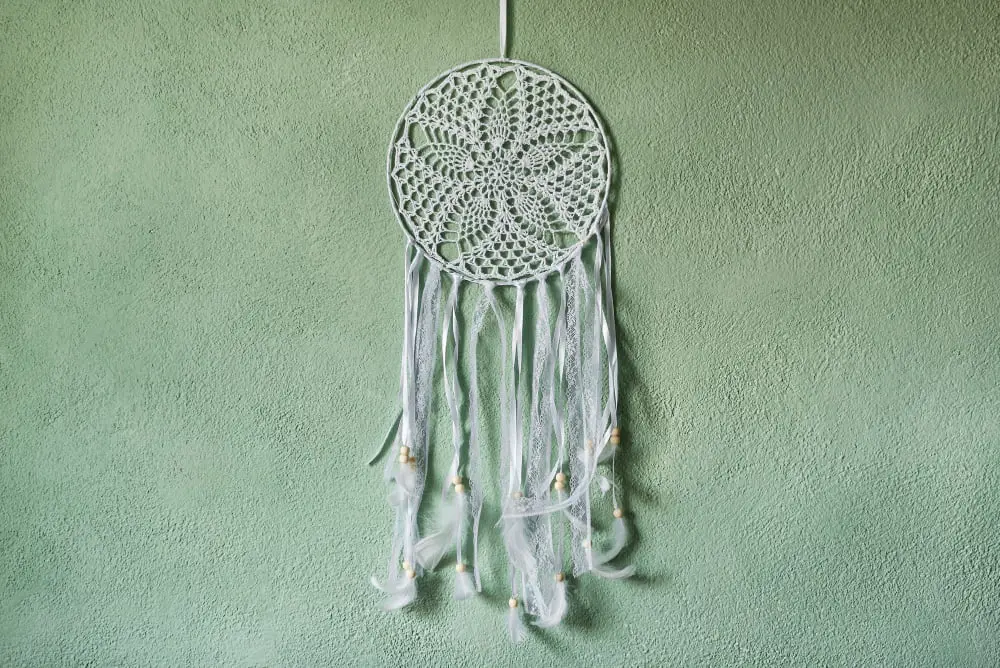
Dream catchers: With yarn and a hoop, you can create boho-inspired dream catchers. They are excellent for decorating bedrooms and living spaces and can even be personalized for gifting.
Tassel bookmarks: Combine your love for books and crafts by creating tassel bookmarks. Simply loop some yarn strands together and trim them into a uniform tassel shape. Attach to a long string for marking pages.
Mobiles and windchimes: Hang multiple strands of yarn with bells or beads at the ends to create a simple but effective decorative piece.
Wall hangings: These can be simple tassels attached to a wooden dowel, or more complex weaving projects. Wall hangings are an artistic way to add texture and color to a room.
Pom pom animals: Use a pom pom maker to create colorful yarn pom poms, then assemble them into cute animals or characters. This one is perfect for kids and kids-at-heart.
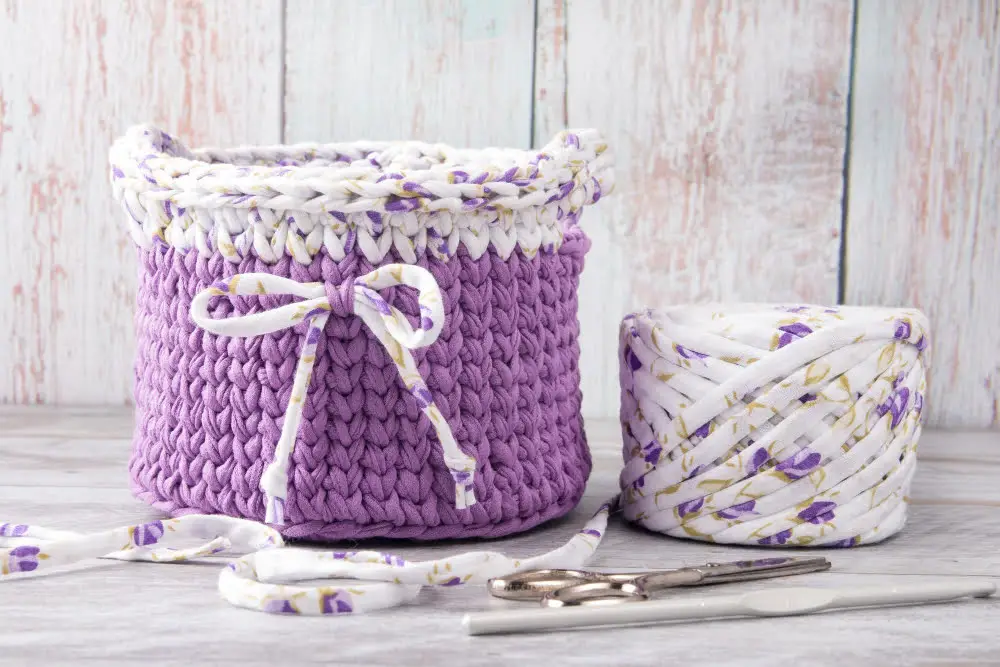
Knitted or crocheted baskets: Rather than traditional makes, why not create some small baskets? These can be used for storage or decoration.
Wrapped Bottles: As a unique home decor idea, use yarn to wrap around old wine or beer bottles. It creates a vibrant, textured vase or candle holder.
With these ideas, your options for yarn crafts extend far beyond the customary knit and crochet. Challenge yourself and explore the myriad possibilities yarn offers. But remember, in crafting, the aim is not perfection, but creativity and enjoyment.
DIY Yarn Garland
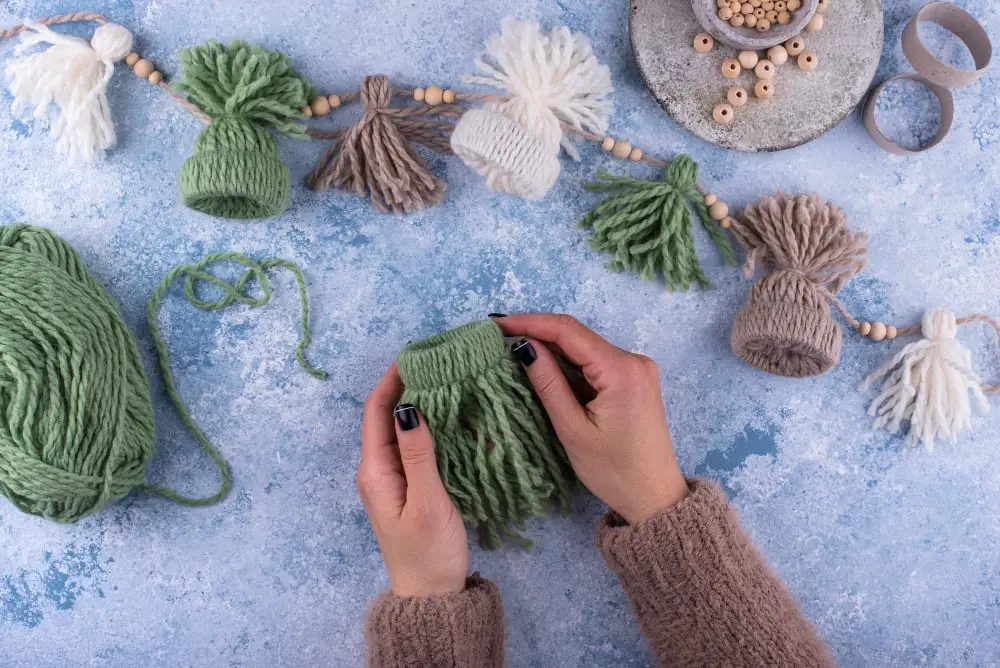
Creating a DIY yarn garland can be an engaging and rewarding activity.
Select various shades of yarn that complement each other. Cut the yarn into similar length strands. The length depends on how long you’d like the garland to be.
You will also need a piece of sturdy twine, again, the length would be dependent on where you’d like to hang your garland.
Start by folding a piece of yarn in half and form a loop at the folded end. Slip this loop under the twine. Next, take the two loose ends of the yarn and pass them over the twine and through the loop. Pull the loose ends to tighten against the twine, forming a knot.
Repeat this process with all the yarn pieces. Mix and match the colors to create a vibrant design.
Spread out the knotted yarn evenly along the length of the twine. At this point, you can trim the ends of the yarn to give your garland a uniform appearance or leave them uneven for a more rustic look.
Your DIY yarn garland is ready. It’s a versatile decoration, suitable for brightening up any corner of your home or as a festive adornment.
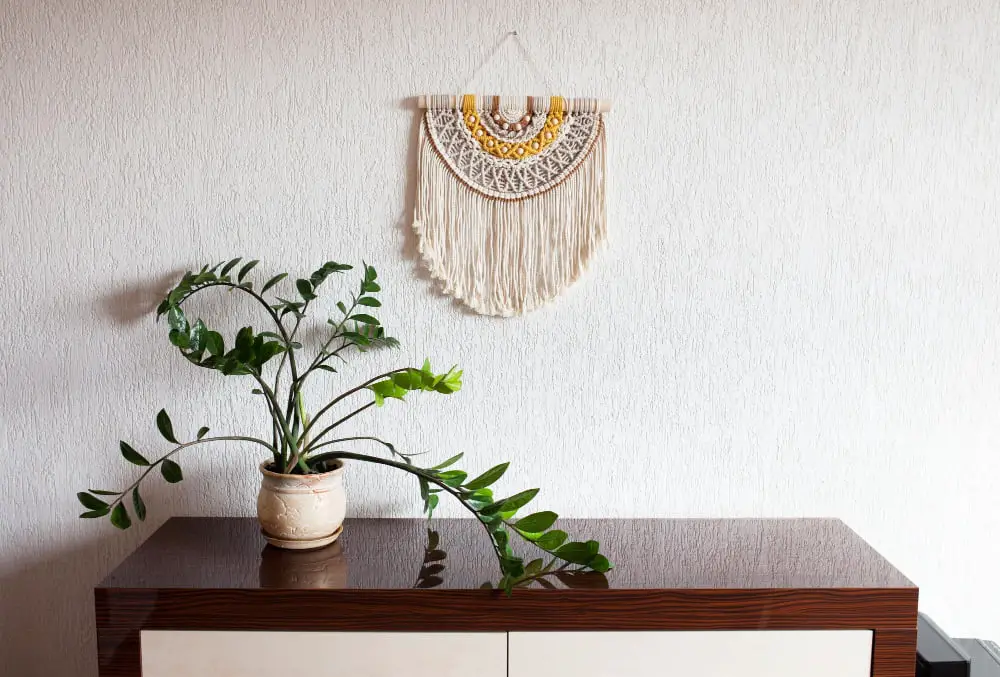
Macrame Yarn Garland DIY
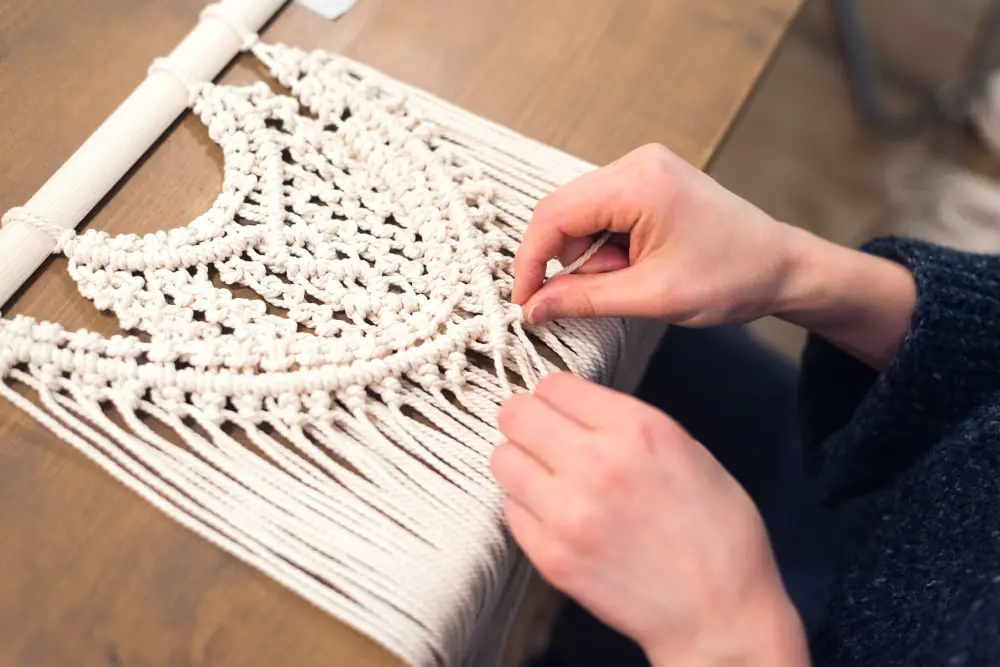
Macrame yarn garlands add a handmade, boho touch to any space. They are a perfect blend of craftiness and elegance, easy to make using simple macrame knotting techniques.
– Choose your desired shade of yarn. This could be a single color, or several coordinating colors.
– Cut multiple strands of yarn, all the same length. The length will depend on how long you want your garland to be, but remember to allow extra for knotting.
– Tie the strands of yarn onto a sturdy string or cord using a simple lark’s head knot. This type of knot involves folding the yarn in half, placing the loop under the cord, then feeding the two loose ends through the loop.
– Space the knots out evenly along the cord, or cluster them for a fuller effect.
– Once the yarn is tied on, it’s time to start knotting. There are various macrame knotting techniques to use, and the square knot is a good one for beginners.
– To create a square knot, take four strands of yarn (two tied pieces), cross the far-right strand over the two middle strands, then under the far-left strand. Pull the far-left strand under the two middle strands and through the loop created by the far-right strand. Repeat this in the opposite direction starting with the far-left strand.
– Continue knotting until the garland has reached your desired thickness.
– As a final touch, consider adding some beads or other adornments to the garland.
With a little practice, you will master the knotting techniques and you will be creating macrame yarn garlands in no time. This craft is not only fun but it also produces stylish decorations for your home.
How to Make a Loop Yarn Blanket
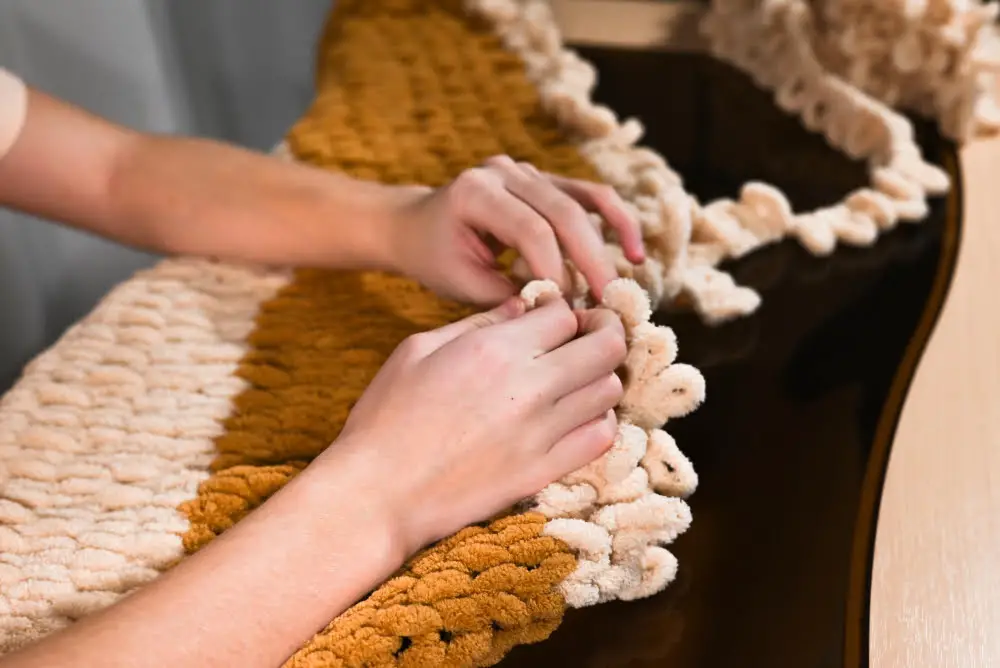
Making use of loop yarn, knitting a blanket becomes an easily accessible craft even for beginners. Start with choosing the color and texture that suits your preference. The loop yarn comes already with loops that are easy to work with, removing the need for knitting needles.
Select your first loop on the yarn and lay it out flat. Take the second loop in the yarn, and push it up and through the first loop from the back. Let the first loop fall down over the second loop, pulling it tight enough to create a knot-like structure known as a knit stitch.
Creating the blanket’s width entails pulling more loops from the yarn bundle through your previously knitted stitches, repeating until you reach the wanted width. The length of the blanket is simply achieved by layering row upon row of these stitches.
Ensure to weave in loose ends, for a neat finish, once you’ve reached your desired size. Secure the ends by trimming excess loop yarn, taking care not to cut too close to your last stitch to prevent unraveling.
For those who desire a patchwork design, create several small squares and sew them together. This is an excellent method for using multiple colors or to make use of leftover yarn.
Remember, patience is vital, especially if you’re a beginner. The process might feel complicated initially, but with each stitch, you’ll gain confidence and speed.
DIY Yarn Canvas Art
To create your own DIY Yarn Canvas Art, you’ll need a blank canvas, different yarn colors, a pencil for sketching, and a strong adhesive or mod podge.
Begin by sketching your desired design lightly onto your canvas. Simple shapes and abstract forms are recommended for beginners. Next, measure the yarn to fit the lines of the sketch on the canvas. Cut the required length.
Apply adhesive on the sketched lines. Remember to work on one line at a time so that the glue does not dry out prematurely. Now, gently press the yarn onto the adhesive, following the sketched design. Take care to keep the yarn straight and taut without any slack.
You can choose to fill your pencil lines completely with yarn for a bold look or create an outline for a minimalist design. Explore with different colors of yarn for varied aesthetic effects. Let the adhesive dry for a suggested time before moving or hanging your artwork.
Remember that patience is key to create beautiful Yarn Canvas Art. The process might be time-consuming but the end result, a personalized piece of art, is worth it.
Yarn Wall Hanging
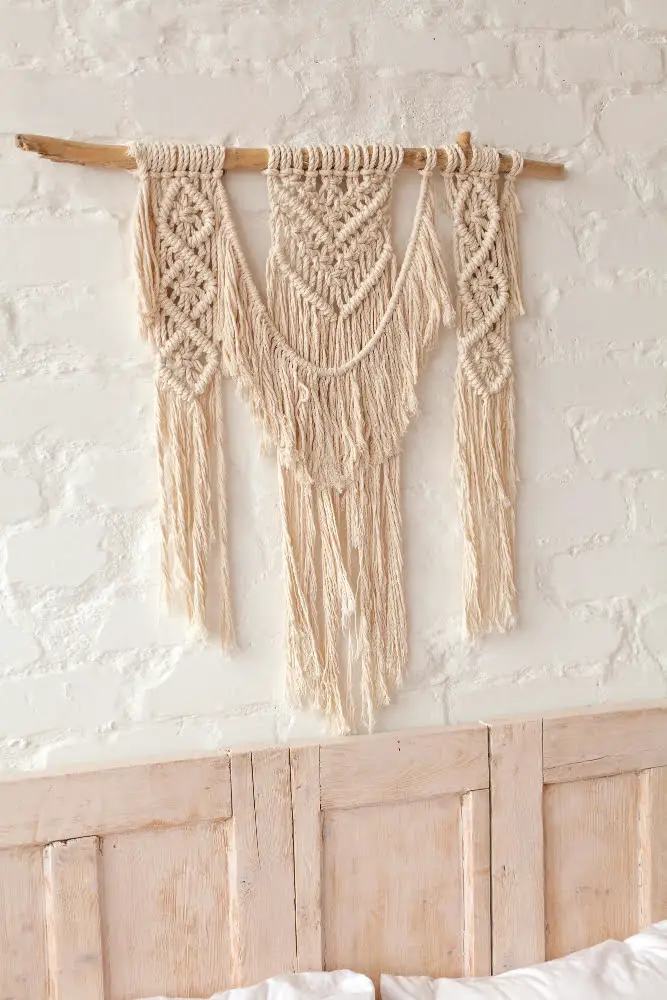
Creating a yarn wall hanging can be a fun and rewarding project. First, you need to select a dowel or stick that becomes the base of your work. This could be anything ranging from driftwood to a simple wooden dowel from a craft store.
Next comes the choice of yarn. Consider multiple shades or even contrasting colors. Also, the thickness of the yarn can greatly enhance the texture of your wall hanging.
Once armed with your essentials, start by cutting your yarn into lengths double the size you want your hanging to be as it will be folded over.
Then, you attach these lengths to your base using a lark’s head knot. Simply fold your yarn length in half, place the loop under the dowel, and then feed the two loose ends through the loop and pull tight.
Continue this process across the length of the dowel until you’re satisfied with its fullness.
Scissors then come into play, helping you add designs to your hanging. Trim the ends in an angle or a curve, or keep it simple with a straight line.
One important aspect of this craft is remembering that perfection isn’t the goal; the unique nature of each piece is what makes it special.
How to Embroider Baskets With Yarn
Firstly, pick a basket made of a porous material like wicker or cane, as these are easier to embroider. Get yarn in the colors desired for the embroidery, and a thick, sharp needle.
To begin, thread your needle with a long piece of yarn. Push the needle through a hole or crevice in the basket from the inside – this will form your starting point. Leave a small tail of yarn on the inside of the basket to ensure your job won’t unravel.
The method is simple: push your needle from the inside of the basket through to the outside, creating a stitch. Then push your needle through a neighboring space from the outside, back to the inside, and repeat the process. You can make your stitches in any pattern you’d like!
For a clean finish, when you’re about to run out of yarn or have finished your pattern, cut the yarn leaving a small tail on the inside of the basket. Tie this tail firmly to your starting point of yarn.
With these steps in mind, you can create stunning patterns on your basket. A simple straight line embroidery or a more complicated cross-stitched pattern can add a unique touch to your room decor. Learn the basics and then let your creativity soar with different colors, patterns and baskets!
Pom Pom Wreath

To begin the Pom Pom Wreath project, you’ll need a foam wreath form, yarn in colors of your choosing, a pom pom maker, scissors, and a hot glue gun.
Start by making several pom poms using the pom pom maker. The process involves wrapping yarn around the parts of the pom pom maker, then using scissors to cut along the center.
For a full, fluffy wreath, create enough pom poms to densely cover the entire foam wreath form.
Next, depending on your preferred design, arrange the pom poms before using the hot glue gun to attach them to the foam wreath form.
Spacing can vary based on your aesthetic preference. You can have them tightly packed for a full look or spaced out for a minimalist design.
To hang the wreath, a length of yarn can be attached to the form, then mounted on a hook or nail.
While this craft is relatively easy, keep in mind it might be time-consuming due to the pom pom creation process, so plan accordingly.
Remember, this craft allows for customization; don’t hesitate to choose different yarn colors and textures to create your unique wreath.
DIY Shaggy Latch Hook Cushion Cover
Crafting a Shaggy Latch Hook Cushion Cover can be a creative and rewarding task. Start by choosing your favorite yarn color and texture for a personal touch.
Then, gather a latch hook tool, canvas cube, and scissor.
Firstly, cut several strands of yarn to equal length, ideally about twice as long as you’d like the shaggy ends to be.
Then, carefully wrap each strand around the base of the latch hook tool, ensuring equal distribution across the canvas square.
Following this, use the latch hook tool to pull your yarn loop through a hole in the canvas. Repeat this process until you’ve filled all the canvas square holes.
After each square is filled with the latch-hooked yarn, it’s time to assemble your cushion. Begin sewing the canvas square to your cushion cover using a yarn of choice.
Lastly, remember to secure the ends with sturdy knots to ensure the work doesn’t unravel with use over time. Take pleasure in adding a crafted piece of décor to your room that is cozy and personalized.
DIY Woven Yarn Bangles
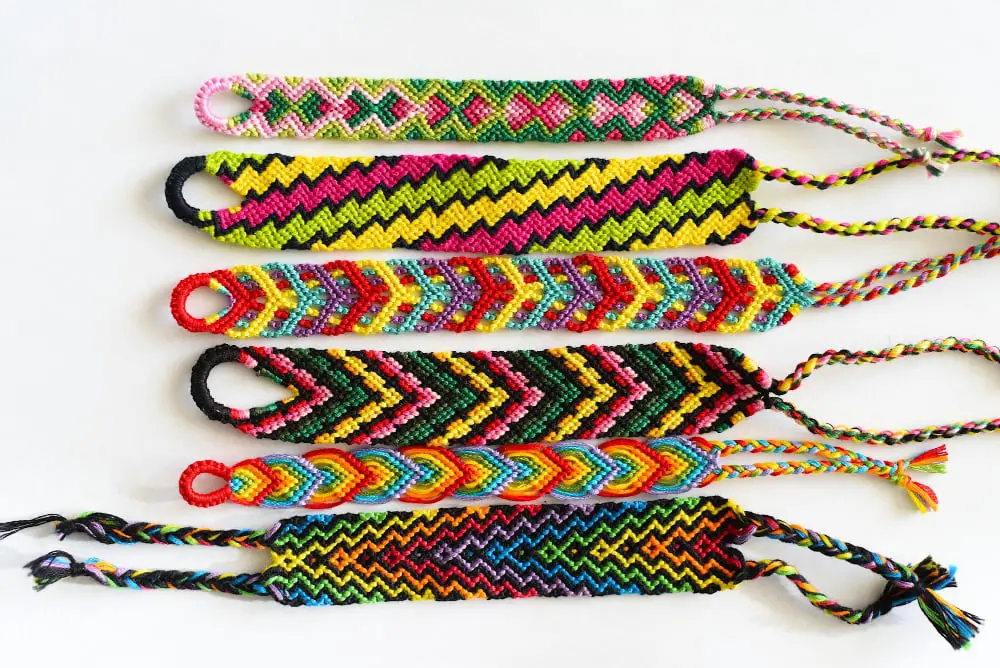
Begin with the right materials. You’ll need an old bangle, 100% cotton yarn in colors of your choice, glue, scissors, and a palette.
Start by adding a small dab of glue on the inner part of the bangle, tie the cotton yarn over this spot. Remember to let the glue become tacky before you attach the yarn. This will reduce slippage while you are working.
Wrap the yarn tightly around the bangle and make sure to cover the initial knot as you proceed. You can switch the colors by cutting the yarn, attaching a new color with a knot, and continuing the wrapping process.
Keep an eye on the spacing as tidy, consistent wrapping is key to achieving a great look. If you spot any gaps, gently push the yarn together to cover them.
When you have completely covered the bangle, cut the yarn leaving a small tail. Thread this tail under the previously wrapped yarn, pull it tight, and then cut off any excess to finish.
Add a personal touch by using a different combination of colors for every bangle to create a set.
How to Make Yarn Dolls
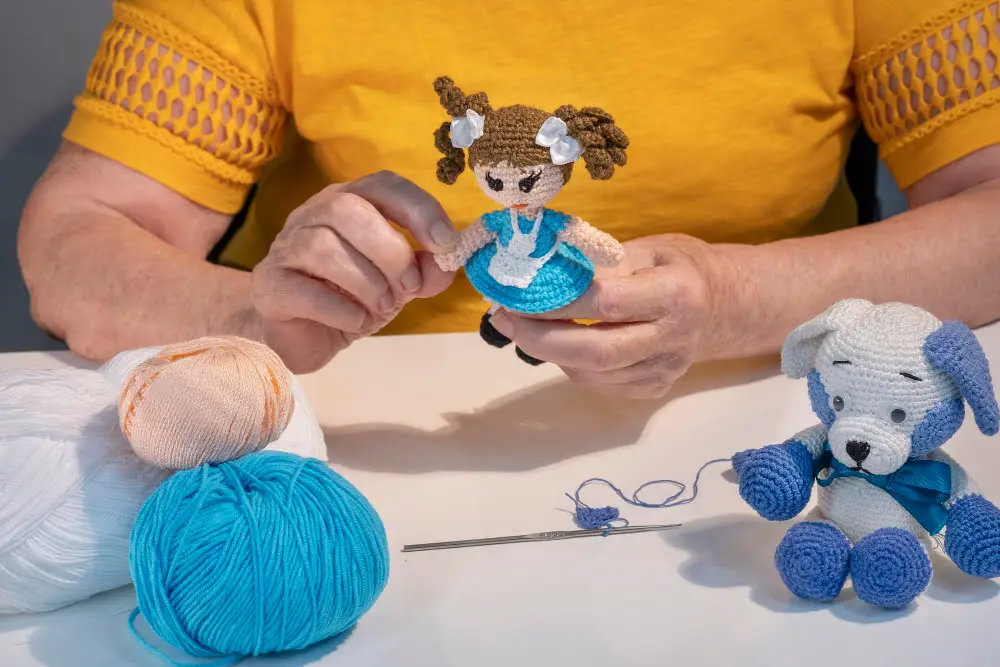
To start, gather your materials which includes yarn, scissors, and a piece of cardboard. The yarn’s color and texture are up to your preference while the cardboard should be approximately 5 inches in length.
Wrap the yarn around the width of the cardboard about 30 times, ensuring that it’s held securely but not overly tight. Carefully remove the wrapped yarn from the cardboard to maintain its shape.
Next, cut a short piece of yarn and slide it under the wrapped yarn at one end. Securely tie a tight knot to create the doll’s head.
For the doll’s arms, cut two lengths of yarn about a foot long. Position these lengths of yarn at the place where you want the doll’s arms to be, and tie them off tightly. Divide strands of yarn into two proportional bunches, one for each arm, and braid them. Secure at the ends with tightly tied knots.
Finally, to form the doll’s body, divide the remaining strands into two bunches, creating the doll’s legs. Braid each leg as you did the arms, securing with knots at the ends.
This easy approach allows you to create delightful yarn dolls that can be customized through your choice of yarn colors and textures. The size of the doll can also be manipulated by the size of the cardboard and the amount of wrapping done.
Modification is key, specialized dolls can be made by accessorizing with small hats or scarfs using other crafting materials such as felt and ribbons. Glued googly eyes and drawn facial expressions can add the final touches to these yarn playmates.
Yarn Weaving On a Cardboard Loom
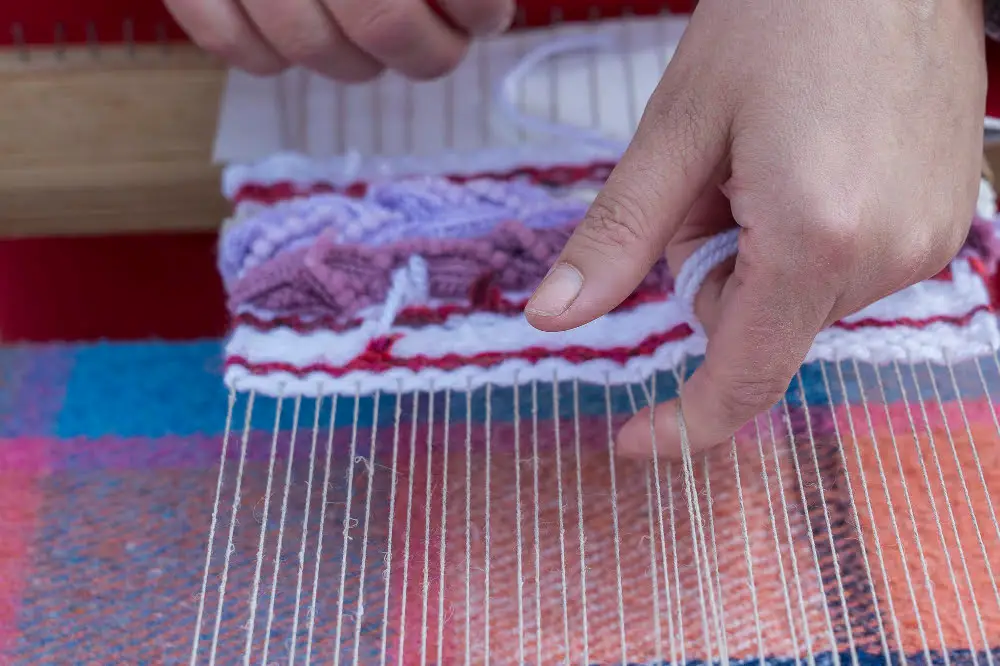
Begin by gathering materials: a piece of cardboard for the loom, a pair of scissors, and your choicest yarn. Cut slits along the top and bottom of the cardboard piece to make a simple homemade loom, allowing room for different patterns and textures.
Firstly, thread a yarn piece from a slit at the top to a corresponding slit at the bottom, using a neutral hue to create the warp threads. Double knot the final end at the base to secure your warp.
Next, choose a yarn color for the weft, your pattern. Thread the yarn through a tapestry needle. For your first row, weave the weft yarn over and under the warp threads, creating an alternating pattern.
Continue by finishing the row and flipping the pattern—over where you previously went under—starting the next line. This method creates the classic weave texture.
To incorporate a rya knot, which adds tassels to your weave for decorative effect, cut two pieces of yarn. Loop them over a warp thread, with each yarn end coming under the two adjoining warp threads.
Layer your weave, changing the color and textures as desired. Experiment with various knots and patterns to make your weave more intricate and personalized.
Trim completed work from the loom, double knotting the warp threads at the back. The final product can serve as a wall hanging, a coaster or add aesthetic value to any craft project.
DIY Cross Stitch Sweater
To initiate the process of creating a DIY Cross Stitch Sweater, select a simple cross stitch pattern and a solid-colored sweater as your base. Although a cozy woolen fabric would be perfect, ensure it’s thick enough to handle the weight of the stitch work. The necessary materials include yarn in your chosen colors, a large stitch needle, and scissors.
Begin by sketching your pattern onto the sweater with a piece of chalk. This doesn’t have to be perfect, as it is merely a guide where to put your stitches. Keep the sweaters’ knitted pattern in mind while doing this so your cross-stitch design aligns.
Threading the needle with your chosen yarn, make sure it’s double threaded to create a bold design. Double threading is done by simply threading the needle and tying the loose ends together.
For the actual stitching, push your needle up through the sweater from the inside out. Leave a small end of yarn and hold firmly while creating the first stitch to secure your thread. Make your stitches by crossing over diagonally, creating a ‘X‘ pattern.
Remember to finish your thread neatly once you’re done with it. This can be done by running your needle and remaining thread back through the stitches at the back of the sweater.
Following these steps allows one to refresh an old sweater or personalize a new one with beautiful yarn patterns, making your DIY Cross Stitch Sweater brighten even the gloomiest winter day.
Creation of Yarn Bowl
Creating a yarn bowl can be an enjoyable and practical project for yarn enthusiasts, requiring just a few materials and simple steps.
Start with your favorite yarn and a bowl for shaping. For a sturdier finish, consider adding a fabric stiffener or homemade starch solution to the mix.
Firstly, dip the yarn into the stiffener solution to thoroughly soak it. Then, drape the yarn over the shaping bowl which has been covered in plastic wrap to avoid sticking. You can create different patterns by crossing or spiraling the yarn. Once the design is set, let it dry completely. This may take a few hours to a day depending on your environment conditions.
After it has dried, gently remove the yarn bowl from the shaping bowl. Now you have a custom-made yarn bowl ready to hold your yarn for your next project! Remember, these bowls are delicate, handle with care. They add a personal touch to your crafting area and also make thoughtful handmade gifts for friends who love yarn crafts.
It’s worth noting that these are not washable, so avoid getting them wet. Also, remember to use yarn that’s not needed for other projects, as once it’s stiffened, it won’t be useful for knitting or crocheting. Happy crafting!
FAQ
What are common uses for yarn?
Common uses for yarn include producing textiles, sewing, knitting, crocheting, weaving, embroidery, and making ropes.
What are the different types of yarn and their specific purposes in knitting and crocheting?
The different types of yarn include wool for warmth and elasticity, cotton for durability and washability, acrylic for affordability and easy-care, silk for a soft and luxurious touch, alpaca for softness and warmth, and cashmere for ultimate softness and luxury, each chosen based on properties that suit various knitting and crocheting projects.
How does one choose the right yarn for a specific project?
Choosing the right yarn for a specific project involves considering the desired texture, weight and fibre type stated in the pattern as well as the purpose of the finished project.
Can you recommend any creative, non-traditional uses for leftover yarn?
Leftover yarn can be creatively repurposed into jewelry, hair accessories, woven placemats, embroidered artwork, or even knitted or crocheted toys.


